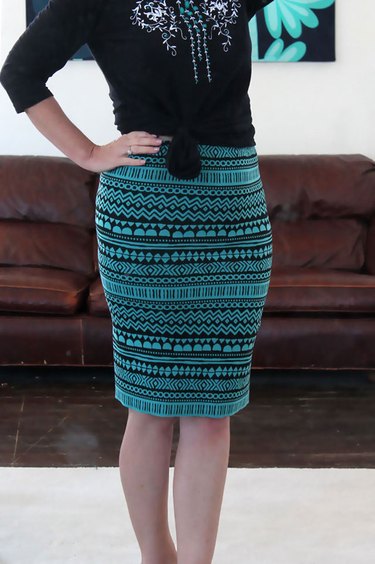
French designer Christian Dior introduced the modern pencil skirt in 1954. His classic design has stood the test of time and has been a staple in women's wardrobes ever since. Not only is the pencil skirt a versatile item, but it also looks great on many body types.
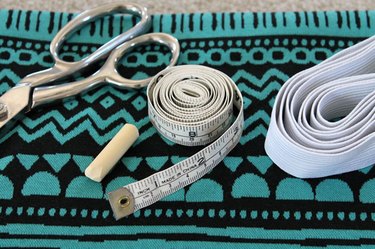
Things You'll Need
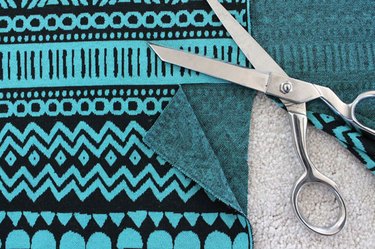
Medium or heavy-weight stretch knit fabric (25% stretch or more), 1 yard
Measuring tape
Sharp scissors
Pins
Sewing machine with a ball point needle
1-inch elastic, 1 yard
Washable marking pen or tailor's chalk
Iron and ironing board
Step 1
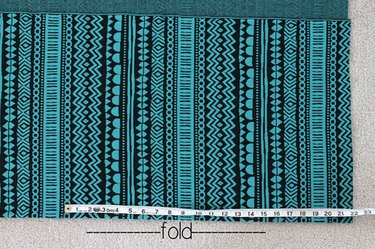
Measure the circumference of your waist. If you have narrow hips, you don't need to add anything to this measurement. If you have full hips, you will need to add 2 to 4 inches to this measurement. This will become the circumference of your skirt. Divide this number in half. Fold your fabric over widthwise so the fold is on your half-measurement.
Video of the Day

Step 2
Have a friend measure the distance from your natural waist to your desired length for the hem of the skirt. Measure and mark this distance on the folded side of the fabric.
Step 3
Use your marks to cut the width of your skirt.
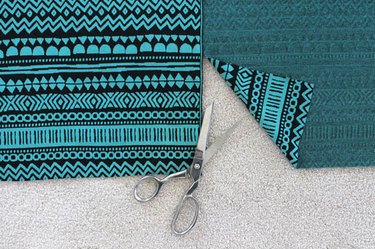
Step 4
Cut along the line you marked for the length of your skirt. You will end up with a wide rectangle of fabric that is the circumference of your waist by the length of your skirt.
Step 5
Fold over the rectangle so the right sides and the short sides (the skirt length edge) of your skirt are together. Pin along the raw edges.
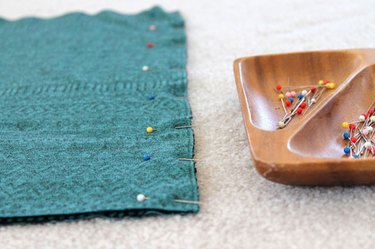
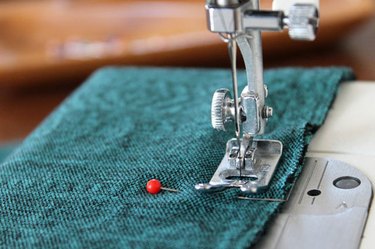
Step 6
Sew a 1/2-inch seam along your pin line. Be sure to remove the pins as you sew. This seam will become the center back of your skirt.
Tip
When sewing with knits, use a stretch, ball point, or jersey needle. These needles are designed for sewing with knit fabric, so you will have a stronger, smoother seam. A universal needle will tend to skip stitches when used with knit fabric.
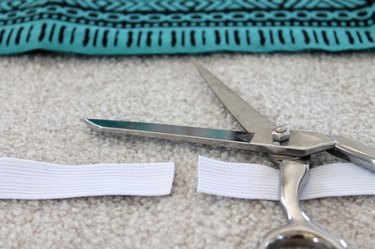
Step 7
Measure the circumference of your waist and subtract 1 inch from this measurement. Cut a piece of elastic to this measurement.
Step 8
Overlap the ends of the elastic and use a zig-zag stitch to attach the ends. This will become the center back of your elastic.
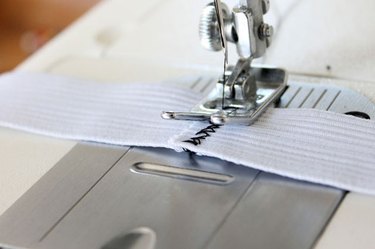
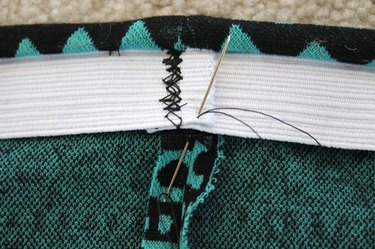
Step 9
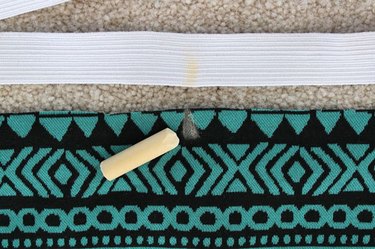
Measure and mark the center front of your skirt and the center front of the elastic with a washable marking pen or tailor's chalk.
Step 10
Match the center front of the skirt with the center front of the elastic, and the center back of the skirt with the center back of the elastic. Pin the elastic in place on the top edge of the skirt.
Step 11
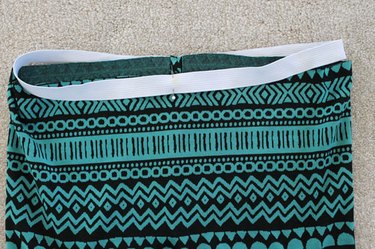
Use a zig-zag stitch to sew the elastic to the right side of the skirt. Pull the elastic slightly as you sew to ease in the extra width of the skirt.
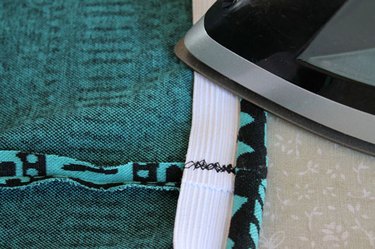
Step 12
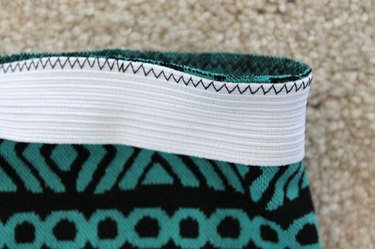
Fold the bottom of the elastic up and over to the wrong side of the skirt and press it with an iron.
Step 13
Use a needle and thread to tack the elastic down on the back seam.
Tip
When using a heavy knit for your skirt, you can save time and effort by not hemming since knits won't fray. If you prefer a more finished look, you may add a simple hem.
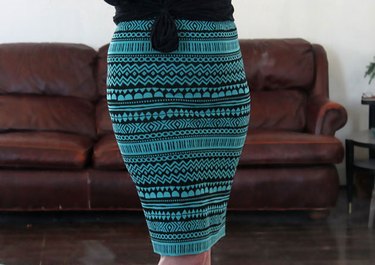
Finished Skirt
Wear your pencil skirt with heels and a jacket for work or wear it with a T-shirt and flats for your weekend activities. No matter how you decide to style your pencil skirt, you can be confident you will look great and be comfortable at the same time.
Video of the Day