Things You'll Need
Stud finder
Measuring tape
Small handsaw
Drywall
Drywall screws
Drywall compound
Putty knife
Paint
Plywood
2-by-4s
Nails
Door for the closet
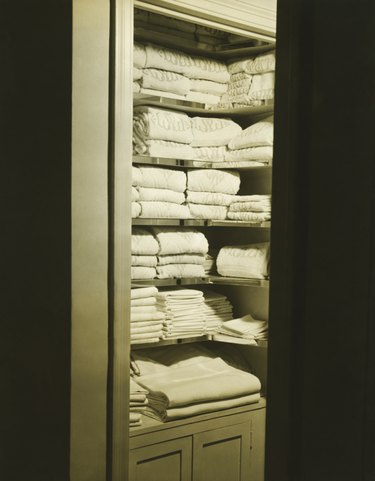
A recessed storage linen closet provides extra room to store your blankets and towels. This is a fairly straightforward project to tackle in your home, and you can put one in any little nook with extra space in your walls. You may need to review your current house plans to spot the areas that have enough depth between the walls to make the closet deep enough to be practical. However a linen closet can work with as little depth as 12 inches, though 24 inches is the ideal depth.
Step 1
Identify the area you want to install the linen closet. Some people choose to do this inside of a bathroom or in the hall next to a bathroom or bedroom. Find the studs in the area you want to have the closet. You have the option for a narrow closet between two existing studs, which should be about 18 inches apart, or to remove one stud and make it 36 inches wide. Check to make sure there is not currently an outlet where you want to put the closet, if there is consider moving over in one direction.
Video of the Day
Step 2
Cut out the already existing drywall in the area you want the closet to be with a drywall saw. Leave the drywall so that it covers up to each edge of the linen closet. If you are removing a stud, you will need to cut one 2-by-4 to the width of your closet to act as the top of the frame for the door to your closet. You need to nail that into place at the height of the framed door so you can anchor the door in place.
Step 3
Frame the sides of the closet. Create a frame by laying out two 2-by-4s that are the depth of the closet and three pieces that are the height from the floor to the ceiling jousts subtracting 4 inches. Nail the bottom piece into the height pieces, so that the 4-inch side of the wood is flush to the floor. Nail the height pieces on each end, and one in the middle of the frame. Then nail the ceiling piece into the top. Nail the frame into place along the floor and the ceiling joists and then along the sides from the floor to the ceiling, with the nails about 18 inches apart.
Step 4
Hang drywall for the closet on the wall frames you just built. If you need to add studs to the back wall to make it line up correctly, just nail 2-by-4s cut to the correct height into place using the already existing studs as anchors. Use screws to hang the drywall and apply drywall compound with a putty knife to seal the seams and cover the screw holes. Allow it to dry, then sand and paint.
Step 5
Design the shelves for your closet. Cut a piece of plywood that is the width by the depth of your closet for each shelf you want in your closet. Cut two 2-by-4s that are the depth of the closet and one 2-by-4 that is the length of the closet for each shelf. So if you have four shelves in your closet you would need eight pieces that are the depth and four pieces that are the width. Sand each piece smooth and paint.
Step 6
Nail the 2-by-4s into place at the level you want each shelf to go. The plywood shelf rests on the 2-by-4s for support. Nail the 2-by-4s into the studs along the wall. Place the plywood shelves on top of the 2-by-4 braces and nail them into place at each corner.
Step 7
Install the door by nailing the door frame into place at each corner and about 12 inches apart from the corner up to the top of the door frame.
Tip
As an alternative, have a custom cabinet door made, and attach it using hinges directly to your wall.
Video of the Day