Things You'll Need
2 cups flour
1 cup salt
1 cup hot water
Large mixing bowl
Wooden spoon or paint stirrer
You don't need to have access to, or invest in, a kiln to start exploring the arts of sculpting and making pottery. There are recipes for homemade, air-drying clay that are made with ingredients commonly found in most households. While you may decide later on to become more involved in one of these crafts by taking classes and investing in specialized tools, a potting wheel or a kiln, you may find your first attempts at free-hand sculpting or pot-making to be more satisfying than you would have thought possible.
Step 1
Mix the flour and salt together in a large bowl. Add the hot water and stir the mixture with a wooden spoon or paint stirrer. Make sure the ingredients are thoroughly mixed and add a little extra water, if necessary, to produce a doughy consistency. Let the mixture cool for about five minutes.
Video of the Day
Step 2
Press and knead the mixture in the bowl. At first it will not feel much like clay, but, as you continue to work with it, you should start to notice an increase in flexibility and cohesion.
Step 3
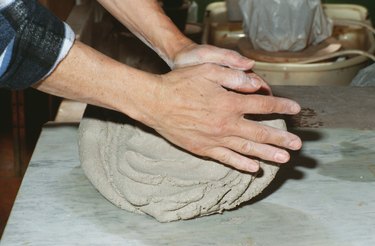
Transfer the clay to a smooth surface. If the clay is sticky, dust the surface and your hands with flour or cornstarch. Continue kneading and pummeling the clay for about five minutes until it is springy and easily manipulated. At this point, it is ready to be used, and you can make your clay object.
Step 4
When you finish making your clay object, place it in a warm, dry spot, preferably where there is direct sunlight. If you are drying more than one piece, rotate them often to ensure that each one receives the maximum amount of sunlight possible. Depending on the thickness of the object, the amount of moisture in your clay and the environment, and the amount of available sunlight, the clay should be dry and ready for painting within two to seven days.
Tip
Try replacing all or part of the salt with sawdust to get a different texture and feel. This clay will be sturdier and can be sanded after it has dried. Add food coloring along with the water and oil to produce colored clay. Use acrylic or tempera paints to decorate your object after it has dried. Finish with an acrylic sealer to give it a glossy sheen.
Warning
Avoid letting your finished piece get wet during the drying process as it could get moldy.
Video of the Day