Things You'll Need
Plastic Bags
Mop handles
Twine
Scissors
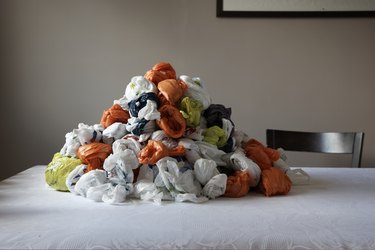
Instead of becoming landfill, plastic bags can be used for fun craft projects. Parents can teach about recycling in the house and how plastic bags take years to decompose. One easy project, appropriate for ages six to adult, is weaving a doormat from left over bags. The end result will be an inexpensive, easy to clean, custom sized, one of a kind doormat for your home. Rugs can be one color, or multicolored depending on the plastic bags selected for the project.
Selecting your bags.
Step 1
Select bags that are the colors you want for your mat. Tie the bags at each end until the cords are slightly over the desired length of your mat.
Video of the Day
Step 2
Tie one end of the cord to a mop handle. Continue to tie ends of the cords close to each other on the handle until you are slightly wider than the desired width of the rug.
Step 3
Tie a small piece of twine around the end of the cord, placing the knot right next to the mop handle. Make a knot for each cord. Cut the twine close to the knot.
Step 4
Tie the unattached end of the cord to the second mop handle, starting at edge of your row of cords. Select the next cord over, and be careful not to skip a cord. Tie the cords in order until all of the cords are tied to the second mop handle.
Step 5
Hold the second mop handle and tie a small piece of twine around the end of the cord, placing the knot right next to the mop handle. Make a knot for each cord. Cut the twine close to the knot.
Step 6
Select bags that are the colors you want for your mat. Tie the bags at each end until the cords are over the desired width of your mat.
Step 7
Take a width cord and place it at the top of your length cords. Select the edge the length row, and slide the width cord over the top of the first length cord and under the length cord next to it. Continue to weave the cord over and under until you length cords until you reach the end.
Step 8
Pull the newly woven row towards the mop handle. Make sure it is tight all the way across the row.
Step 9
Select the edge the length row, right under your first woven cord, and slide the width cord under the top of the first length cord and over the length cord next to it. Continue to weave the cord under and over until you length cords until you reach the end. When completed push the woven row tightly against the woven row before it.
Step 10
Alternate weaving under and over the remaining width rows. Make sure you do start on the opposite side of the previous row. Weave your width rows until you reach the end of the second mop handle.
Step 11
Starting at the end of the row, tie each end of the width cord with a small knot. You can either use the twine or you can just tie a knot in the plastic. Be sure and knot both sides of the width cords.
Step 12
Slide the mop handles out of the length cords. This is your new mat. You can leave the mat as is, or you can cut the loops of the length end for a fringe, or knot them to match your other sides.
Tip
Tighter cords make a denser, stronger mat.
Video of the Day