Things You'll Need
Used tires
Cardboard
Shovel
Fill
Concrete
Sledgehammer
Infill for walls (aluminum cans, cement mortar, metal lath or chicken wire)
Building a house or other structure out of used tires offers a unique, affordable and practical construction opportunity. Tire walls, which are typically built using tires that have been tightly packed with dirt, are stable, strong and provide good insulation. Another added benefit is that tire walls are generally wide enough that they do not require an extensive or sometimes even any foundation. Many county or municipal governments do have certain building codes that tire walls, if part of a large enough structure, must adhere to.
Step 1
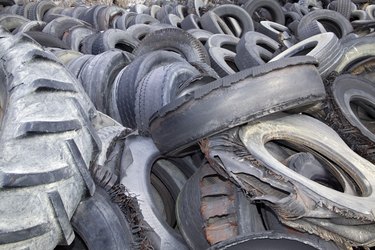
Obtain an adequate amount of tires. Tire dealers often have a large volume of used tires that they are willing to sell cheaply or even give away. Tires used should be of a uniform size. The exception to this is when larger tires, often filled with concrete, are used for the first course, or level. Estimate the number of tires required by determining the planned wall length and dividing this length by the diameter of the tires used. Multiply this number by the number of courses, or tires high, the wall will be.
Video of the Day
Step 2
Prepare the foundation by ensuring that the ground is solid and level. The foundation can either be poured concrete or compacted subsoil, depending on soil characteristics, local ordinances and engineer or architect recommendation. The foundation should be wider than the walls to ensure stability.
Step 3
Pack the tires. Block the center hole on one side with a piece of cardboard. Shovel dirt into the hole, then place dirt into the tire cavity until it is full. Compact the dirt into the cavity by pounding it with a sledgehammer. Repeat this filling and pounding until no more dirt can be added. If you don't want to use dirt, you can use smashed, compacted aluminum cans instead. Either fill all the tires at once or pack them as needed.
Step 4
Lay the first course of tires along the foundation. Fill the holes in these tires with concrete rather than with dirt or aluminum can infill if this is desired or required by building code.
Step 5
Lay the second course after the first course is complete and, if concrete was used, dry. Place the filled tires in the second layer on top of the first course so that their centers are directly above where two tires meet below.
Step 6
Continue to build up the wall in this alternating manner until the desired height is reached.
Step 7
Infill the tires, after roofing and other portions of the construction have been completed enough to provide protection from the elements. There are a number of materials that can be used to infill and coat the walls. These range from aluminum cans and reinforced cement mortar for the exterior to metal lath or chicken wire attached directly to the tires and coated with multiple layers of stucco.
Tip
To ensure that the first level of tires will not shift, install vertical rebar rods that protrude from the ground or concrete foundation and extend into the holes of the first course of tires.
Walls more than six tires high require larger tires for bottom rows or other accommodations as advised by an engineer or architect.
Before attaching a roof, a top plate made of concrete or wood attached using rebar should be installed into the uppermost course of tires.
Video of the Day