
The delightful sound of a wind chime in the breeze is a great way to liven up any outdoor space. The gentle chimes can be created from many different materials such as glass, bamboo, seashells, beads and metal tubing. This article shows you how to easily make a copper wind chime with parts found in the plumbing section of the hardware store. No tools are needed!
Things You Will Need
Video of the Day

- 9 copper pipes
- 9 T-shaped copper connectors
- 9 copper couplings
- Brass toilet flange ring
- Hook
- Rope
- Scissors
- Super glue.
Video of the Day
Cut the Rope
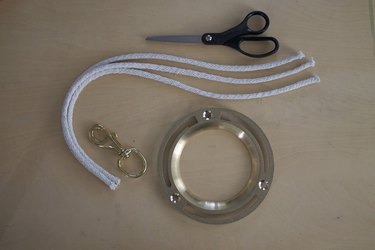
Cut 3 equal pieces of rope for the top of the wind chime. Make each piece approximately 10 inches.
Attach the Rope
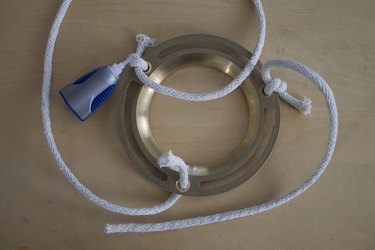
Attach one end of each rope to the brass ring by tying an overhand knot. Add a few dots of super glue for extra support.
Attach the Hook
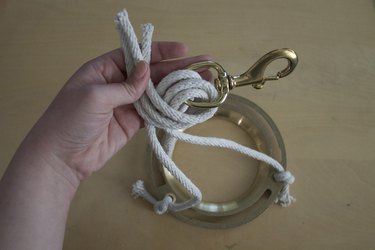
Bunch the three ropes together and tie them to the hook. Add super glue at the knot for support.
Prepare the Pipes
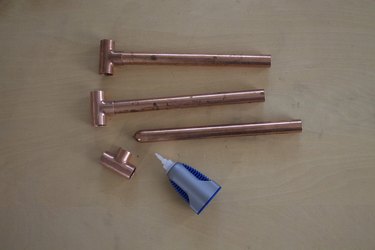
Glue the T-shaped copper pipe connector to the copper pipe.
Add Rope to the Pipes
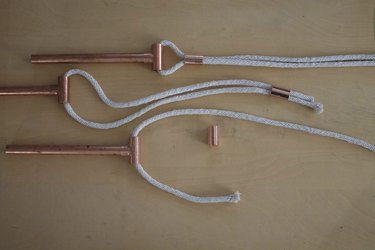
Thread a long piece of rope through the open end of the connector and match the two ends of the rope together. Insert both ends of the rope through a copper coupling, and push it towards the copper pipe.
Arrange the chimes
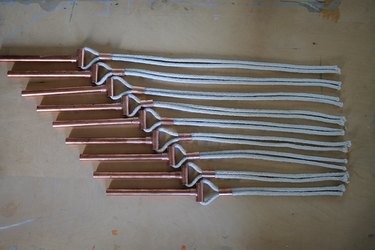
Continue to add rope to each copper pipe. Arrange the pipes on a table as they would be hung, and cut the ropes to match up at the end.
Attach the chimes
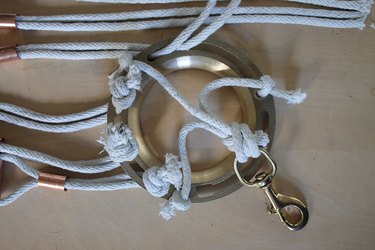
Tie each pipe onto the brass ring with a knot. Space them out equally.