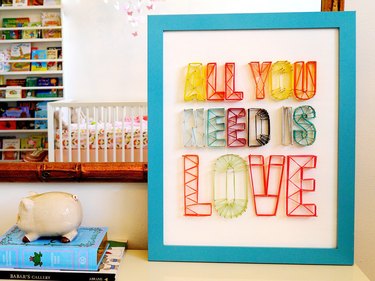
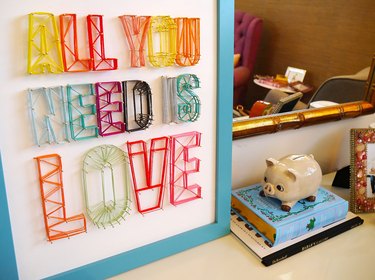
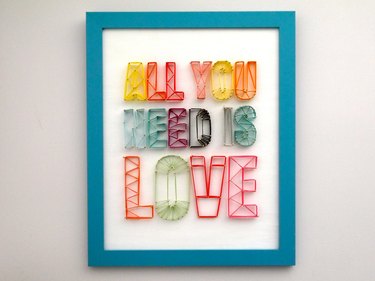
Nursery room decor has come far from the old school pink and blue with many stylish parents opting for modern decor. A handmade string art sign is sweet enough for a baby's room and adds a pop of color, but modern enough to stay current as baby grows. In fact, a string art sign can go anywhere in the home. Make one to display birth stats, your baby's name or a favorite quote.
Things You'll Need
Video of the Day
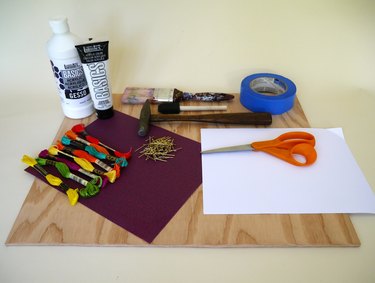
- Plywood, 16-by-20 inches
- Medium-grit sandpaper
- Gesso acrylic primer
- Acrylic paint
- Paint brush
- Foam brush
- Painter's tape
- Printed templates
- Scissors
- Hammer
- 1-inch, #18 gold nails (1x18), 2 boxes or 3 ounces
- Embroidery floss, 12 colors, 8 meters (8.7 yards)
- 16-by-20 frame (optional)
Video of the Day
Step 1: Sand the Plywood
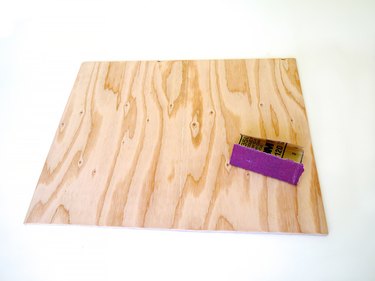
Sand both sides of the plywood with medium-grit sandpaper until the wood is smooth to the touch. Wipe away any dust.
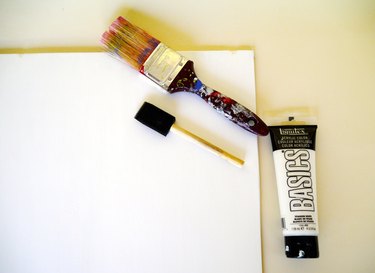
Step 2: Prime the Plywood

With a paint brush, paint two coats of liquid gesso primer on one side of the plywood. Allow the primer to dry for 20 minutes in between coats. Clean the brush with soap and water and set it aside.
Step 3: Paint the Plywood
After one hour of drying time, paint three coats of acrylic paint on the primed side of the plywood board. Let the board dry for one hour between each coat of paint. Use a paintbrush for the first two coats, and then use a foam brush for the final coat. The foam brush smooths the surface of the final coat. After the third coat, leave the board to dry overnight.
Step 4: Attach a Template to the Board

Once the board is completely dry, print the attached template or make your own using block letters in a word processing program. Position the pages of the template over the center of the painted board and trim any excess paper with scissors. Secure the template pages to the board with painter's tape.
Step 5: Outline the Letters with a Hammer & Nail
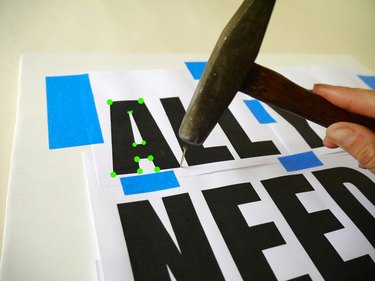
Lightly tap a nail into the corners of the block letters with a hammer and then remove the nail. The green dots on the photo illustrate where to tap the nail. The idea is to outline the letters by marking the wood underneath the template. Avoid marking the rounded portion of any letters at this point.
Step 6: Mark the Rounded Letters

For the rounded portion of letters such as "S" or "O," space the nail marks 1/4 inch apart around the curves as illustrated by the green dots.
Step 7: Remove the Template
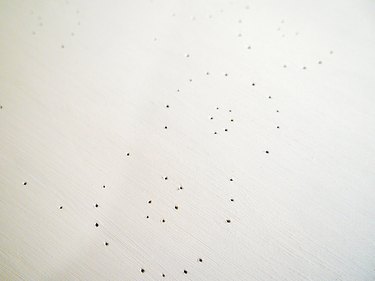
Once all of the letters are marked, remove the templates from the board. The nail marks should be clearly visible.
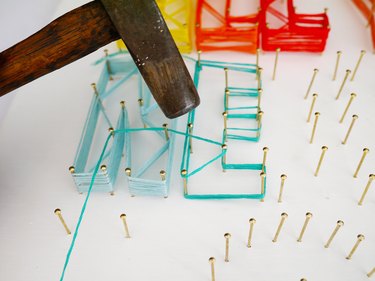
Step 8: Hammer Gold Nails Into the Marks
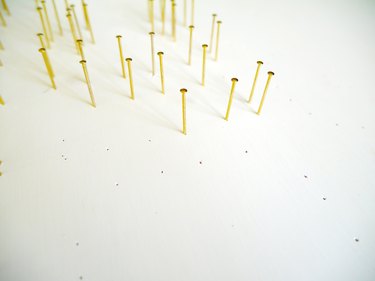
Hammer a gold nail into each of the marks until it feels stable. Keep each nail as straight as possible.
Step 9: Outline the First Letter With String
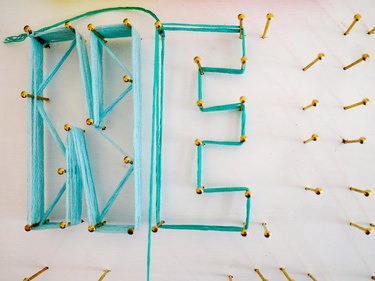
Tie the end of a spool of embroidery floss to a corner nail on the first letter. Wrap the floss along the outline of the letter three times to create the shape of the letter around the nails.
Step 10: Add a Pattern Through the Letter
Wrap the floss three more times around the letter, but this time cross it through the middle of the letter in any pattern you like, zig-zagging it around existing nails and/or adding more nails where needed. Whatever pattern you choose to create, be sure to wrap the embroidery floss in that same pattern three times to make the pattern stand out. There are no rules to making a design pattern -- be creative. Then, wrap floss around the outline of the letter three more times. The letter should have a total of nine wraps around it.
Step 11: Tie & Trim the Embroidery Floss
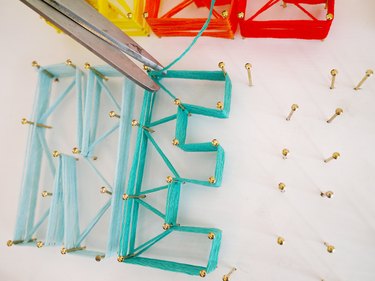
Finish the letter by tying off the floss on the same nail you started with. Trim any excess floss.
Step 12: Wrap the Remaining Letters
Follow this same method to design all of the remaining letters. Vary the pattern a little in each letter for visual interest. Use the existing nails and/or add new ones where needed to create different patterns in each letter.
Note: Each letter in this template requires half of a spool of embroidery floss. The larger letters in "LOVE" require a full spool.
Step 13: Frame the Sign
Add a frame to give the sign a clean, polished look. Choose a fun color to complement the letter colors. There is no need to spend a lot of money on a custom framing job. Because the plywood board is a standard 16-by-20 size, it's easy to place into a ready-made frame.