Things You'll Need
Embroidery design books (optional)
Embroidery machine
Embroidery thread
Embroidery stabilizers
Sketch pad
Pencils/erasers
Tracing paper
Tailor's chalk
You can create your own design with your embroidery machine even when you are working with pre-set embroidery designs and parameters. You can also opt to combine inspiration, technique and creativity and design your own embroidery. By following a few tips and design tricks, you will be able to use your pre-set embroidery designs as well as develop your own concepts and ideas to create endless embroidery possibilities.
Step 1
Print out your pre-set embroidery designs. Look through embroidery books for design and concept ideas as well. It is beneficial to have these designs in full view instead of relying on your embroidery wheel or digitized screen. Take note of your hoop dimensions and set parameters. Although these pre-set specifications cannot be altered, they provide pertinent information for your embroidery redesign.
Video of the Day
The type of embroidery machine you are working with will dictate how you will be able to transfer your design to be stitched out by your machine and the type of design you can create. For example, if you are working with a machine that can only stitch out pre-set motifs, you will only be able to create random embroidery patterns or mix motifs in a repeat design. If you are working with a digitized embroidery machine, you will have to scan your design into your embroidery software, convert your freehand sketch into a digitized format with the software conversion tool and write your digitized embroidery card in a separate reader-writer box attached to your computer.
Step 2
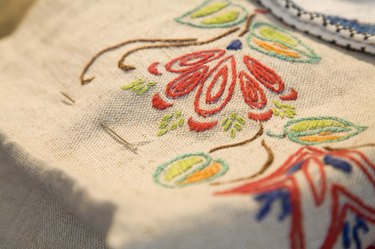
Sketch your idea or design a pattern using your existing embroideries. For instance, if you have a pre-set flower and paisley, create your concept of a leaf outline and insert the two motifs in random placement to fill your leaf. Choose one embroidery thread color for your leaf outline and repeat the thread color within the pattern mixing it with accent embroidery threads. For an Easter or festive holiday motif, mix pre-set animal motifs such as bunnies with your design of a soft bow. The key is creating an original embroidery or mixing your pre-set motifs with your concept within your hoop and embroidery set parameters.
Step 3
Trace your design on tracing paper. Mark your embroidery on your fabric with tailor's chalk. Check your fabric weight and select the right type stabilizer. This step is advisable if you are using several motifs.Your stitch count will increase, which will add to high needle punctures into your fabric. The stabilizer will prevent fabric from puckering.
Step 4
Select embroidery thread that will add interest to your embroidery. For example, use novelty threads such as a colortwist or metallic thread and mix as accents with a high-sheen polyester or rayon embroidery thread. You can also opt to use a mercerized cotton thread as your accent and your novelty as the main thread running throughout your design.
Step 5
Mix decorative embroidery stitches from your stitch selector by changing stitch placement within your design. You can also opt to embellish your embroidery by adding novelty trims such as beads.
Tip
Embroider your placement on fabric scraps prior to using your project fabric.
Test different weight stabilizers. The lighter your fabric weight, the heavier the stabilizer you need and the heavier your fabric weght, the lighter the stabilizer you need.
Video of the Day