Things You'll Need
Polymer clay
Oven
Pasta machine
Heavy-gauge wire
Aluminum foil

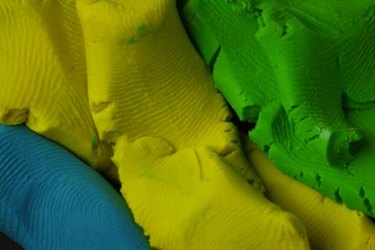
Polymer clay, also known as polyvinyl chloride, is a plastic-based material that does not harden until it is baked. It is used in various arts and crafts applications including doll making, jewelry and figurines. There is a wide range of colors to choose from and they can be mixed together to create custom colors. When hardened, polymer clay is waterproof, making it a suitable material for making outdoor pieces such as mosaic pots, lawn sculptures or tabletops.
Step 1
Condition the clay. Conditioning is the kneading of the clay until it is soft and pliable. This makes the clay easy to work with and removes any air in the clay, which is important in creating a durable, finished piece. Knead the clay with your hands, squishing it together repeatedly until it is soft. When working with large amounts of clay, use a pasta machine to condition the clay by turning the clay through the rollers. This will lessen the amount of work and time to knead with your hands.
Video of the Day
Step 2
Build an inner structure. When creating a large polymer clay piece, it is important to build an inner structure to help form the clay and ensure durability. Wire and aluminum foil are common fillers, as well as extra pieces of polymer clay from old projects, baked or unbaked. Polymer clay is a dense material, so it is heavy. Be sure to use a heavy-gauge wire that will hold all the clay. For large pieces like lawn sculptures, bend the wire to create the form you want and cover the wire with aluminum foil to fill in the inner structure. When finished, your project should be formed in wire and aluminum foil, and resemble the shape of what you are making.
Step 3
Attach the polymer clay to the form by wrapping the clay around it. Press the clay together and smooth any seams with your finger. Use layers of clay just thick enough to keep the inner structure from showing. Work one section at a time until it is completely covered in clay. Add any details, such as a face or accents, last. Check for bubbles in your work and smooth them out of the clay. Bubbles and seams affect the durability of a finished piece.
Step 4
Bake the polymer clay piece in an oven according to manufacturer's instructions. Most clay will bake at 230 degrees Fahrenheit for 30 minutes, but always check the directions to confirm. Be careful to not over bake your piece or it will burn and give off harmful fumes. Use a kitchen timer to help keep time. After baking, carefully pull out the clay and let it cool before handling. Clay is fragile after coming right out of the oven and needs to cool for it to fully harden.
Tip
Because polymer clay is waterproof, adding a glaze is not necessary, but it does add shine to your finished piece. If you use a glaze, choose one that is water-based. Chemicals in other finishes do not react well with polymer clay and can leave a sticky film.
Warning
Polymer clay is non-toxic when used correctly, but you should never mix kitchen tools and polymer clay tools. Always use a workspace away from food prepping areas.
Video of the Day