Things You'll Need
42 oak planks dimensions 17 1/2-by-1-by-3/4 inch
Measuring tape
Table saw
Planer
Electric sander
6 pieces of iron banding (two 41 inches, two 43 inches, two 45 inches)
Acetylene torch
Rubber mallet
Skill saw
Fire pit
Flour
Rivets
Rivet gun
Drill
Hole cutter drill bit
A bung
Food-grade sealant
There are several reasons to make your own small whiskey barrel: for a garden decoration, home distilling, liquid storage or furniture. The amount of precision you will need when making your barrel depends on the use it will be put to. Making the perfect whiskey barrel takes a lot of practice, but thankfully, oak is a very forgiving wood.
Creating Staves
Step 1
Purchase oak planks from a local hardwood retailer. Two 2-by-4s can be cut down to size with a table saw and planer.
Video of the Day
Step 2
Mark off and cut 17 1/2-inch sections on each 2-by-4. You should be able to get 10 sections out of the two boards. Do not discard the extra 8-inch sections; they will be used in a later step.
Step 3
Cut the 17 1/2-by-2-by-4-inch pieces in half along the 2-inch side. This will give you 20 17 1/2-by-7/8-by 4-inch pieces.
Step 4
Set the table saw for a 1-inch cut. Lay the boards so that the cut will be made along the 4-inch surface. This should leave you with three 17 1/2-by-7/8-by-1-inch planks from each board. You will also have one board that is smaller because of the width of the cutting blade. Set these smaller pieces off to the side; they will also be used later.
Step 5
Use a planer to bring the 7/8-inch sides of each board down to a thickness of 3/4 inch. This will allow more flexibility in the oak when it is time to bend them into place.
Step 6
Sand any rough edges down until they are smooth to the touch. You now have 60 potential staves, 18 more than you will need. (It is always good to have extras, and you will use 12 for the top and bottom.)
Assembling the Barrel
Step 1
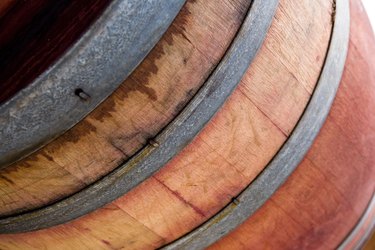
Bend a 41-inch piece of iron banding into a circle. Temporarily weld it together with an acetylene torch.
Step 2
Lay the ring on a flat surface and place 42 staves into the hoop. The last one will be tough to fit; you will need to hammer it in with a rubber mallet.
Step 3
Slip a 43-inch hoop around the tops of the staves and leave 3 inches from the bottom hoop. Weld it temporarily in place.
Step 4
Place a 45-inch hoop over the staves in the same manner, leaving 3 inches between it and the 43-inch hoop. Also weld this in place temporarily.
Step 5
Drop another 45-inch hoop over the top. This time, leave 5 1/2 inches between this one and the last one. Again, weld in place.
Step 6
Place another 43-inch hoop over the staves. Leave it 3 inches above the last one. Weld it in place.
Step 7
Place the last 41-inch hoop around the top of the staves. Weld it in place as well. This will complete the cursory assembly of the barrel. All that is left is to attach the top and bottom.
Making the Top and Bottom of the Barrel
Step 1
Lay out six staves side by side. Make sure that the 17 1/2-inch sides are flush against each other.
Step 2
Set the cursory barrel on top of the staves and use it as a stencil. Trace the exterior of the barrel on the staves. Repeat this to create a stencil for the bottom of the barrel as well.
Step 3
Use a skill saw to cut the staves to create a top and bottom for the barrel. Retain all of the scrap material for later use.
Step 4
Mix together flour and water to form a paste. Use this paste to join together the top pieces of the barrel. Do the same for the bottom.
Step 5
Place the top and bottom barrel pieces in a preheated oven at 350 degrees for one hour.
Step 6
Remove the barrel top and bottom from the oven and set them off to the side.
Char the Barrel
Step 1
Build a fire in an outdoor pit. Once it has been burning for about 30 minutes, toss on all of the scrap oak wood that you have left from making cuts.
Step 2
Wait 10 minutes and then place the barrel upright over the fire.
Step 3
Char the interior of the barrel for three minutes. This caramelizes the sugars in the oak sap and will help to infuse any whiskey you plan to make with a slightly sweet flavor.
Finalize the Construction
Step 1
Rivet all of the iron hoops into place. Place rivets every 3 inches.
Step 2
Place the top and bottom on the barrel. Tap them into place with a rubber mallet.
Step 3
Soak the barrel with water. You can do this by submerging it in a large pool (non-chlorinated) for a day or by running water from a hose over it for eight hours. This process with cause the oak to expand and seal any leaks that may have been present in the initial riveting.
Step 4
Air-dry the barrel for two days.
Step 5
Drill a hole in the middle of one of the staves with a hole cutter drill bit slightly smaller than your bung. (If you have a 1/2-inch bung, use a 7/16-inch hole cutter.)
Step 6
Tap the bung into the bung hole with a rubber mallet.
Step 7
Fill the barrel with water and check the barrel for leaks. If there are any leaks, seal the exterior of the barrel with a food-grade sealant.
Tip
If you are going to use this barrel for wine, omit the charring step.
Warning
Wear protective eyewear when using tools.
Video of the Day