Things You'll Need
Wire clay cutter
Rolling pin
Needle tool
Toothpicks or wire
Wire cutters
Stamps (optional)
Wood modeling tool

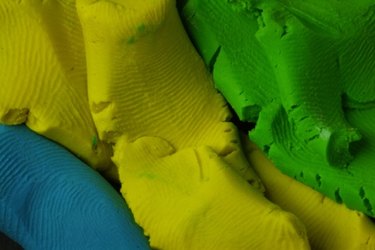
Plastilina, also known as plastalina or plasticine, is an oil-based, nondrying modeling clay. Unlike regular clay that contains water, plastilina contains wax, which makes the material extremely malleable, and it can be reused. This material is used in sculpture projects to make masks, figurines on armatures or prosthetic devices and is also employed in making characters for claymation movies. The material is available in many hues, so it doesn't require coloring. Using plastilina clay is similar to using regular clay, but plastilina never hardens.
Step 1
Soften the plastilina clay using a procedure known as wedging. Use the heels of your hands to forcefully push the clay away from you and press the material. Fold the material, and press and push it away from you again. Turn the material to the other side and repeat the same movements to obtain a soft, smooth clay. This process resembles kneading dough. If you have large amounts of clay, cut them with a wire clay cutter to obtain quantities that you can easily wedge.
Video of the Day
Step 2
Shape clay slabs to create your sculpture. Use a rolling pin or your hands to make the slabs. Create a criss-cross pattern on the edges of two clay slabs using a needle tool and join the two pieces. Even out the joints with your fingers. Alternatively, join two slabs by using several small pieces of wire or toothpick ends that you insert between the edges of the slabs.
Step 3
Decorate your sculpture with smaller pieces of plastilina. For instance, roll a small amount of plastilina clay between your hands. Place the cylinder you obtain on an even surface and roll back and forth until it reaches the desired thickness. Cut the cylinder in several pieces that have the same or different lengths and apply them to your sculpture. Alternatively, coil the cylinder into a spiral going clockwise and apply it to the sculpture.
Step 4
Use a wire armature if you are marking large-scale pieces to provide support for the sculpture. Apply clay over the wire to create the desired shape.
Step 5
Apply patterns or motifs on your sculptures using stamps or by carving on the surface of the clay with a wood modeling tool.
Tip
Plastilina is available in four levels of hardness: soft, ideal for large-scale items; medium, for average size projects; medium-firm, for making smaller figures; and very hard, ideal for pendants. Choose the hardness that is best suited for your projects. Use plastilina of different colors to create your sculptures. The material doesn’t harden and is difficult to paint otherwise. If painting the clay, don't use water-based colors, because they won't adhere to the material. Use nail polish or oil paints. Place your sculpture on a wooden stand. Reuse the material in your future projects. When destroying your object, remove each color separately. Plastilina doesn't stick to surfaces at normal temperatures, but may leave stains on some materials or work surfaces because it is an oil-based compound.
Warning
Plastilina burns if it comes in contact with fire, and the wax acts as an accelerant. The material becomes sticky if heated.
Video of the Day