Things You'll Need
White glue
Permanent marker
Ruler
Sand
Sugar cubes
Sand paper (if desired)
Clay (if desired)
Butter knife
Craft paint
Paint brush
Students will have many opportunities to learn about ancient Egyptian culture throughout their time in school. A day will come sometime in middle school when they have the assignment to re-create an ancient Egyptian structure. Middle school is the convergence of math and history that makes a project like this valuable. Teachers use real models and hands-on experience to excite students while they learn. While pyramids seem to have a basic structure, making them look more accurate could possibly mean the difference between passing and failing.
Step 1
Begin with a piece of wood or foam core that is big enough for your finished model. Depending on what you have chosen to build your structure from, this should be at least 1 1/2 feet long by 1 1/2 feet wide.
Video of the Day
Step 2
Use the marker to place a dot in the center of your foam core. Use the ruler to draw two lines, 12 inches long, making an "x" over the center dot. Now, connect each point of the "x" to make a square. This will be the outline for your pyramid.
Step 3
Take the sugar cubes and glue a row of cubes along the line. You want the outside of the sugar cube to touch the inside of the square. Glue down the entire first layer of cubes and allow them to dry. It is not necessary to fill in the entire area of the square, just the outline.
Step 4
Wait for the glue to dry and then lay the next layer. Place the cube half way off the row below it to make it look like steps. Make sure to offset the blocks so there is a solid cube above the seam between the two lower cubes. This will make the pyramid look more authentic. Allow each layer to dry completely before laying the next layer.
Step 5
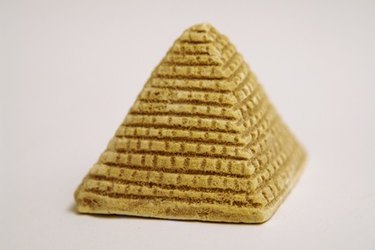
Sand the cubes gently if you would like a smoother look to the pyramid, or you can use clay to fill in the space and use the sugar cube structure as a skeleton. Make a triangular point from the clay and attach it to the top cube. Then make "snakes" of clay by rolling it on a flat surface with your hands and place the "snakes" into the steps of the pyramid. Then roll out large pieces of clay and use the ruler to measure out the length of one side of the pyramid and cut it out of the clay. Gently place the piece on the structure and secure into place. Use a butter knife or a clay tool to add horizontal and vertical lines to simulate bricks. Repeat for the three other sides.
Step 6
Paint the cubes (if you didn't cover them with clay) a light sandy color with acrylic craft paint.
Spread the glue in small sections along the foam core and sprinkle sand over the glue. Continue covering the base with sand until completely covered and allow to dry.
Tip
Plaster of Paris can be used to make bricks that can be sanded also. Cast them in an ice cube tray that has been greased with petroleum jelly for easy removal of the bricks.
Warning
Take care that you don't move one layer of cubes by pressing on them before they are dry. Any shift in the layers will be noticeable.
Video of the Day