Artists enjoy drawing rocks because their mottled, irregular appearance makes for an interesting and varied subject. Rocks also offer studies of heavy forms that prove useful for those studying volume and shading. Adding moss to this equation heightens the visual interest and textural quality of rock drawings. When drawing your moss-covered rocks, be sure to vary your use of line as you move from drawing the rock's surface to capturing the appearance of moss.
Step 1
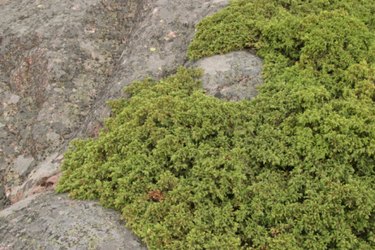
Study the surface of the rock that you wish to draw. Some rocks display sharp, jagged angles, while others remain rounded and smooth. Note these qualities of texture and shape.
Video of the Day
Step 2
Sketch the outline of the rock lightly in pencil. Do not make hard lines because they look unnatural.
Step 3
Note the areas of moss on your subject. Observe the size and growth patterns of the moss.
Step 4
Lightly draw the outline of the mossy area using your pencil tip.
Step 5
Turn your pencil tip on its side and shade inside of the rock. Apply pressure to your pencil to create darker tones on the sides of the rock. This adds volume and dimension. Do not shade inside of the region outlined for moss.
Step 6
Using the tip of your pencil, make quick, vertical strokes to draw the moss. Continue this process throughout the outlined region.
Tip
When drawing moss, make the lines in an upward motion. Start from the bottom and move your pencil upward. This will create a natural shadow at the base of moss.
Video of the Day