Things You'll Need
Tape measure
Miter saw
Primer and paint
Brush
Nail gun
10d nails
Nail set
Wood fill
Sandpaper
Caulk
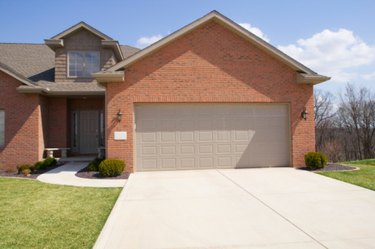
Brick molding is a type of trim molding that is installed around exterior doors and windows. The molding is thick and often contoured, and is used to fill or bridge gaps. The molding is often used with brick exteriors to trim around the exterior door jamb and fill space if the door wasn't a perfect fit for the brick opening. Molding is available in many materials, but the standard and most common type is wood.
Step 1
Measure and mark 1/2 inch above the door jamb. Measure and mark 1/2 inch to each side of the door jamb. The inside edge of the brick molding will rest against these marks, forming a 1/2-inch reveal. A reveal is the amount of the front edge of the jamb that is allowed to remain visible or revealed.
Video of the Day
Step 2
Measure across the top of the garage door from outside mark to outside mark. This is the inside or bottom measurement of the top piece of brick molding.
Step 3
On a piece of brick molding that's 6 inches longer than your measurement, measure 3 inches from the edge and make a mark along the bottom edge. The flat side opposite the contoured side is the back of the molding when mounted, and the contour will face out toward the street. The short, flat sides are top and bottom.
Step 4
Mark your measured length determined in Step 2 from your first mark. You will cut each end at a 45-degree angle using a miter saw. Position the points of the cut along the top edge with the left side cut pointing to the left, and the right side cut pointing to the right. It may help to draw the cut from the inside mark in the direction of each cut. Cut your top piece with the miter saw.
Step 5
Prime and paint your brick molding on all sides, including the miter. Often water will find a way into the exterior molding at unpainted or cut ends.
Step 6
Center your brick molding on the jamb with a 1/2-inch reveal. The inside miter cuts will each start at the side reveal marks. Nail using 10d nails every 8 to 10 inches along the molding and into the header immediately above the garage door.
Step 7
Measure from the inside miter cut to 1/4 inch above the concrete. Mark the brick molding and cut the miter. Repeat for the other side of the door. Prime and paint your moldings and allow them to dry four hours between coats. Paint the bottom end with two coats of paint as you will never be able to paint it once it is installed and water likes to wick up from the concrete. Nail the brick molding, allowing for the 1/2-inch reveal and matching the miters tight.
Step 8
Set nail heads with a nail set. Fill holes with wood fill and sand after 15 minutes. Apply a bead of paintable exterior caulk along all seams and joints. Allow the caulk to dry for 24 hours. Paint the entire brick mold and jamb with a finish coat.
Tip
Exterior moldings are particularly prone to rot from taking on water through open wood ends. Check your moldings yearly and replace when any signs of rot appear.
Video of the Day