Things You'll Need
Candy melting wafers
Microwave safe bowl
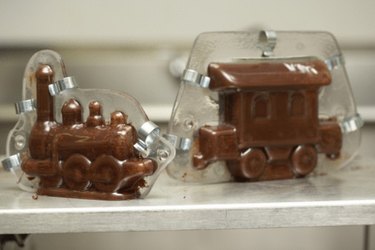
Candy mold
Washcloth
Paintbrush
Paper towel
Chocolate bar
Resealable sandwich bag
Scissors
Add color and dimension to your molded chocolate candies by painting the molds before you fill them. You can add multiple colors of melted candy to create your own designs or fill in the designs imprinted on the inside of the mold. While painting your candies is not complicated, it does require a steady hand. Don't be disappointed if your first few attempts look slightly messy -- your technique will improve with practice.
Step 1
Place a few candy melting wafers in a microwave-safe bowl or cup. Microwave the candy at 10-second intervals until it is smooth and melted. This should take less than one minute.
Video of the Day
Step 2
Wipe a clean candy mold with a dry washcloth to remove any lint or dust on the mold and make sure that it is completely dry.
Step 3
Dip a clean paintbrush into the melted candy and use it to paint the inside of the mold. If you make any mistakes, you can wipe away the candy with a paper towel and start over.
Step 4
Place the candy mold in the refrigerator for approximately five minutes to harden the candy.
Step 5
Repeat steps one through four to paint additional colors onto the mold.
Step 6
Chop a bar of chocolate and place it in a resealable sandwich bag. You can also use chocolate chips, if you prefer.
Step 7
Seal the bag and heat the chocolate in the microwave at 50 percent power for approximately 90 seconds. Knead the bag gently to mix the chocolate and continue to heat at 30-second intervals until it is completely smooth.
Step 8
Snip a small hole in one corner of the bag and pipe the melted chocolate into the candy mold. Fill each cavity to the brim with chocolate.
Step 9
Refrigerate the candy mold until the chocolate is set. The chocolate will appear dull when it is ready to be removed from the mold. Any dark or shiny spots on the surface indicate that the chocolate is still wet.
Step 10
Push on the bottom of each cavity gently to pop the chocolates out of the mold.
Video of the Day