Things You'll Need
Screwdriver
Dish soap
Sponge
Newspaper
Drop cloths
Lacquer remover
2-inch paintbrush
Paint scraper
Steel wool
Wood putty
Sandpaper
Tack cloth
Stain
Polyurethane
Lacquer provides a durable, resilient finish over kitchen cabinets. As a protective type of coating in the kitchen, lacquer forms a barrier between the underlying wood and certain acids, alkalies, solvents and water. Unlike some finishes, lacquer does not penetrate the wood. Refinishing old lacquer cabinets can help bring them up to date and give them an attractive face lift.
Step 1
Remove the hardware from your kitchen cabinets with a screwdriver. Drop the hardware into a bowl of hot water mixed with a few drops of mild dish detergent. Let the hardware soak for about 30 minutes. Scrub the hardware with a sponge, rinse and set aside to dry.
Video of the Day
Step 2
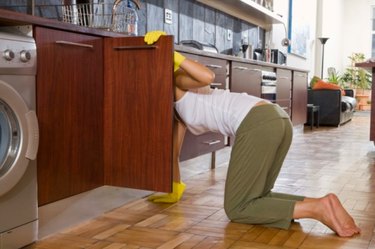
Wipe down the surface of your cabinets with a damp sponge, washing away grease and debris. Let the cabinets dry for 15 to 20 minutes while you lay drop cloths over the floor and countertops.
Step 3
Paint your lacquer remover over one cabinet at a time. Use a 2-inch paintbrush to apply the remover as if you were painting. Let the chemical remover absorb for about 5 minutes, or as long as recommended on the product label. Scrape up the soft lacquer with the blunt edge of a paint scraper, peeling the filmy coating from the underlying wood. Scrape all the flat surfaces on your cabinet with your scraper. Use a piece of steel wool to buff away remaining lacquer along curves and grooves. Brush a second application of remover onto stubborn areas of lacquer. Scrape or buff off the loosened film. Remove the lacquer from the rest of your cabinets using this same technique.
Step 4
Wipe down the surfaces of your stripped cabinets with hot, soapy water. Rinse off the residue with clear water. Let the cabinets dry for two to three hours.
Step 5
Repair any scrapes or gouges in your cabinets with wood putty. Press the putty into the blemish, wiping the edges even with the surrounding wood. Let the putty dry for the recommended length of time, then buff smooth with a piece of fine-grade sandpaper. Rub the surfaces of your cabinets with a tack cloth to remove dust and lint.
Step 6
Apply your stain to the bare wood with a soft cloth. Rub the cloth in the direction of the wood grain, evenly covering the surfaces of your cabinets. Wipe off any excess stain, leaving a uniform color over the wood. Let the stain absorb and dry for 12 to 24 hours.
Step 7
Apply a clear coat of polyurethane over the stained cabinets. Use long strokes with your paintbrush, spreading the clear coat in the direction of the wood grain. Allow this protective coating to dry for at least 12 hours before applying a second coat. Replace the hardware after the topcoat dries completely.
Warning
Ensure plenty of ventilation to your work area when using harsh chemicals, such as lacquer removers and polyurethane products.
Video of the Day