Things You'll Need
Slotted screwdriver
Phillips screwdriver
Stack switch cover plate
Pliers
Fish tape
Electrical tape
Wire cutters

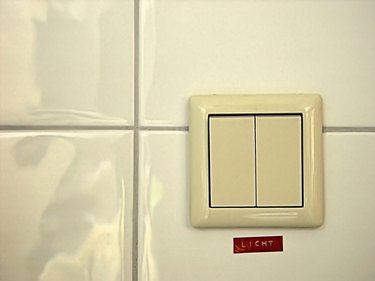
A stack switch, or double stack switch. is essentially two switches together on a unit that fits a standard size electrical wall box for a single switch or receptacle. A stack switch installation is common in bathrooms with a separate switch for the light and fan, or any room with more than one lighting circuit. Stack switch wiring is simply a matter of wiring one light or appliance to one switch and another device to the other switch.
Step 1
Shut off the power running through the circuits that hold the lights or appliances with the breaker switches. The two lights or appliances aren't necessarily on the same circuit simply because they are in the same room. Tag or lock the breaker box to prevent someone from turning the switches on while you work.
Video of the Day
Step 2
Run a hot wire from one or both of the lights or appliances to the electrical wall box if necessary. Use electrical tape to secure the end of the hot wire to a fish tape and push it down the inside of the wall to the electrical box. Bring the wire in through a knock-out hole in the box.
Step 3
Break off the connecting metal piece between the dark bronze terminals on the double stack switch with a pair of pliers. Stack switch wiring will not work for separate circuits if the two switches remain connected.
Step 4
Strip off 1/2 an inch of the wire insulation on the end of each wire to be connected to the switch, using wire cutters. Loosen the terminal screws on the double stack switch with a Phillips screwdriver.
Step 5
Connect an incoming power wire to the dark bronze terminal on the top switch by wrapping the bare wire around it clockwise and tightening the terminal screw. Connect the hot wire for the first light or appliance to the brass or silver terminal on the opposite side of the top switch in the same fashion.
Step 6
Connect a power supply wire to the dark bronze terminal on the bottom switch. Connect the hot wire from the second light or appliance to the silver or brass terminal on the other side of that switch. Both switches will now control the separate lights or appliances. Wrap the bare copper ground wire around the green ground terminal between the silver or brass terminals and tighten that terminal screw.
Step 7
Complete the stack switch installation by gently pushing the stack switch wiring into the electrical box and securing the upper and lower mounting screws into the box with a slotted screwdriver. Cover the stack switch with a wall plate and secure the holding screw in the center with a slotted screwdriver. Restore the power and test the switches.
Warning
Never attempt to do your own wiring unless you have been properly trained in residential electrical systems.
Video of the Day