Things You'll Need
Yarn
Needle
Pattern
Craft scissors
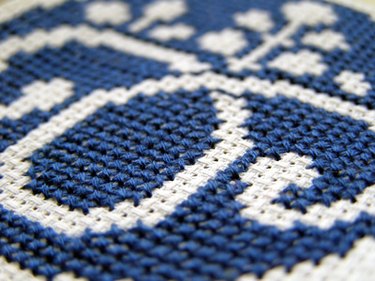
Crafters of any age can create a design by stitching plastic canvas—you only need simple techniques to create virtually any design. You can cut plastic canvas to any size and shape using craft scissors. Stitch round plastic canvas pieces to use as coasters and decorations. Choose from a variety of stitch patterns for your design, such as long stitches, cross stitches or whip stitches; most beginners start with the basic diagonal continental or tent stitch.
Step 1
Pull yarn through a needle. Start at one side of the round plastic canvas and insert the needle from the underside of the canvas into the second row. You will leave the outer row of the entire circle stitch-free until the whole pattern is finished.
Video of the Day
Step 2
Pull all but the last inch of yarn up through the first hole. Pinch the last inch of thread with your fingers, holding the plastic canvas to prevent it from coming through the hole and unraveling your design. Put the needle down through the next hole that is diagonal and up to the right of the hole where you started. Pull all the thread down through this hole until there is a tight diagonal stitch visible between the first and second hole.
Step 3
Pull the needle and thread up through the hole that is to the left of the first hole where you started. Put the needle back down through the hole that is diagonal and up to the right. Continue in this pattern until there are no more holes available to the left of the last hole you did. Weave the starter end of yarn (the 1 inch you are holding with your supporting hand) into the underside of the stitching as you work your way across. Make sure to leave one hole at the outside edge for the final edge stitch.
Step 4
Move to the next row up and all the way to the right from the underside. Come up through the farthest right hole on the next row. Put the needle down through the hole that is diagonally up and to the right of this hole. Continue in the same pattern as before and gradually move to the left.
Step 5
Repeat this pattern row by row until the whole plastic canvas is covered with diagonal stitches except for the outside edge. Skip any areas in which the pattern you are following shows another color thread. After you finish all of one color, you can go back in and do other colors. Make sure to weave the end of the yarn into the underside of the stitching for both the beginning and end of the thread to prevent unraveling.
Step 6
Weave a whip stitch around the outside edge when all the interior stitching is complete by wrapping the thread up through the first hole, around the outside and then up through the next hole. Repeat this pattern all the way around the outside. Trim any poky plastic canvas edges that may still protrude with craft scissors. Weave the beginning and end of the thread used for the outside edge the same way you did for the other thread.
Video of the Day