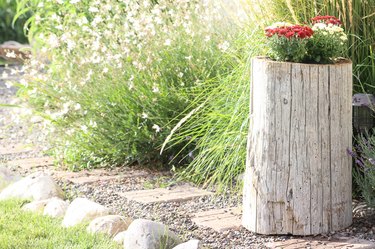
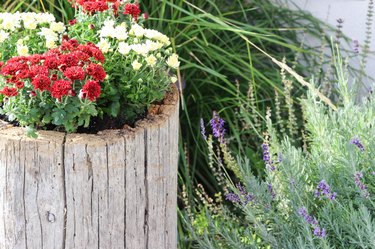
Add instant character to your garden or patio by making your own log planter. It's an easy project to customize for your space, it adds a great natural touch and it uses something you may already have on hand in your yard! For added bonus, it can also be used indoors, too.
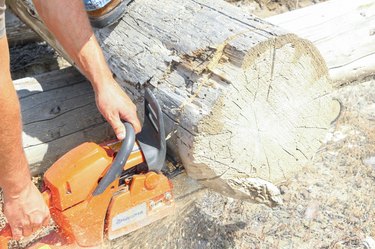
Step 1: Choose a Log
Choose a stump, log or large branch. Using a chainsaw, cut a clean, straight line at the bottom.
Video of the Day
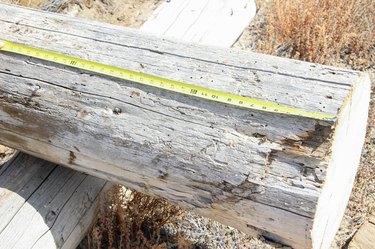
Step 2: Measure and Cut
Measure the length of the stump to 2 feet, mark it, and then use the chainsaw to cut a second clean, straight line.
Tip
Customize the height of the stump to fit your style and specifications!
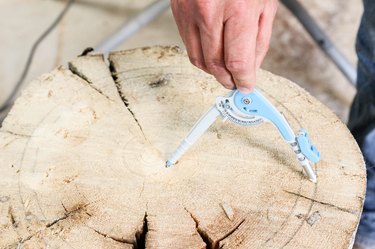
Step 3: Draw a Circle
Use a protractor to draw a circle on the top of the stump. Be sure to leave an edge along the rim of the stump, at least one inch, to an inch and a half.
Tip
Use a sharpie to trace over the pencil line for easier viewing.
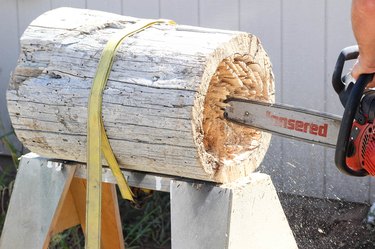
Step 4: Stabilize and Start Cutting
Using a sawhorse, turn the stump on its side, top facing you, then secure the stump to the sawhorse with a strap. Use the chainsaw to begin notching out the wood. Be sure to stay within the marked circle!
Step 5: Knock Out Large Pieces
As the wood chips are removed, break up larger sections by hitting them with a hammer.
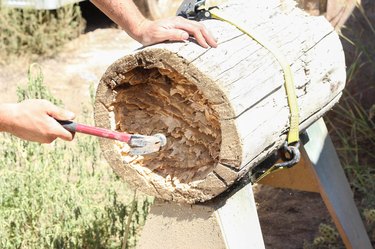
Step 6: Continue Cutting
Continue using the chainsaw to repeat the previous two steps until the desired depth is reached. Once it is, gently use the chainsaw to grind off any sharp edges within the stump.
Tip
Depending on the length of the log, you may be able to drill a hole at the bottom for drainage.

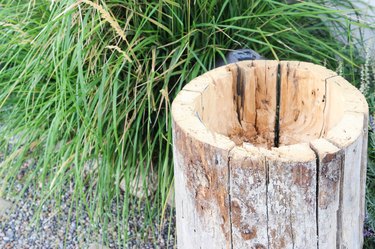
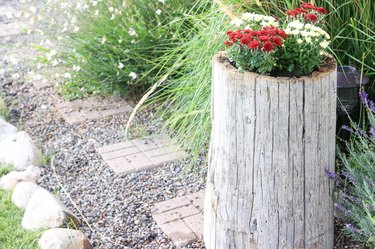
Step 7: Move to Garden or Patio
Remove the strap from the log and move to your garden or patio... or wherever you choose to display it.
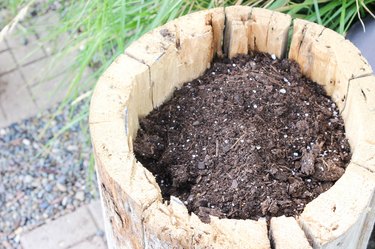
Step 8: Add Potting Soil
Fill the log with potting soil.
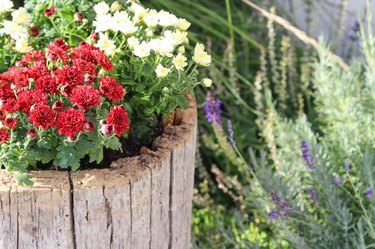
Step 9: Add Plants
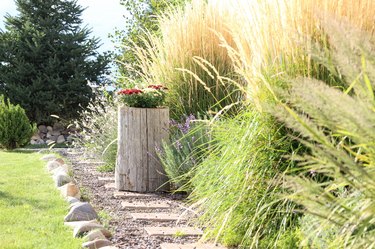
Add plants and water.
Tip
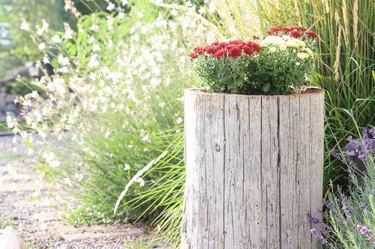
These log planters look great in pairs, so feel free to make more than one, or include varied sizes and shapes for a big statement.
To make this project...
Things You'll Need
Log
Chainsaw
Safety glasses
Gloves
Tape measure
Protractor with pencil
Sharpie or marker
Hammer
Strap
Sawhorse
Potting soil
Flowers
Video of the Day