Things You'll Need
Copy machine
Scissors
Cellophane tape
You may have found the perfect pattern you want sew or create a craft project with, but find that the image isn't as large as you'd like it to be. Don't let a small paper pattern stop you from making a big project. With a few simple math calculations and a copier, you can enlarge patterns quickly and easily to get the results you imagine.
Step 1
Determine the difference between the size of the original project and your project in terms of a percentage. For instance, to make something twice the size of the original, increase the pattern by 200 percent.
Video of the Day
If you have finished dimensions in mind, you can calculate this percentage. Divide the finished dimension of one length of your intended project by the finished dimension of the same length of the original project.
For instance, to make a 5-inch-square quilt block into a 7 1/2-inch block, divide 7.5 by 5, resulting in 1.5. 1.5 x 100 = 150, or 150 pattern. The new pattern will be 150 percent of the size of the original.
Step 2
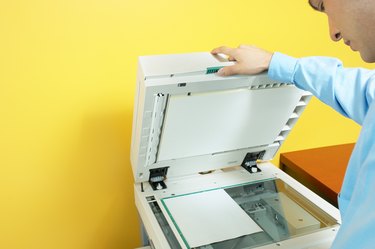
Make a clean (non-enlarged) copy of the original pattern at a copy shop or on a home copier. If the pattern is in a book, press the book flat on the machine so the pattern does not distort.
Step 3
Use the clean copy of the pattern to create the enlarged version based on the percentage you determined. If you have a multi-purpose scanner-printer-copier with the capacity to enlarge, consult the instructions to learn how to program this percentage into the machine. At a copy shop, consult an employee to learn how to program this percentage.
Step 4
The enlarged pattern may be bigger than standard-sized paper. If so, cut and tape sections of the enlarged pattern together. If taped joints distract you, many copy shops have the ability to print your enlargement on larger paper.
Tip
Many computer design programs have the capacity to enlarge scanned materials digitally. Consult your program's directions to do this.
Warning
To enlarge a clothing pattern, consult clothing-design resources. The process is more complicated than simply enlarging the size of the pattern.
Determine whether you need additional bracing, seaming, or other reinforcements. Don't compromise the structural integrity of your work or you may be disappointed or injured.
Adjust your materials list to ensure you have sufficient supplies.
Video of the Day