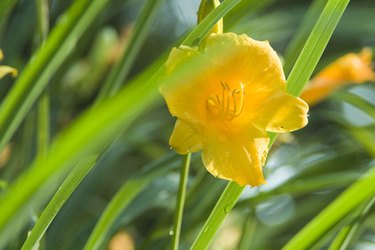
Your garden is bursting with bright orange-yellow Stella d'Oro daylilies (Hemerocallis 'Stella d'Oro'), and you may think that by collecting the seeds and planting them, you'll replicate the flowers that are already blooming. This is not true. Seeds do not carry the same genetic configuration as the existing flowering daylilies; only propagation will give you a clone. Dividing the original flower at the roots or through cuttings gives you the same kind of plant. Seeds yield a new kind of daylily. Thriving in USDA plant hardiness zones 4-9, Stellas require full sun and can survive in partial shade.
Growing Stella d’Oro Daylilies From Seed
Video of the Day
The Stella d'Oro daylily comes to our gardens from Asia yet carries an Italian name meaning "star of gold." The bright yellow flower carries a tinge of orange deep in the bowl or the opposite – leaves of orange with yellow bowls. That's the joy of planting daylilies from seed – you never know what the resulting flower will look like. But there is an art to collecting the daylily seeds and germinating them. The key to the process is continuous deadheading.
Video of the Day
Daylilies bloom for a day and then fade. What you want to do is make them rebloom, and by deadheading, they will. Instead of putting all their energy into making seeds, the lilies produce blooms when they are deadheaded, and your garden turns into a field of lilies throughout the summer season. When it's time to deadhead, do it at least every other day until the number of blossoms shrinks and the work is nearing its end.
Preparing Stella D’Oro Seeds for Planting
Once you've collected fresh seeds from blossoms that haven't been deadheaded or bought a packet of Stella d'Oro seeds, tuck them into a plastic bag along with a piece of moist paper towel and put them into the refrigerator until you see a sprout. This takes about six weeks. When the seedlings hatch, plant them in a pot and place it where the temperature reaches a consistent 70 degrees Fahrenheit. Germination takes place in three weeks to three months.
Wait several months until the plant gains strength and then replant in the garden in the spring where they will get full to partial sun. If you're too late to plant in the spring, try the fall when the weather is cooler and the insects go dormant. Blooming won't happen the first year but will take at least one more year before flowering happens. The thrill of planting the seeds is in seeing what they yield. There are so many different variations in color.
Maintaining Stella d’Oro Daylilies
Daylilies grow best in fertile, moist soil that is well drained, but they are hardy and thrive in most conditions, appearing along the edge of a road, in a field, on slopes or along foundations. In a controlled atmosphere, watering is important to their growth and helps them get established. Mulching also chases away weeds and keeps the soil around them moist.
When your daylilies start to bloom after the first year, remove spent foliage just before the first freeze or after the last frost of spring. Spread granular all-purpose fertilizer along the base of the plants after clearing away the spent foliage. Then, add mulch.
Your seed-originated daylilies can then be propagated after they've bloomed to continue the expansion of your garden. Pull up the entire flower and its root system in late summer. Pull apart the root system, divide it into several sections and then replant. Trim the flowering top to a height of 5 to 6 inches. This adds dazzling color to your daylily garden.