Things You'll Need
3/4- by 12- by 18-inch plywood sheet
Pencil
Band saw
Fine-grit sandpaper
1/4-inch drill bit
Drill
Three 1/4- by 6-inch dowels
Wood glue
Damp rag
Four 1/2- by 2- by 6-inch boards
1/16-inch drill bit
Two brads
Tack hammer
1/4- by 18-inch dowel
Craft paints
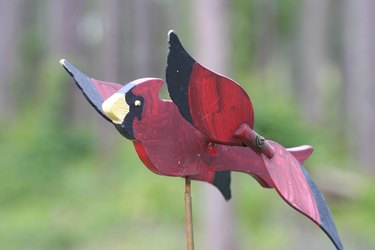
Whirligigs are whimsical wooden lawn ornaments featuring elements that come to life when the wind blows. Whirligig designs vary from classic folk art to cartoon characters, and can be made at home with just a few basic tools and materials. They are ideal projects for the weekend hobbyist because they can be completed quickly using a basic construction method that is applicable to a wide range of shapes and characters. For your first project, turn a classic icon of American folk art -- the rooster -- into a whimsical whirligig using this versatile method.
Step 1
Place the 3/4- by 12- by 18-inch plywood sheet on a work surface. Draw the silhouette of the rooster onto the plywood. The 18-inch side of the plywood sheet is the height of the rooster. The 12-inch side is the width of the rooster.
Video of the Day
Step 2
Cut out the silhouette of the rooster with a band saw. Guide the board through the saw slowly, following along the pencil line until it is cut out.
Step 3
Sand the silhouette with fine-grit sandpaper.
Step 4
Drill a 1/4-inch hole through the silhouette at the position where the wings will spin. It should be located approximately mid-way down the rooster's body.
Step 5
Drill a 2-inch deep 1/4-inch hole in the bottom of the rooster silhouette. This will accommodate the dowel that sticks into the ground to display the whirligig.
Step 6
Apply glue on the inside edge of the hole in the center of the whirligig. Slide one 6-inch dowel through the hole. Center it, so there is an even amount of dowel sticking out of each side of the whirligig. Wipe off any glue that oozes out. Allow the glue to dry.
Step 7
Drill a 1/16-inch hole through the center of the remaining two 6-inch dowels.
Step 8
Drill a 1/4-inch hole in the center of one 2-inch end of each 1/2- by 2- by 6-inch board. The hole should be approximately 1 inch deep.
Step 9
Align one 6-inch dowel against the end of the dowel in the whirligig. Position it, so the 1/16-inch hole is aligned with the center of the dowel end. Drive a brad through the hole into the end of the dowel. Follow the same procedure with the remaining 6-inch dowel. The dowels should spin freely on the ends of the center dowel of the whirligig.
Step 10
Apply glue to the holes in the 1/2- by 2- by 6-inch boards. Insert the boards onto the ends of the spinner dowels. Angle the dowels opposite each other. One should face horizontally and the other vertically on each side of the whirligig. This will create a surface for the wind to catch and allow the wings to spin.
Step 11
Paint the whirligig with craft paints. Add as much detail to the whirligig as you would like. Allow the paint to dry.
Step 12
Insert the 18-inch dowel into the ground. Align the hole in the bottom of the whirligig over the dowel and slide it into place on the dowel.
Tip
Create a few hens, mallards and geese to accompany the rooster for a complete country yard display.
Try making non-bird whirligigs such as a pinwheel, windmill, frog, airplane or swimming mermaid.
Warning
Wear eye protection when woodworking.
Video of the Day