Floor plans are drawings that show the bird-eye views of houses and other structures that people occupy. Floor plans show you the position, shape and size of each item inside a structure, including walls and fixtures like bathtubs and sinks. Before advances in technology made computer-aided design (CAD) possible, architects drew floor plans by hand, using templates, compasses, French curves and other hand-based design tools.
Step 1

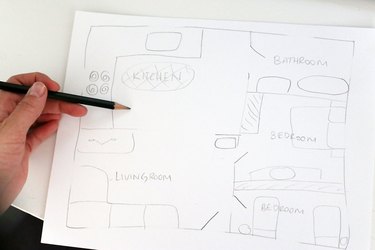
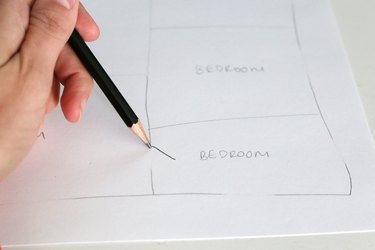
Draw the largest closed polygon that you can fit on a piece of plain typing paper. "Closed" means that there are no gaps in the polygon. Examples of polygons include rectangles, triangles, and more complex shapes like hexagons and octagons. The polygon is the top or "plan" view of the outside walls of the structure you're designing.
Video of the Day
Step 2
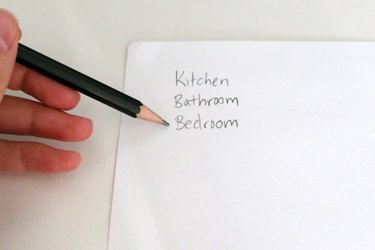
Make a list of the rooms or areas you want in this structure, letting the purpose of the structure determine the list. If the structure is a house, for example, then list the rooms in a house, e.g., bedroom, kitchen.
Step 3
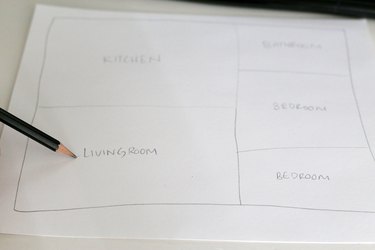
Draw, for each area you listed in the previous step, a polygon interior to the main polygon. This polygon represents the top view of the walls that define the area. Try to keep these polygons simple by drawing rectangles, and draw the lines lightly so you can erase and re-draw them if needed. Write, in the center of each area bordered by walls, the area's name (e.g. "bedroom," "bathroom").
Step 4
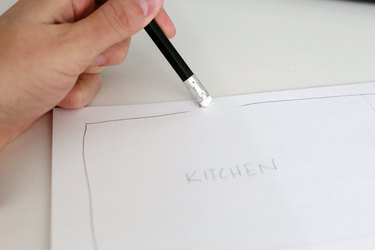
Select an edge, or "wall," of the outer polygon where you want to locate a window, and erase a 1.5-inch-long portion anywhere along that edge. This gap represents the top view of a window. Create other windows in other walls as desired.
Step 5
Begin drawing a door by erasing a portion of a "wall" where you want a door, just as you did for the windows. Position your pencil on one end of the gap, and draw a 1.5-inch-long line segment perpendicular to the edge that contains the door. This segment can protrude from either side of the edge. Finish the door by drawing an arc, or curve, that runs from the end of the segment you just drew to the other end of the gap. Make other doors as needed.
Step 6
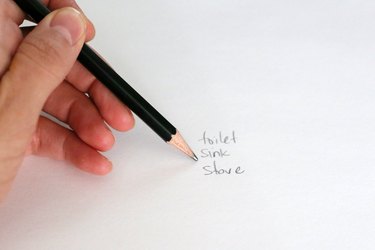
Make a list of fixtures your structure needs (e.g. toilets, sinks, stoves), then gather images that represent the top views of those fixtures. You can find these images on floor plans pointed to by the Resource links. You can also find the images in floor plans printed in architectural magazines.
Step 7
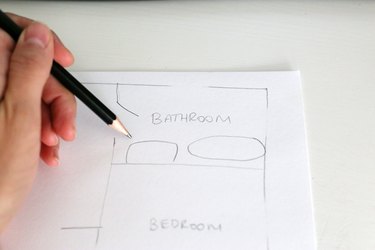
Redraw each fixture image found at the place you want it in your structure. For example, if you're drawing a bathtub for a house floor plan, draw the bathtub image you found alongside one of the walls inside your plan's "bathroom" area.
Video of the Day