Things You'll Need
Cotton, printed T-shirt
Clothespin
2 or more rubber bands
1/2 cup soda ash fixer
Large bucket
1 gallon water
Spoon
Liquid fabric dye
Plastic squeeze bottles
1/2 cup and 1/4 cup (separated) industrial-strength laundry detergent
Scissors
1/4 cup regular laundry detergent
Gloves
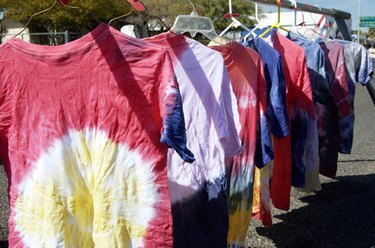
Tie dye T-shirts have been popular for decades. Tie dying is an easy and fun way to bring some great color to any old T-shirt. You can even tie dye any printed shirts. Because the printing on the shirt is not made from cotton (many are screen printed on), the dye will not absorb into the lettering. Therefore, you can safely dye any printed T-shirt without ruining the lettering. Keep in mind that the lighter the shirt (white is best), the better the tie dye will come out.
Step 1
Place your T-shirt under hot running water. Ensure that the entire shirt gets saturated, then wring out the excess water. This will help to dye the entire shirt evenly.
Video of the Day
Step 2
Lay the T-shirt flat on a hard surface like a counter top. Make sure there are no wrinkles or bumps in the shirt.
Step 3
Pinch a small bit of fabric in the very center of the shirt. Close a clothespin around the pinched fabric. Turn the clothespin clockwise with your fingers. Continue to do this until the entire shirt is wrapped around itself.
Step 4
Place two rubber bands on the T-shirt, crisscrossing. This will give you 4 "pie pieces" to dye four different colors. If you'd like more pieces, which will mean more colors, you can add more rubber bands crossing the shirt.
Step 5
Pour 1/2 cup of soda ash fixer into a large bucket. The bucket needs to be large enough to hold more than 1 gallon of water. Add 1 gallon of hot water to the bucket. Dissolve the soda ash fixer into the water by stirring it with a spoon.
Step 6
Place your wrapped shirt into the bucket. Push the shirt down using the spoon. Keep the shirt in the water for couple of minutes to ensure it is saturated. Pull the shirt out and carefully squeeze it to remove excess water. Dunking the shirt in the soda water will ensure bright and vibrant colors.
Step 7
Pour your liquid dyes into separate squeeze bottles. Clear squeeze bottles used for condiments work well. Make sure that you write on each bottle what colored dye is in it. The liquid dyes will all look dark and very similar, and this will help you know which color you're using.
Step 8
Start with your first pie piece. Squeeze the dye from one bottle onto one pie piece. Ensure the piece is saturated in the dye, then move onto the second pie piece and second color of dye. Do this until every pie piece--front and back--is completely dyed.
Step 9
Allow the dye to absorb and set into your printed t-shirt for 18 hours.
Step 10
Turn on your washing machine. Turn the heat setting to the highest temperature possible. Pour 1/2 cup of industrial strength detergent into the washing machine. Cut off the rubber bands from the shirt using a pair of scissors. Place the shirt into the washing machine. Allow the shirt to "wash" in the washing machine as normal. When the washing machine cycle is completely finished, move on to Step 11.
Step 11
Turn the washing machine back on to the hottest heat setting. Pour 1/4 cup of the industrial strength detergent into the machine, along with 1/4 cup of regular laundry detergent. Allow the shirt to wash as normal. When finished, throw the shirt into the dryer to completely dry.
Tip
Soda ash fixer can be purchased from any art store. Wearing gloves when dyeing your T-shirt is helpful to avoid staining your hands.
Video of the Day