Things You'll Need
Adjustable wrench
Bucket or small container
Emery cloth
Teflon thread tape
Straight or angle stop valve
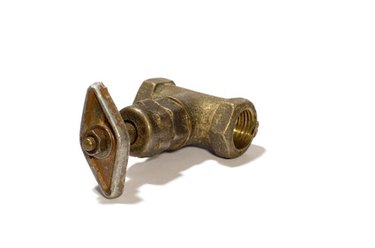
The water to a kitchen or bathroom sink is supplied through small copper or flexible neoprene tubes from a small control valve, called a stop or shut-off valve, under the sink. There are two basic types, straight stops and angle stops, and these valves normally remain on and are seldom closed, functioning maintenance-free for years. Aging stop valves can begin to leak as tap water mineral deposits build up or the internal seals degenerate. Replacement of these inexpensive valves is a simple repair.
Step 1
Turn the water supply off to the stop valve by closing the main gate valve. This main valve is typically located on the exterior of the house.
Video of the Day
Step 2
Open the sink's faucets to drain water from the fixture and release siphon pressure in the water line.
Step 3
Position a bucket or container beneath the stop valve being replaced to capture the small amount of water in the lines when the water line from the faucet is disconnected.
Step 4
Use an adjustable wrench to loosen the small hex nut that connects the water line to the sink faucet.
Step 5
Loosen the larger hex nut at the base of the stop valve, turning it clockwise until it is free of the valve's threads.
Step 6
Remove the stop valve from the copper water line by pulling it forward. Remove the brass compression ring around the copper water line to free the large hex-head nut.
Step 7
Clean any corrosion or mineral buildup from the exposed copper water line with a piece of emery cloth.
Step 8
Push the new stop valve's large hex nut onto the copper waterline, with the opening toward you, then slide the new brass compression ring over the copper waterline.
Step 9
Wrap two or three full layers of Teflon thread tape clockwise around the threaded sections of both the large and small hex nut connections.
Step 10
Slip the new stop valve onto the copper waterline and tighten the large hex nut to finger-tight, making certain the water line connection is positioned straight up. Use the adjustable wrench to tighten the hex nut.
Step 11
Connect the waterline from the sink faucet to the smaller connection hole and tighten the hex nut.
Step 12
Turn the control knob on the new stop valve counterclockwise to the fully open position. Open the sink's faucet.
Step 13
Open the main gate valve to turn the house water supply back on.
Step 14
Check the new stop valve's connections for leaking, and tighten the hex nut connections as necessary. Do not over-tighten.
Video of the Day