Things You'll Need
Newspaper strips
Bowl
Flour
Petroleum jelly, or alternative
Scissors
Large mirror
Fan

Inexpensive and fun to make, a paper-mache mask fits well and feels comfortable because you make it using your own face as a mold. You can even preserve the major features of your face in the mask. Paper-mache requires patience as it takes time to wait for the newspaper strips to dry out. Set aside a few hours of time to complete this project.
Step 1
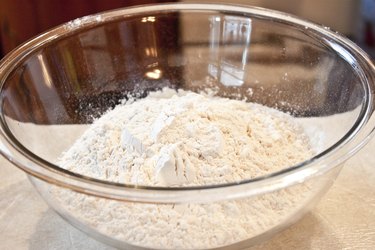
Mix flour paste. In the bowl, mix together three parts water and one part flour until smooth. Add a little more water or flour to adjust the thickness of the paste as desired.
Video of the Day
Step 2
Prepare for the mask. Set up a comfortable, well-lit spot in front of the mirror. Place the paste and newspaper strips nearby. Apply a protective layer of petroleum jelly to your face, brows and hairline. If you are allergic to petroleum products, try using aloe vera gel or olive oil instead.
Step 3
Start with an X-shape. Dip two thin strips of newspaper into the paste, coating both sides. Place one strip diagonally from the lower left nostril across the bridge of the nose and ending over the right brow. Smooth flat. Place the second strip diagonally in the opposite direction ending over the left brow. This helps provide structure to build on for the rest of the mask.
Step 4
Move to the forehead. Dip a wider strip of newspaper into the paste. Apply it horizontally across the forehead. Smooth flat. Work around each side of the forehead, applying more newspaper strips. Overlap about half of the previous newspaper strip with each new one.
Step 5
Wrap the eye sockets and nose. Continue wrapping newspaper strips from the temples around the eyes. Leave the eyes open -- you will need to see while you work. Wrap the newspaper strips around the bottom of the eye sockets and over the nose. A last strip over the nose will secure both sides of the face together. If you are making a masquerade ball mask, stop here and let the newspaper dry.
Step 6
Finish the lower half of the face. Outline the rest of the face, lower jaw and chin with newspaper strips. Work inward from the outside, overlapping newspaper strips as you go. If you want to leave a mouth hole, work around the mouth in the same manner used to wrap around the eyes.
Step 7
Add another layer to the mask. For a thicker, more durable paper mask, repeat steps 4 through 6.
Step 8
Allow the mask to set. Set up a small room fan nearby. Sit back and relax for about an hour while the mask sets. The air from the fan helps some of the excess water to evaporate.
Step 9
Remove the mask. Lean forward, holding your hands against the mask. Gently scrunch your face to work it loose from the newspaper. Ease the mask away from your face. It will still be mostly wet at this point, so be very careful.
Step 10
Set the mask in front of the room fan to help it completely dry out. It can take up to 24 hours for the paper to dry entirely.
Tip
Have a friend help out by putting the strips on your face. This is a good idea for a full face mold. Hold a straw between your lips to breath through if creating a full face mold.
Warning
You can also use plaster strips to create a mask. However, plaster of Paris is irritating to sensitive skin.
Video of the Day