Things You'll Need
Drill
Pry bar
Hammer
Reciprocating saw
2x4 lumber
3-inch screw or nails
1x3 hardwood
L-brackets
Drywall patching tools
Door jamb material
Pocket or bypass doors
Door guides
Bypass or pocket doors give more space in a room and can be installed in the space where a hinged door already exists, but there are some things to consider. Bypass doors require twice the width of an ordinary door, so you will need to enlarge the door opening unless you are replacing double doors. Pocket doors also require modification of the wall framing since you need to make a space for the door in the wall and create a slot in the stud framing the door.
Retrofitting a Pocket Door
Step 1
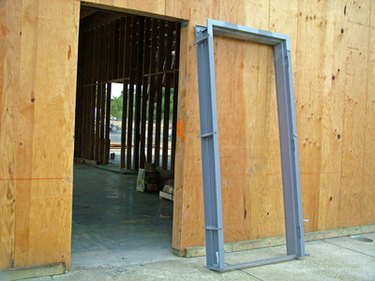
Remove the old door, door trim and jamb.
Video of the Day
Step 2
Remove the drywall from one side of the wall to uncover enough space for the door pocket. Cut it back to the middle of the next available stud and to a height corresponding to the top of the door header. Remove the screws or nails holding the drywall to the exposed studs on the other side of the wall. You don't need to remove the drywall on the other side of the wall, although it is easier if you do.
Step 3
Make a line following the top of the door header to the last stud, and cut all the studs at this line except the last one. Remove the studs. Cut the bottom plate flush with the last stud and remove it.
Step 4
Remove the old header, and replace it with a longer one that extends to the last uncovered stud. Screw or nail it to the ends of the overhead studs. Set two pieces of 1x3 hardwood at the edge of the door opening to function as the pocket bypass and, using a level to plumb them, screw or nail them to the header and use L-brackets to attach them to the floor. The opening should give 1/4-inch clearance to the door on both sides.
Step 5
Install a stud to form the end of the pocket, plumbing it and fastening it to the header. Install a new section of bottom plate between this stud and the last one, and fasten the stud to the bottom plate.
Step 6
Install the upper and lower door guides and hang the door, ensuring that it slides smoothly, closes completely and that the edge is flush with the pocket when it is open.
Step 7
Replace the drywall, being careful that the drywall screws do not go all the way through the 1x3s forming the pocket. Trim the door opening.
Retrofitting a Bypass Door
Step 1
Remove the old door and jamb.
Step 2
Measure the new opening, and cut the drywall on both sides of the wall back to the middle of the first stud past the new opening. The height of the opening should be the same as the height of the top of the door header.
Step 3
Remove the old header, and cut all the studs off at the measured height except the last one. Install a new header that extends all the way to the last stud, and install another stud to frame the opening, being sure to allow for the thickness of the door jamb. Set the stud on top of the bottom plate, level it and screw it to the header and the bottom plate. Cut the bottom plate flush with this stud and remove it.
Step 4
Repair the drywall, and set a new door jamb in place. Attach the door guides to the overhead jamb, hang the door and make sure it slides correctly. Attach any floor hardware that came with the door to keep it aligned, and trim the jamb.
Tip
Retrofitting a bypass door in the opening of a double-hung door may not involve any modification of the door opening. The process may be as simple as removing the old doors, setting the guides in place and hanging the bypass doors.
Warning
Be careful when you cut into an old wall because there may be electrical wires. These will, of course, have to be re-routed, Don't forget that when you remove a section of the wall and the bottom plate, you must make floor repairs as well.
Video of the Day