Things You'll Need
Paper
Pencil
Ruler (optional)
Chain link fences are relatively low-cost and therefore, commonly found around back yards and properties that need to be kept private. Drawing a chain link fence seems like a complicated task from the outset, but this type of drawing can be broken down into easy steps that, when placed together, form a fairly realistic representation of a fence.
Step 1
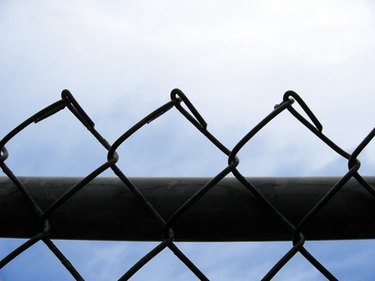
Draw a horizontal line above the ground, representing the top bar of the fence.
Video of the Day
Step 2
Draw two vertical bars supporting the top bar of the fence (leading from the horizontal bar on top, down to the ground). One bar should be on the far left side of the fence, and one bar should be on the far right.
Step 3
Draw a diagonal line from the top left corner of the fence, down to the ground. This line should bisect the 90 degree angle of the corner of the fence, forming two 45 degree angles inside the fence. This is the first line of the chain link.
Step 4
Draw a series of evenly spaced lines placed below the line you just drew in step 3, running parallel to it. Start from the top of the fence, and draw them at even intervals all the way down. These lines will start with the vertical bar at the left side of the fence and stop when they reach the ground. You are beginning to form the body of the chain links.
Step 5
Draw a series of evenly spaced lines, placed above the line you drew in step 3, but parallel to it. These lines will move from the left side of the fence to the right side of the fence. These lines should start at the horizontal bar moving across the fence, and move down to the ground (or until they hit the far right side of the fence).
Step 6
Repeat steps 3 through 5, starting from the other end of the fence, mirroring all of the lines you drew in steps 3 through 5. Start by drawing a diagonal line from the top right corner of the fence, down to the ground. This line should bisect the 90 degree angle of the corner of the fence, forming two 45 degree angles inside the fence. Draw a series of evenly spaced lines placed below the line you just drew, running parallel to it. Start from the top of the fence, and draw them at even intervals all the way down. These lines will start with the vertical bar at the right side of the fence and stop when they reach the ground. Then, draw a series of evenly spaced lines, placed above the line you drew, but parallel to it. These lines will move from the right side of the fence to the left. These lines should start at the horizontal bar moving across the fence, and move down to the ground (or until they hit the far right side of the fence). You have completed the chain link fencing.
Step 7
Thicken and darken the horizontal and vertical bars of the fence.
Step 8
Draw a zig-zag line across the top horizontal bar of the fence, from the left to the right. This zig-zag will form an even series of triangles that mirror the zig-zag of the chain link beneath the horizontal bar.
Video of the Day