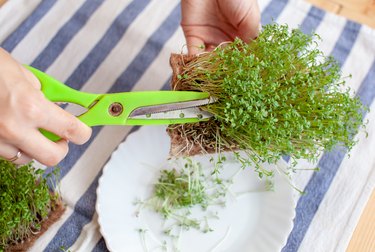
Whether you enjoy them raw, in salads or in sandwiches, sprouts are a refreshing way to add texture to your favorite foods. If you're looking for a different growing method instead of the usual glass sprouting jar, sprouts can be easily grown in a DIY seed-sprouter tray.
Safety of Sprouts
Video of the Day
Like any food that is consumed raw, eating sprouts raw carries its own danger. When sprouts are cooked, the heating process destroys any bacteria that might have grown. However, growing sprouts at home allows you to control the environment in which you grow and what your sprouts are being exposed to. Thus, home sprouting is not considered dangerous.
Video of the Day
In order to safely grow your own sprouts, make sure that you're using clean water. Avoid standing water and be careful when the air is particularly warm because humidity and warmth are ideal conditions for bacteria to grow. Finally, make sure that you don't consume any sprouts that you've had in the fridge for more than seven days.
Sprouting’s Six Rules
There are six basic rules for sprouts when you're making your own sprouting trays via DIY: rinse often, keep them moist, keep them at room temperature, make sure they have ample room to breathe, do not overcrowd and keep them covered. Sprouts can sour and spoil when they are exposed to carbon dioxide and other metabolic wastes for prolonged periods, so regular rinsing with cool water several times a day will help wash away these wastes. Make sure they are well-drained but never wet.
Although sprouts must be kept at room temperature, their ideal temperature will vary depending on the type of seed; however, this temperature is typically between 70 and 85 degrees Fahrenheit. Furthermore, air circulation is also essential to overall sprout health. To make sure they have enough room to breathe, leave one-third of the tray empty. Since sprouts will grow six to 10 times their size, this will leave them enough room to expand. Sprouts are light-sensitive during their early stages of growth and should be covered at all times to ensure that no light seeps in.
Preparing the Seeds
The first step for growing sprouts in a DIY sprouting tray is selecting a suitable tray and lid. While you can purchase a plastic growing tray and lid from garden supply stores, thoroughly washed plastic deli trays can work as well. Once you've selected a tray, punch drainage holes with a punching tool. Then, use a nest tray without holes to act as a catch basin.
Before planting, be sure to rinse seeds well with cool water and then drain. The temperature of the water should be approximately 70 degrees Fahrenheit. This will remove any debris, stones or broken seeds before planting.
Next Steps in the Process
Once rinsed, soak seeds in a jar filled three-quarters of the way with cool water. Then, cover it with a mesh lid or cloth and secure it with a rubber band, as it's essential that the seeds still receive airflow. Let the seeds soak for at least eight hours until they double in size; however, larger seeds may need to soak longer. For example, chickpeas or kidney beans may take up to 24 hours.
Drain your seeds well for several hours to allow proper air circulation. Then, gently rinse the seeds with cool water and drain again. Repeat this step two to three times a day for the next three days. If you live in a warmer climate, rinse them more frequently. Conversely, rinse them less frequently in cold temperatures.
Transfer to DIY Seed-Sprouter Tray
Once your seeds are ready for the tray, drain them thoroughly and then spread them evenly over the tray. Move the tray out of the sun to a cool, dry area that has indirect sunlight and cover it. Rinse the tray two to three times a day and always check for signs of mold. If you find mold, wipe it away with a towel and rinse your seeds again. Once tiny leaves begin to sprout (after one or two days), remove the lid to allow indirect light. Rinse and drain well before harvesting.