Home Sweet Home
Hacks, Tips & Tricks
Squeaky Clean
DIY Decor
Carpentry & Remodeling
Maintenance & Repair
Green Thumb
All Home Sweet Home
Chow Down
Main Dishes
Sweet Treats
Snacks
Copycat Recipes
Drinks & Cocktails
Sides & Appetizers
Veggie Faves
Food Hacks
All Chow Down
Get Crafty
Sew Simple
Fun Crafts
Art Projects
All Get Crafty
Let’s Celebrate
Valentine's Day
St. Patrick's Day
Easter
Mother's Day
Father's Day
4th of July
Back to School
Halloween
Thanksgiving
Christmas
New Year
Weddings
Baby Showers
Birthdays
Parties & Events
Gifts
All Let’s Celebrate
JOIN OUR NEWSLETTER
JOIN OUR NEWSLETTER
Home
Let's Celebrate
Let's Celebrate
By
Trisha Sprouse
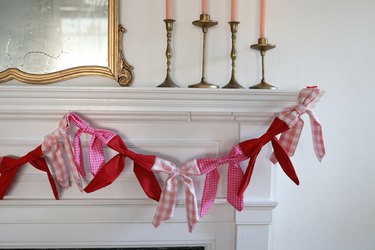
Bow Garland for Valentine's or Galentine's
Let's Celebrate
By
Beth Huntington
DIY Valentine Explosion Box
Let's Celebrate
By
Laurie Gunning Grossman
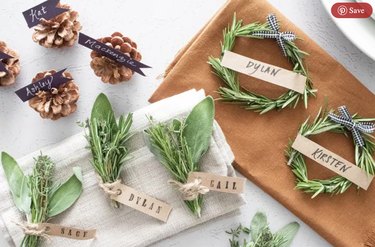
14 Things to Bring to Thanksgiving or Friendsgiving Dinner
Let's Celebrate
By
Jessica Kielman
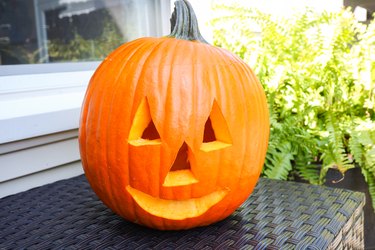
How to Clean a Pumpkin and Make It Last Longer
Let's Celebrate
By
Sharon Hsu
How to Make Mini Coffin Cakes
Let's Celebrate
By
Beth Huntington
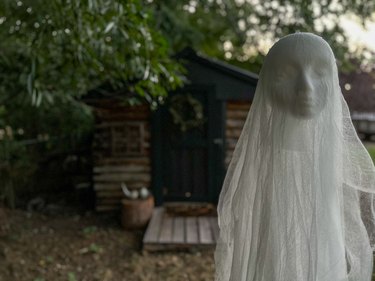
DIY Cheesecloth Halloween Ghosts
Let's Celebrate
By
Trisha Sprouse
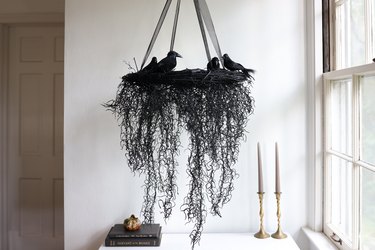
Eerie Halloween Chandelier DIY
Let's Celebrate
By
Sharon Hsu
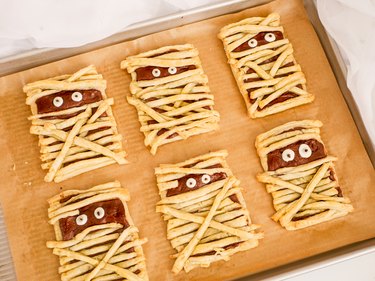
Mummy Pie Treats for Halloween
Let's Celebrate
By
Bianca Fernandez
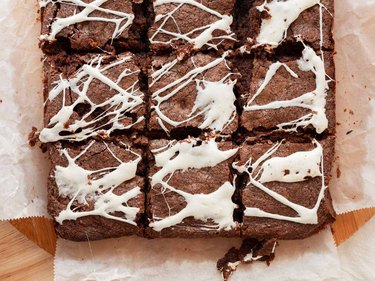
Spooky Spiderweb Brownies
Let's Celebrate
By
Kirsten Nunez
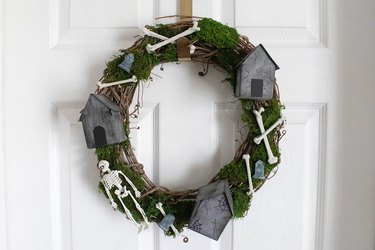
Haunted House Halloween Wreath
Let's Celebrate
By
Kirsten Nunez
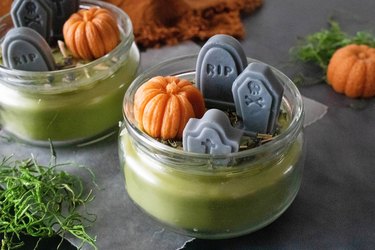
Cute and Spooky DIY Candle Graveyard
Let's Celebrate
By
Beth Huntington
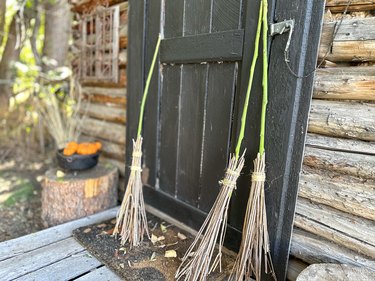
How to Make a Wicked Witch's Broom
Let's Celebrate
By
Trisha Sprouse
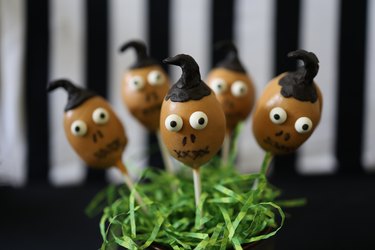
How to Make Beetlejuice Shrunken Head Cake Pops
Let's Celebrate
By
Beth Huntington
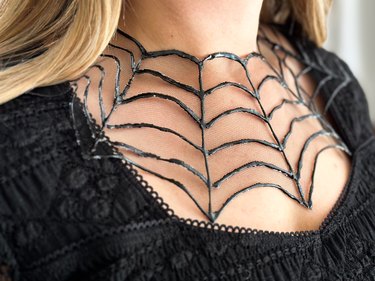
How to Make a Bewitching Spider Web Necklace
Let's Celebrate
By
Kalia Silva-Phillips
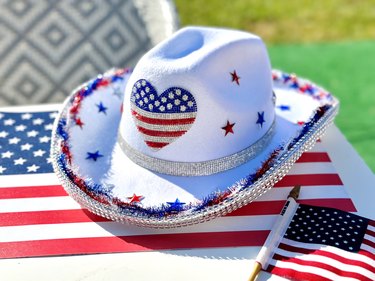
Bling! July 4th Cowboy Hat
Let's Celebrate
By
Trisha Sprouse
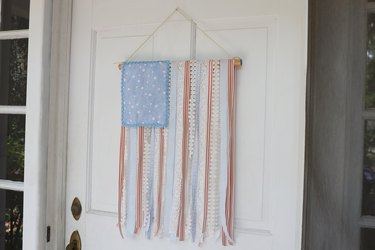
July 4th Pretty Ribbon Door Hanger
Let's Celebrate
By
Laurie Gunning Grossman
Father's Day Gift Ideas for Every Type of Dad
Let's Celebrate
By
Bianca Fernandez
Cookies That Say 'Love You, Mom!' — Vanilla Shortbread Hearts Dipped in Chocolate
Let's Celebrate
By
Laurie Gunning Grossman
Graduation Gift Ideas for Every Type of Grad
Let's Celebrate
By
Lauren Murphy
Mother's Day Gift Ideas for Every Kind of Mom
Let's Celebrate
By
Sharon
Peeps Sugar Cookies
Let's Celebrate
By
Sharon
No-Bake Chocolate Coconut Bird's Nests
Let's Celebrate
By
Elba Valverde
Easter Centerpiece
Let's Celebrate
By
Beth Huntington
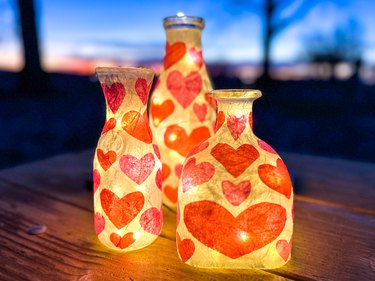
Valentine's Day Jar Lanterns
Let's Celebrate
By
Sharon Hsu
Love Letter Cookies
Let's Celebrate
By
Bianca Fernandez
Chocolate-Dipped Strawberries for Valentine's Day
Let's Celebrate
By
Beth Huntington
Best-in-Class DIY Valentine Box
Let's Celebrate
By
Kirsten Nunez
Disco Ball Hot Cocoa Bombs for New Year's Eve
Let's Celebrate
By
Kirsten Nunez
New Year's Eve Earrings
Let's Celebrate
By
Kirsten Nunez
Pink Tinsel Party Crackers
Let's Celebrate
By
Bianca Fernandez
Chocolate-Covered Strawberries for New Year's Eve
Let's Celebrate
By
Kirsten Nunez
Soaps Inspired by Holiday Drinks
Let's Celebrate
By
Kathryn Walsh
9 Christmas Tree Themes for Festive Inspo
Let's Celebrate
By
Elba Valverde
Festive Fabric Coasters Shaped Like Christmas Ornaments
Let's Celebrate
By
Beth Huntington
A Candy Land-Inspired Garland to Sweeten Your Space
Let's Celebrate
By
Sophie Boudreau
14 Holiday Trends, From Pink Trees to Retro Vibes
Let's Celebrate
1
2
3
4
5
>