The simple stitches and repetitive pattern of granny squares make them an ideal project for beginning crocheters. Granny squares can be used for afghans, baby blankets, scarves or shawls. The squares are clusters of three double crochet stitches separated by two chain stitches. Two clusters are worked in the corners, while the chain stitches leave decorative openings.
Supply List
Video of the Day
To make granny squares you need yarn, a crochet hook and a pair of scissors. Heavy or bulky yarn makes larger squares than lightweight yarns, which will affect how many squares you need for a particular project. Be sure to use the right crochet hook for the yarn you choose. Lightweight yarn such as sport or baby yarn needs a size E or 4.5 mm hook, worsted weight needs an I or 5.5 mm hook and chunky yarn needs a K or 6.5 mm hook. Crochet hooks may be sized by letter or millimeter measurement, depending on the manufacturer. You'll need to know how to chain stitch, slip stitch and double crochet.
Video of the Day
Create a Circle
A granny square has a circle at the center. Begin with five chain stitches. You can use a slip knot at the beginning if needed or simply loop the yarn around the hook and begin the chain. Once you've done five chain stitches, insert the hook in the first chain stitch and connect the loop with a slip stitch.
First Row
Start with three chain stitches; they count as the first double crochet of the row. Add two double crochet stitches, working the yarn around the center circle rather than through individual stitches. Chain stitch twice. Double crochet three stitches then two chain stitches, and repeat two more times for a total of four "groups" of double crochet stitches separated by small gaps of single chain stitches. Join the last chain stitch to the beginning chain three with a slip stitch. This will form a small square.
Second Row
Chain three stitches and turn. Double crochet two stitches, chain two, and double crochet three stitches in the chain two opening from the first row. Chain two stitches. In the next chain two opening from the first row, double crochet three times, chain two, double crochet three stitches and chain two. Repeat in the two remaining chain two spaces from row 1. Join at the beginning chain three with a slip stitch.
Third Row
Chain three stitches and turn. Double crochet twice in the chain two gap from row 2. Chain two. Move to the next gap, which will be a corner. Double crochet three stitches, chain two, double crochet three stitches in the same gap. Chain two and, in the next gap from row 2, double crochet three stitches and chain twice. Repeat the pattern around the square and join at the beginning chain three with a slip stitch. Cut the yarn, pull through the last slip stitch and weave in the end.
Tips
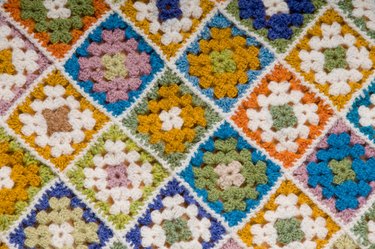
For more color, the yarn can be changed at each row. Larger squares can be made following the same pattern at the corners and gaps.