Things You'll Need
Measuring tape
Tracing paper
Pencil
Scissors
2 to 3 inch foam
Batting
Upholstery fabric
Straight pins
Sewing scissors
Iron
Sewing machine
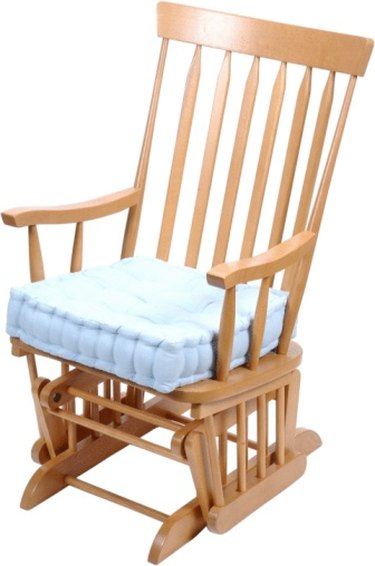
Glider rockers are a common pieces of furniture in a baby's nursery. The gentle gliding motion of these chairs makes them comfortable and relaxing. Most gliders have cushions that can vary in design, style and thickness. If a set of original cushions gets lost, damaged or destroyed, replace them for optimal comfort in your glider. You could purchase replacement cushions, but handmade cushions allow for more versatility and personal expression.
Step 1
Measure the seat and back of your glider rocker with the measuring tape. Add 2 to 3 inches to all of your measurements for seam allowance and write down the adjusted measurements. Draw patterns of the exact shapes of the glider rocker's seat and back onto tracing paper. Draw four rectangles that are each about 6 inches long and 1 1/2 inches wide on additional tracing paper if you wish to add ties to your cushions. Do not add seam allowances to the tie patterns.
Video of the Day
Step 2
Cut the foam into the proper shape and sizes for the chair's seat and back using the patterns. Cut the batting and fabric using your recorded measurements. Include the seam allowances when cutting.
Step 3
Fold each fabric tie in half the long way with right sides of fabric facing in. Stitch the sides of each tie closed with a sewing machine, leaving the short ends open. Pull the right sides of the ties back out to turn the ties right-side-out.
Step 4
Pin the upholstery fabric together with right sides facing each other. Stitch around the edges of the fabric with a 1/2-inch seam allowance, leaving one side of each cushion open for inserting the foam and batting. If you have opted to add ties to your cushions, attach them to the corners of the fabric covers before pinning and stitching the pieces together.
Step 5
Slightly round the corners as you stitch. This will allow the fabric cover to fit the shape of the foam pieces for your cushions better. Use a sturdy pair of sewing shears to clip excess fabric from inside the seam corners. Press the seams open with an iron and turn the fabric right-side-out.
Step 6
Wrap the glider rocker seat and back foam cushions with the previously cut pieces of batting and insert the cushion forms into the fabric covers. Slip-stitch the cushions closed by hand.
Video of the Day