Things You'll Need
Oven mitts
12-by-24-inch plain sheet of styrene
12-by-24-inch wood-embossed (board and batten) sheet of styrene
Compass
Craft knife
Cookie sheet
PVA glue
Model paintbrushes
Acrylic paint in dark brown, yellow, white, blue, red and green
14 bamboo cooking skewers
6-by-6-inch piece of burlap
12-inch-long, 1/2-inch-diameter wooden dowel
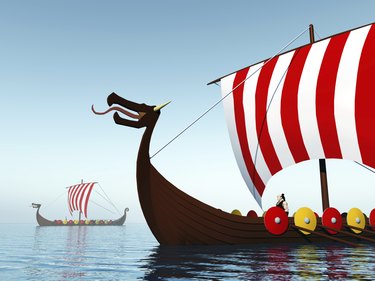
Viking longboats were some of the best-made ships of the ancient world. These extremely well-balanced ships ransacked the coasts of Europe, and the Vikings became wealthy off their well-executed plundering. Viking longboats even made it from Norway all the way to Iceland and Greenland, and now historians have discovered that Vikings landed in the Americas well before Columbus. Creating a model of a Viking longboat is the perfect accent to any report or project on Vikings. Once completed, it will become a treasured possession in your model collection.
Step 1
Cut two 12-inch-long and 4-inch-wide pieces out of sheet styrene to create the sides of the longboat. The sides of each piece should curve up and come to a point. This should look similar to a banana.
Video of the Day
Step 2
Cut out 14 small triangles for the ends of the paddles. These should be 1 inch wide at the base of the triangle and 2 inches long. Cut off the tip of each triangle so you are left with 14 trapezoid shapes. Use PVC modeling glue to attach a paddle end to the end of a skewer. Cut the sharp tip of the stick off at the opposite end with the craft knife.
Step 3
Soak a 6-by-6-inch square of burlap in a mixture of white acrylic paint and water. This should consist of 1/4 cup of white or cream-colored acrylic craft paint and 1 cup of water. Let the burlap soak for 10 minutes. Remove it from the mixture and let it dry on a scrap towel or rag. This will make the burlap look like white sail.
Step 4
Place the two pieces of sheet styrene on a cookie sheet and put them into the oven at 200 degrees F for five minutes. Place the bottom of the pieces together and bend the warm plastic so that the ends and tips touch and form the boat shape. Once the plastic is in this form, quickly dip it into an ice-water bath to set the shape. Dry off the pieces and glue them together with PVC glue.
Step 5
Cut out an 11 1/2-by-2-inch rectangle of sheet styrene for the floor of the ship. Cut a 1/2-inch-diameter hole in the center of this sheet. Do this by using a compass to trace the hole and a craft knife to cut out the hole. Place a line of PVC glue on the left and right long sides of the rectangle and gently place this piece inside the boat.
Step 6
Place a 12-inch-long, 1/2-inch-wide wooden dowel rod inside the hole to create the pole for the mast so that the base of the bowel is flush with the bottom of the boat. Coat the base of the pole with PVC glue. Cut out 16 1-inch-diameter circles from a piece of flat sheet styrene. Measure these with a compass and cut them out with a craft knife. Glue eight circles on each outside top edge of the ship for shields.
Step 7
Glue a skewer along the horizontal top of the sail. Let this dry and cut off the sharp edges of the stick with the craft knife. Place a small dot of glue on the middle of the stick and glue this to the top of the mast. Leave only 1 1/2 inches at the top of the pole. Place the paddles in between each shield and glue in place.
Step 8
Paint the entire boat with dark brown acrylic paint. Let the paint dry and mix one brushload of dark brown with one brushload of yellow. Brush this over some newspaper until the brush strokes barely leave color behind. Brush this over the entire longboat to pull out the detail. Paint each shield in alternating bright colors such as blue, red, yellow and green. You can paint half of a shield in blue and the other half in red or create your own patterns.
Tip
If you prefer, paint each individual piece of the model as you build it.
Warning
Wear oven mitts when handling warm plastic. Turn on your range fan to vent any fumes from the plastic. An adult should melt and handle the warm plastic.
Video of the Day