Things You'll Need
Bead loom
Thread
Scissors
Ruler

Beading on a loom allows you to create a variety of decorative bracelets and baskets. Woven bead decorations have graced the Native American heritage for centuries. Weaving with beads is similar to weaving on a cloth loom and uses many of the same methods and materials. When threading or "warping" a bead loom, you are stringing the long vertical threads on the loom. These will eventually hold the design. The following are step by step instructions on how to string the loom for simple projects.
Step 1

Decide how many beads wide and how long you wish your finished project to be. Measure out your beading thread, increasing the length an extra 12 inches and cut your strings. You will need one more string than the number of beads wide your project is. For example, if you are going to make a bracelet that is 5 beads wide, than you will need 6 strings. Loosen the wing nuts on the ends of your bead loom.
Video of the Day
Step 2
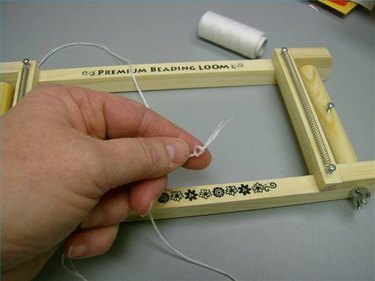
Line your threads up so that the ends meet and knot them together. Carefully separate each strand, and divide the number in half. In this example we are threading the loom with 6 warp threads, so we will have 3 strands on each side.
Step 3
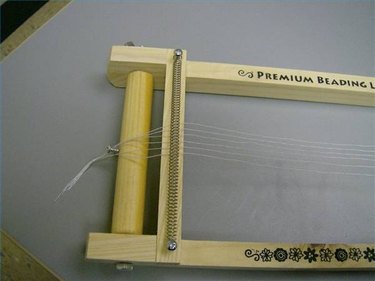
Find the hook or screw on the tension rod at the end of the loom. Place the knot behind the screw so that it "hooks" into place. Gently separate the strands and place them through the spring stretched along the loom. You will want to space the threads so that there is 1 loop of spring in between each strand of thread (every other loop). Carefully turn the tension rod until you have rolled about 6 inches of thread around the rod, then tighten the wing nut.
Step 4
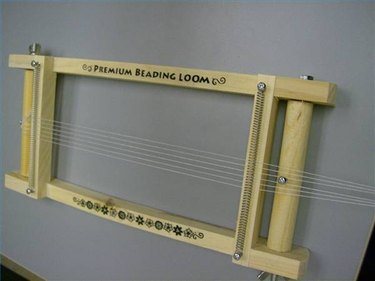
Pull the threads straight so that they line up at the bottom with the same spring loops as on the top. You want the strands to be as straight as possible. Tie a knot in the ends of the strings and place behind the screw or hook on the bottom of the tension rod.
Turn the tension rod until about 6 inches of thread around the bottom tension rod. Tighten the wing nut.
Step 5
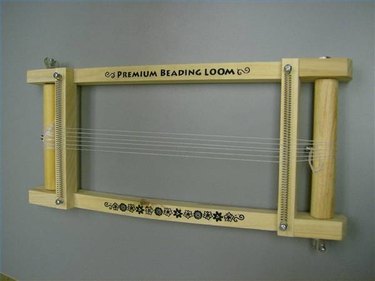
Return to the top and turn the tension rod until the strings are pulled taut on the loom. You are now ready to bead your project.
Video of the Day