Things You'll Need
Cheap beanie or baseball cap
6-by-8-inch piece of fabric
Needle and thread
Marker
Scissors
Cotton balls
Multipurpose glue or spray adhesive
14 inches of string or yarn
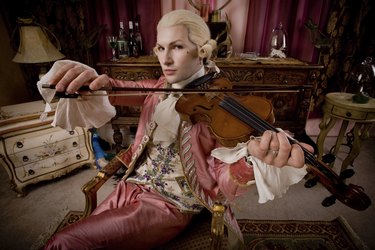
Starting in the late 1500s, powdered wigs were all the rage among European noblemen because they hid the hair loss often caused by syphilis, which was rampant at the time. Wigs lingered as a fashion statement -- and as a convenience when dealing with head lice -- until the late 1700s. Making your own powdered wig out of cotton balls is a way to reinforce your child's school history lessons, or to form the basis of a high-class 16th- to 18th-century costume.
Step 1
Stitch one of the narrow ends of the fabric piece to the backside of the beanie or baseball cap. If you're using a baseball cap, carefully cut away the brim.
Video of the Day
Step 2
Place the cap on your child's head with the fabric flap in the back to form the "tail" at the back of the wig. Using the marker, carefully trace around where you think the outline of the wig should be. Keep in mind that powdered wigs came in an enormous variety of lengths and styles, from towering piles of loose curls to sleek, heavily gelled looks with just a curl or two over the ears. Use full creative license or, if you're imitating a specific historical figure's looks, consult old portraits of said personage.
Step 3
Remove the cap/flap combination from your child's head and carefully trim around the outline you made. Unless you plan to keep the wig for a long time, there's no need to finish the edges.
Step 4
Cover the wig base you just finished completely with cotton balls, using spray adhesive, multipurpose glue or even hot glue to secure them in place. This is a good step for your child to help with. Work one small patch at a time if you're using spray adhesive; if you're using hot glue, you stay in charge of the glue gun.
Step 5
Glue cotton balls to the very edge of the fabric base to conceal the last traces of the fabric. Let the glue dry completely before putting the wig back on your child's head and, if necessary, trimming it into shape.
Step 6
Tie the string or yarn into a bow, if desired, around the "tail" of the wig. Both those who wore wigs and those who chose to show their real hair often tied the wig or hair into a tail, called a queue, at the back of their head.
Tip
Note that most cotton balls are shaped like a squished cylinder, as opposed to an actual round ball of fluff. Placing rows of "cylinders" end to end as you apply them to the wig creates the look of tightly rolled curls.
Some British attorneys and judges still wear powdered wigs in court.
Warning
Watch out for the very understandable faux pas of letting your child wear a cotton ball "powdered wig" as part of a George Washington costume. Although many of America's founding fathers followed the upper-class European tradition of wearing wigs, George Washington was one of the few who did not; instead, he powdered his own hair. Thomas Jefferson also powdered his real hair for most of his life.
Video of the Day