Things You'll Need
Tape measure
Image-editing software or hand-drawn image
Acrylic or watercolor paints
Watercolor pens
Scanner
Pencil
Level or straightedge
Painter's tape
Paint
Paintbrushes
That spark of creativity burning inside you may have you wanting to custom-tailor a wallpaper border for a room in your home -- a new office or den or the nursery for your baby -- or just because you want to stretch your creative legs. With the onset of the digital age, you can make a border without having to stencil it by having your design custom printed. That way, you can order exactly the amount you need.
Digital Design
Step 1
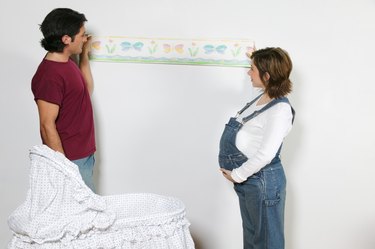
Measure the area where you want to place your wallpaper border. Wallpaper borders generally go midway around a room, lower in a child's room or near the top to serve as a decorative accent. Find out how much border you need lengthwise and decide how tall you want it. Average heights for wallpaper borders range from roughly 6 inches to just over 9 inches. Scale the border to the room's size for better results.
Video of the Day
Step 2
Design your border so that it repeats around the room, as wallpaper borders typically repeat their patterns or designs. If, for example, you have a 12-foot-wide wall on which you want to put the wallpaper border, the actual design may be anywhere from a few inches to 1 foot long, repeated 12 times across that width.
Step 3
Draw up your border by hand if you have the skills and color it in with acrylics, watercolor or watercolor-type pens. Or use an image-editing software to create your wallpaper border design to the required dimensions. With image-editing software, you can cut and paste royalty-free sailboats, doll images, Celtic designs and more based upon your desired results. You can also use your child's artwork or family photos to create your own border.
Step 4
Scan your image to your computer or a thumb drive to save it. Make certain you save it in a .JPG format, as most custom wallpaper shops require a digital image in that format. Don't go over the specified file size based on the store's requirements.
Step 5
Visit the custom wallpaper store or its online site. Give them your design on a thumb drive or upload it to the site after filling out the appropriate forms. Preview its look to ensure it achieves what you desire. Most wallpaper printing companies take from three to five days to complete your order, depending on how busy they are. Pay the fees and wait for your custom wallpaper.
Simulated Border
Step 1
Measure up from the bottom of the room to the top border height every 1 foot across the wall. Repeat for the bottom of the border at the desired width. For example, if you're adding a whimsical border to a child's room, measure up 32 inches for the top of the border. Subtract the border's width from that measurement, such as 9 inches, and make marks across the wall every foot at 23 inches.
Step 2
Draw border lines in pencil across the wall, connecting the marks to create the desired decoration. Use a level or a straightedge to get straight lines. Add two lines for a border above and below the main body of the border. For instance, make two 1-inch borders above and below a 7-inch-wide border.
Step 3
Apply painter's tape above the top border line and below the top border's 1-inch width. Repeat for the bottom border. You should have four lines of tape running across the wall.
Step 4
Paint between the top and bottom border lines between the tape in your desired colors. These can be the same colors, contrasting colors -- opposite colors on the color wheel -- or analogous, side-by-side colors on the artist's color wheel.
Step 5
Tape off the middle section after the two painted smaller borders are dry enough to accept tape without peeling off. Follow the lines of your previous borders.
Step 6
Fill in the middle area with your chosen final border color by painting it on.
Tip
Once you create a digital design, you can print it out on paper and tape it to the wall to see how it looks. This saves both time and money, and it helps you achieve a really custom look.
If you need inspiration, find books with the designs or stencils that you can trace over. The local arts and crafts store, bookstores, library and even your computer may have designs that appeal to you.
You can also buy a roller with a repeated pattern and paint a wallpaper border around the room. These rollers have a pre-cut design. The larger the roller, the bigger the design.
Add wall decals or paint over stencils and the rim with two border lines above and below for a quick and easy simulated wallpaper border.
Warning
If you create your own customized digital design, do not use copyrighted art. Create your own or use royalty-free stock photos.
Video of the Day