Finding the perfect personalized gift for a birthday, holiday or baby shower can feel like an endless search. You want the present to be thoughtful and unique, but more often than not, that's a challenge most purchased products can't live up to. By learning how to silk screen at home, you can make a truly one-of-a-kind gift that will be cherished for years. Use this free printable as the adorable design for a onesie, and you'll have an original item to give and a new hobby to master!

Video of the Day
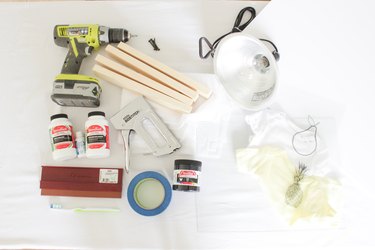
Things You'll Need
1 inch-by-2 inch board, 12 inches long (4)
1 1/2 inch long interior wood screws (4)
Cordless drill
Curtain sheer, (1 panel)
Scissors
Heavy-duty stapler with staples
Photo emulsion solution
Sensitizer for screen printing
Rubber squeegee
Large cardboard box (bigger than screen)
Scrap pieces of wood (2)
Design printed on transparency sheet
9 inch-by-12 inch piece of glass
Hanging clamp light with 150-watt bulb
Toothbrush
Painter's tape
Infant bodysuit or T-shirt
Foam core board cut to width and length of bodysuit
Black screen printing ink, water-based
Cookie sheet with towel
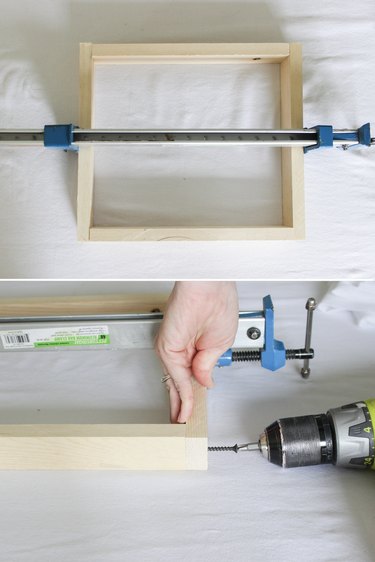
Step 1: Build Frame
Place the 12-inch boards into a perfectly square and flush frame. If someone isn't available to keep the boards together while attaching the screws, use a clamp to keep the boards in place. Pre-drill holes and place a 1 1/2-inch screw in each corner using a cordless drill.
Video of the Day
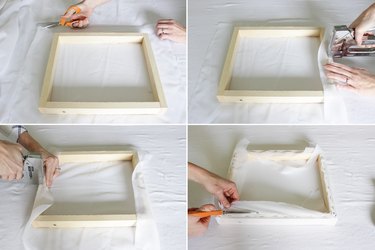
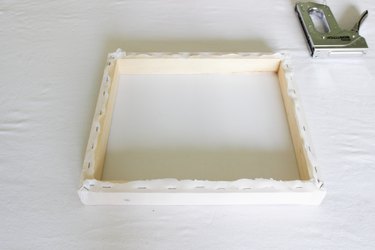
Step 2: Attach Screen
Place a curtain sheer underneath the wooden frame, and cut the curtain sheer so that 4 inches are left around the entire frame. Fold up one side of the curtain sheer and staple it in the middle of the board. On the opposing board, pull the sheer very tight and staple it in the middle. Repeat for the other two remaining sides. Once all four sides have one staple in the middle, pull the sheer tight along each side and staple the fabric to the wooden frame. Trim the excess fabric with scissors.
Tip
When pulling and stapling fabric, it is best to work from one side and then the opposite side, to keep the tension and alignment of the fabric. Do not pull too tight or the fabric will tear.
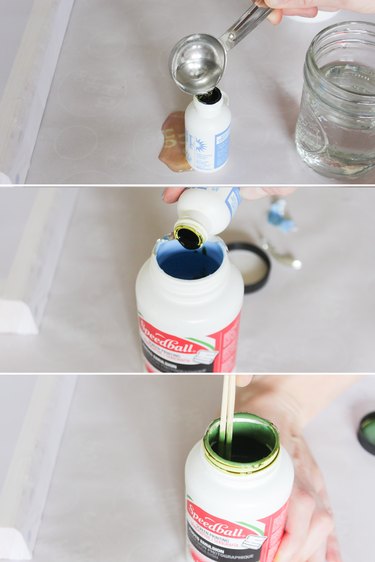
Step 3: Mix Photo Emulsion
Add 2 tablespoons of water to sensitizer and shake well. Then, add the half-full bottle of sensitizer to the entire bottle of photo emulsion. Stir until the sensitizer is combined. Place the lid back on the bottle and shake well.
Tip
When the sensitized photo emulsion is not being used, it can be stored in the refrigerator for three to four months. The cool temperature slows the degradation that naturally occurs once the two components are mixed.
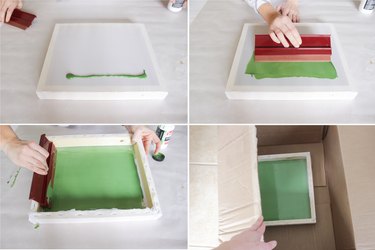
Step 4: Spread Photo Emulsion on Screen
Working on top of discardable paper or a drop cloth, pour a generous amount of photo emulsion along one side the screen. Pull the emulsion across the screen using the squeegee. Pull in both directions until one side is coated. Turn the screen over, and, while keeping it elevated with one hand, use the other hand to smooth the emulsion evenly on the other side. Scrape any excess emulsion back into the bottle. Repeat this process until there is an even amount of emulsion on both sides. Place the screen, top facing down, on a couple of wooden blocks inside a large cardboard box so there is airflow on both sides. Close the lid or place in a dark location (like a garage) and let it dry completely. Drying time can take up to 12 hours, but this can be expedited by placing a fan next to it. Make sure to wash the squeegee immediately after use.
Warning
Photo emulsion is light-sensitive and will start to change color and harden when exposed to light. Make sure to work quickly when spreading it across the screen and do not keep it in a room that has any light source while it dries.
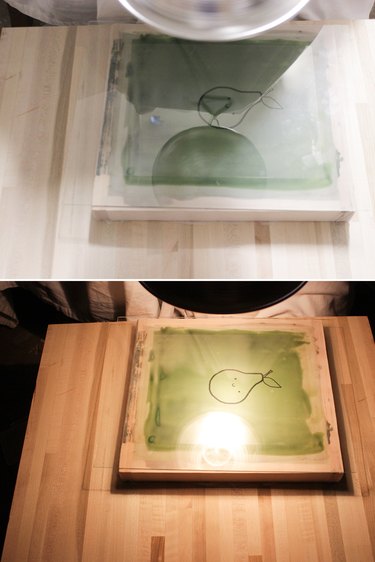
Step 5: Burn Design Into Screen
Once the photo emulsion is dry, place the screen on a surface or table where the hanging clamp light is about 15 inches above the screen. Then, put the transparency (with the design printed on it) on top of the screen. Place a piece of glass on top of the transparency. The glass is necessary because it is heavy enough to keep the transparency from curling up under the heat of the lamp. Turn the lamp on, and make sure there are no other light sources in the room. Once the lamp is turned on, set the timer for 20 minutes.
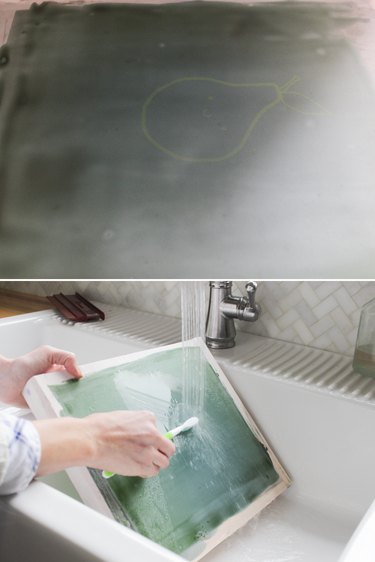
Step 6: Wash Off Photo Emulsion from Design
Once the timer is done, turn the lamp off and remove the transparency and glass. Place the screen under cold, running water. Let the water wash off the photo emulsion that didn't harden, and gently scrub the design with a toothbrush to fully remove the emulsion from the design.
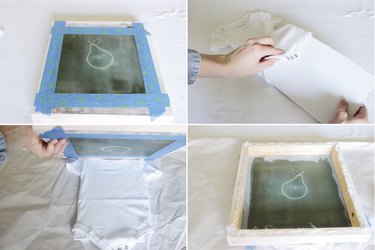
Step 7: Tape Screen and Center Bodysuit
Dry the screen off completely and tape the perimeter with painter's tape. Place the piece of foam core inside the bodysuit. Center the screen on top of the bodysuit with the underside of the screen facing up. Make sure the top of the design starts about 2 inches from the collar, and is centered on both sides of the bodysuit.
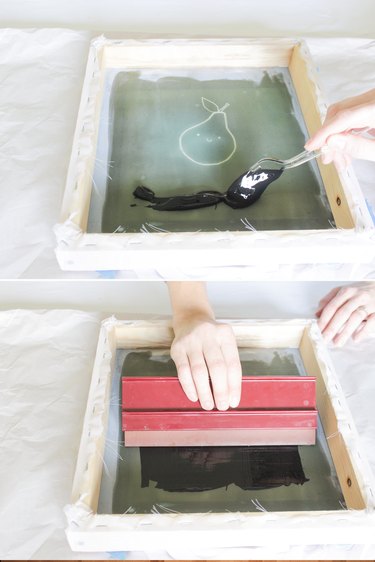
Step 8: Spread Ink On Screen
Place a generous amount of ink across one side of the screen where the design is. Using the squeegee, spread the ink evenly across the screen using very little pressure.
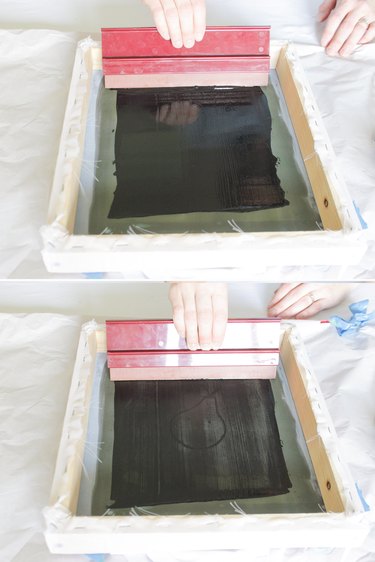
Once the ink is evenly distributed (spreading in several directions if necessary), apply more pressure with the squeegee and pull the ink across. Repeat this process of spreading the ink thick, then pulling the ink across with more pressure, three to four times in alternating directions.
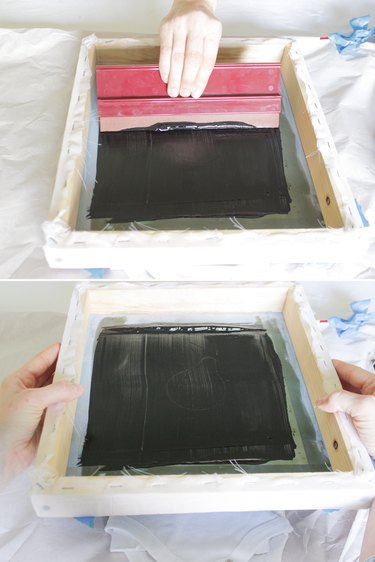
The final pass-through of the squeegee should be with light pressure. Carefully lift the screen straight up off of the bodysuit, and place it off to the side.
Step 9: Let Ink Dry and Heat-Set
Once the design has been inspected and is satisfactory, let the ink dry for two to three hours. Then, the ink will need to be heat-set. Pre-heat an oven to 350 degrees, and place the bodysuit on top of a towel or cookie sheet. Leave it inside the oven for three minutes. Another option is to place the bodysuit in a dryer for 20 minutes on high heat.


Tip
If you want to color part or all of the design: Before the ink is heat-set, simply use all-purpose craft paint that has been watered down to a 1:1 ratio. Place the same foam core board between the front and back of the bodysuit, and apply the color using a paintbrush. Let the paint dry, then finish the heat-set process as described above.