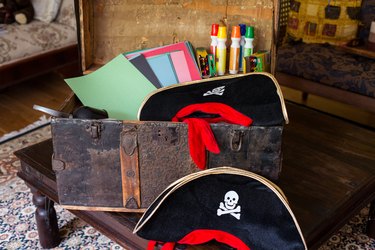
Treasure chests hold a bounty of surprises for kids. Just like pirates, kids are always on the lookout for treasure. If you're throwing a pirate-themed party, fill a treasure chest with the unexpected and let the fun begin. Instead of candy and sweet treats, fill the chest with craft supplies and games so kids can make up their own treasures and adventures.
Treasure Maps
Video of the Day
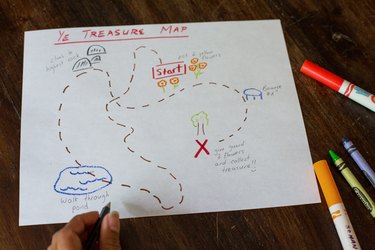
Pirates of old kept their best maps hidden in a chest. Fill the chest with maps that lead to other treasures. Draw maps of different areas of your party space. Make them as complicated as will suit the ages of your party-goers. Make several different maps so the group can split up and search for the hidden treasures. Hide the treasures throughout the house or garden and have a scavenger hunt for the treasure.
Video of the Day
Jewels

Have a craft activity with a pirate theme as part of your celebration. Fill the treasure chest with beads, gems and jewels from craft stores and flea markets. Let kids create original jewelry from old, broken jewelry pieces you salvaged from your jewelry box. Add some new ribbons, elastics and cords and have the kids string new treasures. For older kids, add jewelry-making supplies such as pin backings, hair clips and glues and let them create fashion accessories.
Party Favors
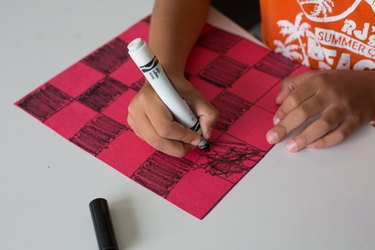
Continue the pirate theme with an assortment of pirate coloring books, puzzle books and games to help fill up the chest. Make up some simple tic-tac-toe and checker games from cardboard, checkered fabric or construction paper. Use skulls and crossbones instead of the usual "X" and "O" marks and checkers. Wrap the books and games in pirate-booty party bags found in craft and party stores and put enough in the treasure chest for each party-goer. Add eye patches and kaleidoscope spyglasses found in many dollar and party supply stores.
Pirate Necessities
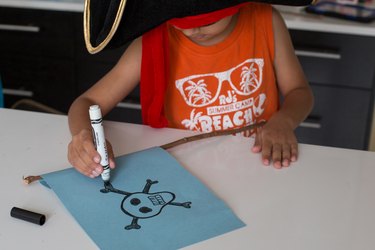
No pirate theme is complete without pirate hats and flags. Make pirate hats from construction paper and simple flags using a variety of colors of cotton fabric. Draw a skull-and-crossbones design with permanent markers and staple the flag to a dowel. Roll them up and tie them closed. Add foam pirate ship craft kits for each party-goer. These are available in craft stores and online with pieces pre-cut and ready to assemble.