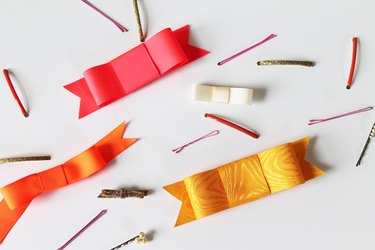
Love a vintage look? You can make retro style hair bows for yourself and your kids in minutes! Customize the color and size or use vintage ribbons and trims for an authentic look.
Things You'll Need
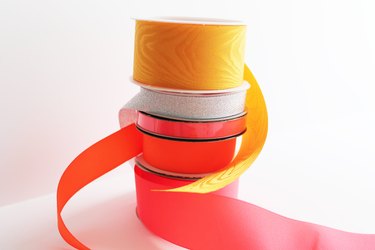
Grosgrain or velvet ribbon
Fast-dry craft glue
Clothespins
Scissors
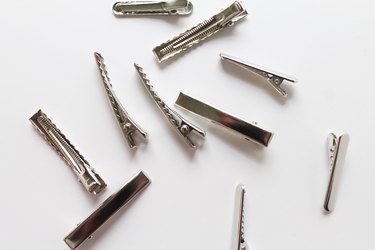
Hair clips, barrettes or hair elastics
Video of the Day
Opaque ribbons like grosgrain work best for this project. You can find a range of metal clips for bow-making in the jewelry section of most craft supply stores.
Video of the Day
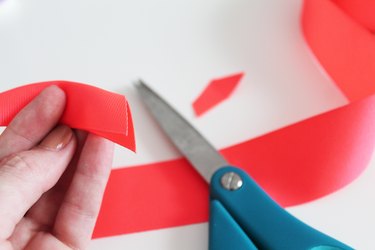
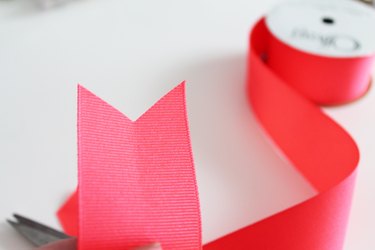
Step 1: Stylize Ends
To create classic notched ends, fold ribbon in half and cut into the end at a 45-degree angle.
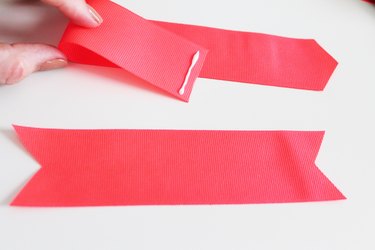
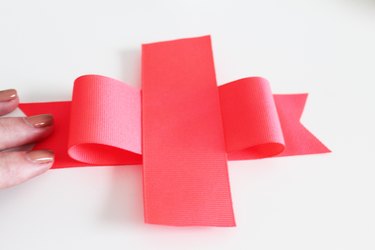
Step 2: Build Bow
Cut one base piece with stylized ends and one longer length piece to create the bow's loop. Create the loop by overlapping the ends by half an inch and secure with a strip of glue.
Center the ribbon loop on the base piece and secure with glue. Be sure to center the loops seam so it's not exposed on the finished bow.
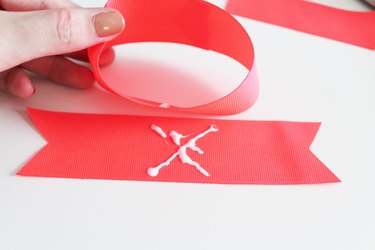
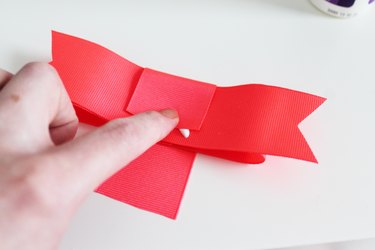
Cut a length of ribbon long enough to wrap around the bow and overlap by at least a half-inch in the back -- this will be our bow's "knot."
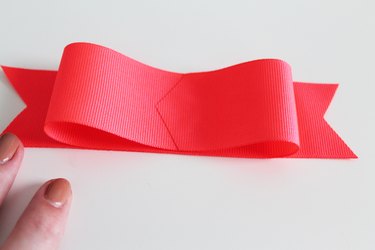
Glue one end down to the back of the bow before tightly overlapping and gluing the other. This will prevent the bow from sliding out of place.
Tip
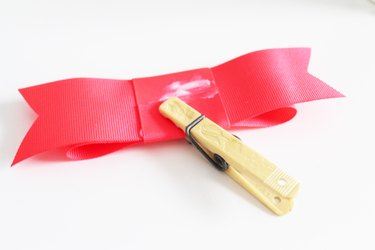
Use a clothespin to keep your bow pieces clamped together while drying,
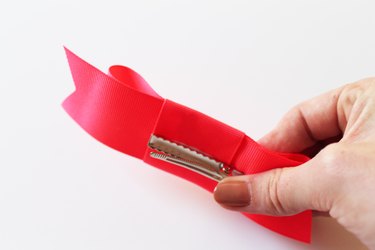
Step 3: Attach Clip or Hair Elastic
For Clips: After your bow has completely dried, attach a clip or barrette by adding a strip of glue to the back of the bow, preferably over the seam, and placing upside down to dry.
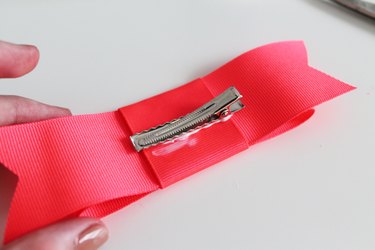
Allow glue to dry overnight before styling in hair.
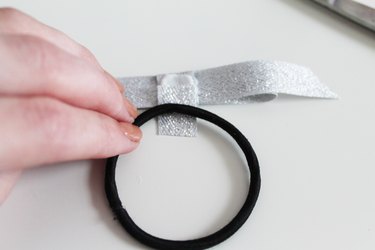
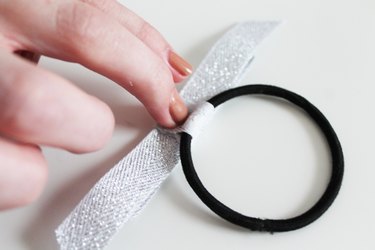
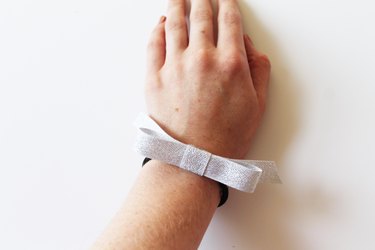
For Elastics: To attach a finished bow to a hair elastic cut a small piece of matching ribbon and glue it to the base of the bow.
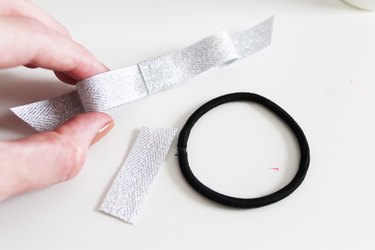
Wrap the ribbon tab around the elastic and secure the end with a dot of glue.
Polish off your perfect ponytail with a posh handmade bow -- try metallic ribbons and retro trims to accent your thrift-store-chic outfit!