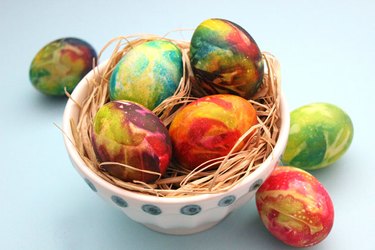
Easter egg hunts are a lot more fun when the eggs are colorfully decorated, and you can't get more vibrant than these psychedelic tie-dyed eggs. They're so easy to create, and no two ever look alike. In fact, it may be more fun to decorate these eggs than to hunt for them.
What You'll Need
Video of the Day
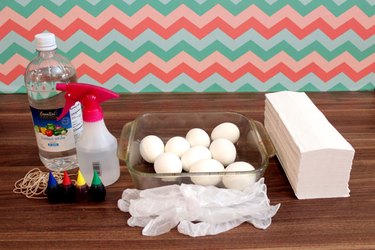
- Hard-boiled eggs
- Food coloring in assorted colors
- Vinegar
- Water
- Spray bottle
- Paper towels
- Glass baking dish
- Vinyl, rubber or latex gloves
- Rubber bands
Video of the Day
Step 1: Spray paper towel with vinegar and water.
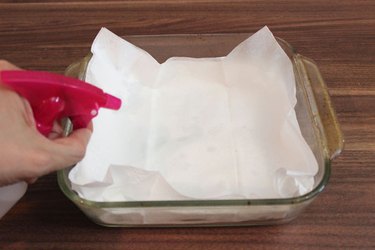
Line a glass baking dish with three paper towels. Fill a spray bottle with equal parts vinegar and water, and spray the paper towel on top with the solution. The bottom two paper towels are there to absorb the excess moisture.
Step 2: Wrap an egg in the wet paper towel.
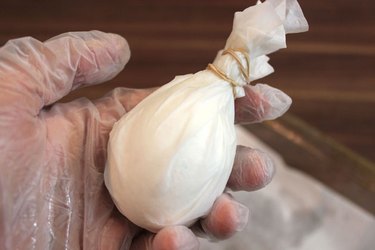
Wrap a hard-boiled egg in the wet paper towel and secure it with a rubber band at the top of the egg. Put gloves on both your hands because things are about to get messy (and fun!).
Step 3: Apply the food coloring.
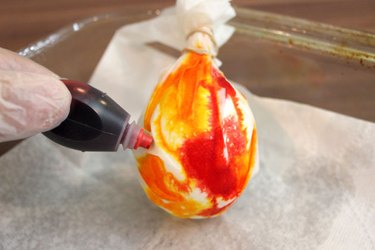
Remove the cap from a bottle of food coloring, place the tip directly on the wet paper towel and squeeze the coloring onto the egg. There are usually folds in the paper towel as it wraps around the egg, so be sure to get underneath the folds with the food coloring. Choose two to three different colors and alternate colors around the egg.
Step 4: Spray the egg with more vinegar and water.
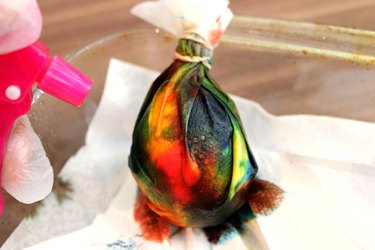
Once you've covered the towel-wrapped egg with two to three colors, spray it with more of the vinegar and water solution so the colors blend into each other. Do not soak the towel. Just spray enough so the colors run a little. Use the extra paper towels to absorb excess moisture. Then, place the egg in your hand and gently squeeze it to make sure that every part of egg comes in contact with the wet paper towel.
Step 5: Let the eggs sit for an hour.
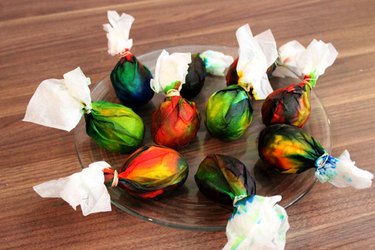
Allow the eggs to rest in their paper towels for about an hour so the colors can set. Be patient. The longer you leave the eggs in the towels, the more intense the colors will be. Don't worry if the colors on the paper towels look muddy – the colors will be vivid and distinct on the egg shells.
Step 6: Remove the paper towels.
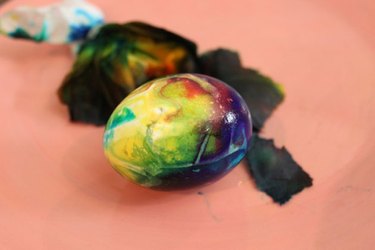
Tear off the wet paper towel, and your tie-dyed egg is revealed! You will see how the colors blended and how the folds and texture of the paper towel created a batik pattern on the egg. If there are spots on the egg that remained white, just rub some of the wet paper towel on it to fill in with color.