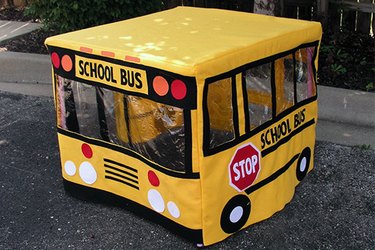
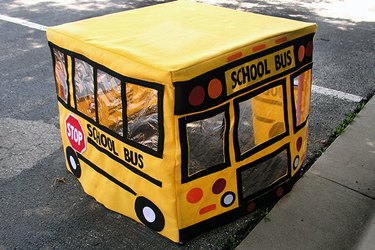
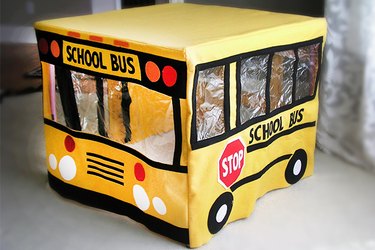
Everything you need to create a school bus playhouse is easily available, including felt, a few sewing supplies and a card table. If you have basic sewing skills, in just a few hours you can delight the kids in your life with this project.
Things You'll Need
Card table
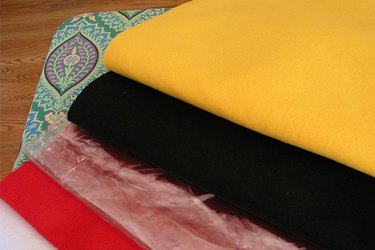
3 yards golden yellow felt
Scissors
Tape measure
Clear tape
1 yard black felt
4 yards fusible web
8-by-10-inch squares of red felt, 2
8-by-10-inch squares of white felt, 2
8-by-10-inch square of orange felt, 1
1/2 yard of 8- or 12-gauge clear vinyl
Parchment paper
1/16-inch drill bit
Power drill
5/8-inch eye screws, 2
1/4-inch dowel
1/4-inch dowel finials, 2
Small plastic rings
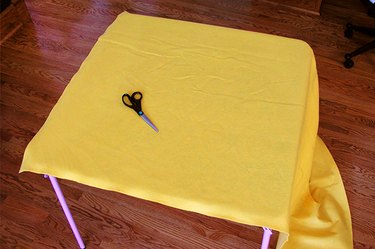
Step 1: Cut the Top
Set up the card table. Spread the golden yellow felt over the card table. Cut the felt to fit 1/2 inch larger than the tabletop on all sides. Most tables will be about 34 inches square.
Video of the Day
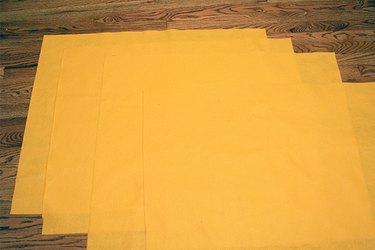
Step 2: Cut the Panels
Cut four panels from the golden yellow felt to be the same width as the piece for the tabletop and the length from the top to the floor. Most tables will use a 34-by-28-inch panel.
Step 3: Prepare the Letters
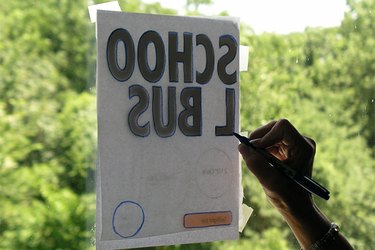
Tape the right side of the printed template to a sunny window. Tape a piece of fusible web with the smooth side up, over the template and trace the letters, which will be in reverse. You will need four sets of "school bus," plus the stop sign and the letters for "stop." To download the free template, click here.
Step 4: Trace the Lights
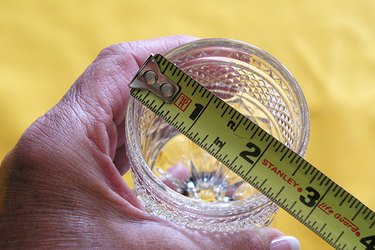
Use the printed template or an object 2 1/2 inches in diameter as a pattern for the lights. Draw the shape onto fusible web. You will need 22 2 1/2-inch circles, two 3 1/2-inch circles, two 1 3/4-inch circles, three 6 1/4-inch circles, six rectangle tail light bars and two of the larger tail lights. Patterns for all of these pieces are included in the template.
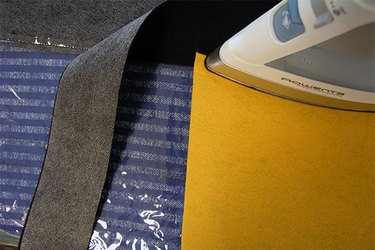
Step 5: Press the Fusible Web Onto the Felt
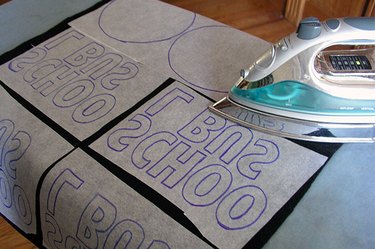
Place the rough side of the fusible web onto the felt of the appropriate color and press for five to eight seconds with a hot, dry iron. Press all pieces of the same color at the same time.
From black you will need:
- 6 1/2-inch circles, 3
- 2 1/2-inch circles, 2
- the "school bus" letters.
From red you will need:
- 2 1/2-inch circles, 8
- the inner stop sign shape.
From orange you will need:
- 2 1/2-inch circles, 6
- tail light bars, 6
- tail lights, 2.
From white you will need:
- 2 1/2-inch circles, 6
- 3 1/2-inch circles, 2
- 1 3/4-inch circles , 2
- the outer shape for the stop sign
- the letters for "stop."
Trim out all the pieces.
Step 6: Cut Out the Additional Pieces
Press fusible web onto the felt and cut from black:
- 5-by-34-inch pieces, 2
- 2 1/2-by-34-inch pieces, 2
- 1-by-34-inch pieces, 12
- 2 1/2-by-22-inch pieces, 4
- 1 1/2-by-22-inch pieces, 2
- 4-by-15-inch pieces, 2.
From golden yellow felt, with fusible web backing, cut:
- 3 1/2-by-16 1/2-inch pieces, 2.
From clear vinyl, without backing, cut:
- 10-by-30-inch piece, 1
- 7-by-9-inch pieces, 2
- 7-by-10-inch pieces, 5
- 11-by-9 inch piece, 1
- 11-by-5 1/2 inch piece, 1
- 5 1/2-by-10-inch piece, 1
- 6-by-22-inch piece, 2.
Step 7: Assemble the Banner
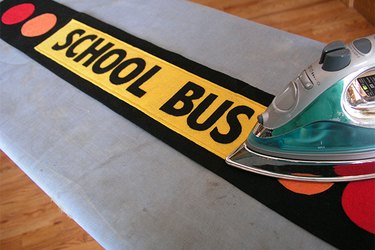
On one of the 3 1/2-inch pieces of golden yellow felt, remove the paper backing and place the letters for "school bus" in place and press with a hot, dry iron. Stitch around the letters if desired. Place this section in the center of one of the black 5-by-34-inch pieces and press in place. Add one 2 1/2-inch orange circle and one 2 1/2-inch red circle on each side.
Tip
It helps to place a sheet of parchment paper over the letters to prevent slipping when you press them in place.
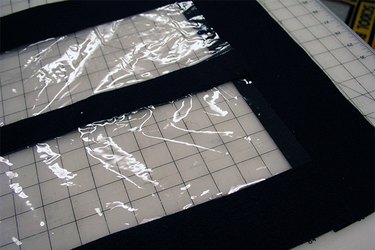
Step 8: Install the Front Window
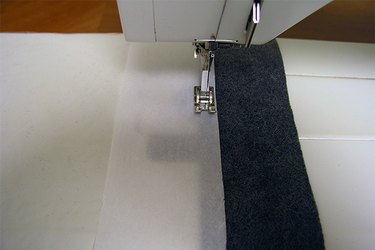
Position the 10-by-30-inch piece of clear vinyl 7 inches from the top edge and in the center of one of the panel pieces. Cover the stitching path with parchment paper or the paper backing removed from the banner piece. Stitch 1/4 inch from the edge all the way around. Remove the paper.
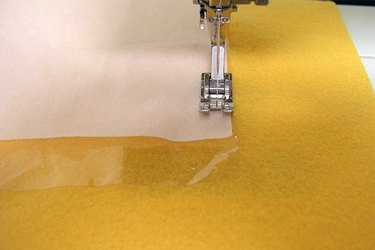
Turn the piece over and cut out the felt about 1/2 inch from the stitching. Fold the seam toward the front and stitch down to re-enforce the window edges. This is now the front.
Tip
Pull slightly as you stitch, because the vinyl has a tendency to stick to the throat of the sewing machine.
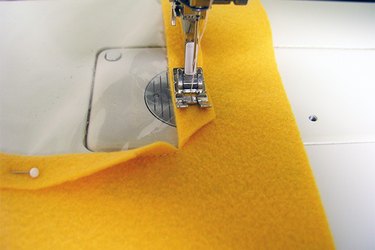
Use previously cut strips of 1-by-34-inch black felt to stitch down the sides of the window, covering the seam. Cut as needed to fit the window.
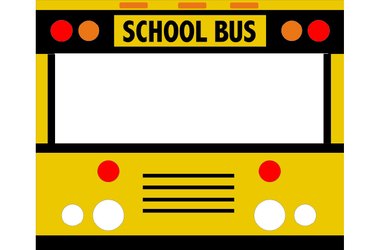
Step 9: Complete the Front of the Bus
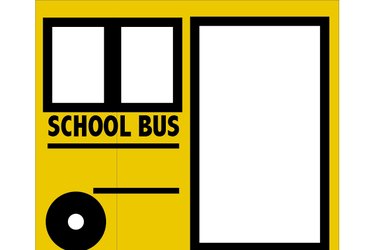
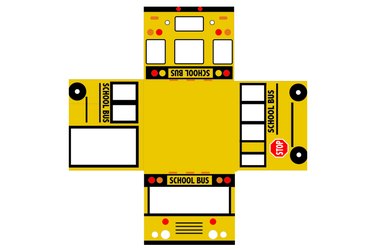
Place the previously assembled banner above the window and press into place. Stitch down if desired. Complete the front panel using the illustration below as a guide for placement of the pieces, pressing and stitching as you go.
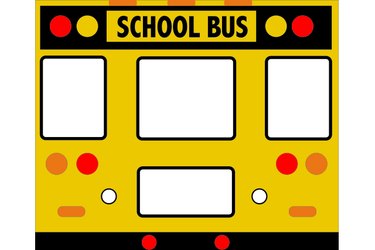
Step 10: Assemble the Back of the Bus
Using the illustration below as a guide, install the windows first using the procedure from Step 8. Complete the back of the bus by placing, pressing and sewing each piece in place.
Step 11: Assemble the Right Side of the Bus
When you are installing the windows, you are starting on the back side of the fabric, and the sides of the bus are directional, so you will need to reverse the pattern when placing the windows, because the back becomes the front.
Complete the right side panel using the illustration below as a guide.

Step 12: Assemble the Left Side of the Bus
Complete the left side panel using the illustration below as a guide. Again, start with the windows and reverse the pattern, like you did on the right side. Do not sew clear vinyl in the doorway. The door is a separate piece.
Step 13: Assemble the Door
Remove the paper backing from one of the 2 1/2-by-22-inch pieces of black felt and place it over the edge of a 6-by-22-inch piece of clear vinyl. Overlap the vinyl onto the black felt by about 1/4 inch and stitch in place.
Sandwich the vinyl by aligning a second 2 1/2 inch by 22-inch piece of black felt with the back edge of this assembly. Place a scrap of felt over the showing vinyl to protect it from heat and press to fuse the pieces together. Topstitch close to the vinyl.
Repeat this process for the center using the 1 1/2-by-22-inch pieces and then the right side of the door again with the 2 1/2-by 22-inch pieces. Attach the 4-by-15-inch pieces across the top with the same method.
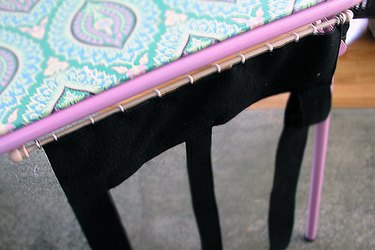
Sew plastic rings across the top about every 2 to 3 inches. Use a scrap of black felt to make a handle and attach it to the right side.
Step 14: Install the Door
Drill a small pilot hole in the frame of the card table about 1 inch from the corner. Drill another pilot hole about 15 inches away.
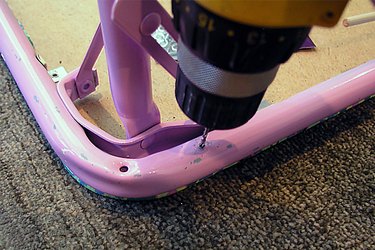
Install 5/8-inch eye screws in both locations. Cut a piece of 1/4-inch dowel 16 inches long. Thread the dowel rod through the plastic rings on the top of the door assembly and then suspend it between the two eye screws. Hold the dowel rod in place by putting a finial on each end. The door rings slide along the dowel and allow it to open.
Step 15: Complete the School Bus Playhouse
Lay the pieces out according to the diagram and stitch each panel to the tabletop piece with right sides together and using a 1/4-inch seam.
With right sides together, stitch the four corner seams with a 1/4-inch allowance. Place over the card table and watch what happens!

Video of the Day