Things You'll Need
Bowl
All-purpose flour
Salt
Wallpaper paste (optional)
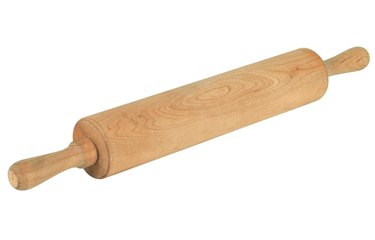
Rolling pin
Cookie cutters or knife (optional)
String or ribbon (optional)
Cornstarch (optional)
You do not need elaborate ingredients or a kiln to create decorative objects using modeling dough. Everyday ingredients like ordinary white flour, salt and water combine to create modeling dough that you can use to make anything you can imagine. The salt-flour dough works well for making decorations, jewelry and things to hang from mobiles or tree ornaments. The dough is nontoxic and inexpensive, easy to mix and perfect for entertaining children or creating something for yourself.
Basic Dough
Step 1
Put a cup of regular flour and a cup of salt into a bowl, and stir. If you want to make a firm dough that is sturdy enough for larger objects, add 2 tablespoons of wallpaper paste to the mixture.
Video of the Day
Step 2
Add 1/2 cup of cold to room temperature water, and stir thoroughly to remove any lumps.
Step 3
Place the dough on a lightly floured counter, and knead it for five to 10 minutes. Kneading involves forming the dough into a ball and folding sections of it over itself. This process strengthens the proteins in flour, which makes the dough elastic and smooth. You may need to add more water if the dough is too stiff or more flour if it is too sticky while you knead it. Place the dough back into the bowl, and cover it with plastic wrap. Let it rest for 30 minutes before using.
Step 4
Roll the dough out on a lightly floured surface if you want to cut things with cookie cutters or freehand with a knife. If you plan to make decorations from the dough, use a nail to pierce the top of the object. Once it's dry, you can thread a string or ribbon through it. If you want to make shaped objects, use your hands to make any kind of object you like.
Step 5
Dry the objects you make from the dough in a low oven for several hours, or place them on a cookie sheet, and air-dry them. When using an oven for drying, you do not need to preheat, but turn the oven on to a temperature at its lowest setting. The oven needs to be on low heat, so that the flour in the dough does not brown. Drying the dough at high temperatures can also cause cracking.
Detailed Work
Step 1
Combine 2 cups of flour, 7/8 cup of cornstarch and 1 cup of salt in a bowl. Stir with a fork.
Step 2
Add 1/2 cup of water, and mix together. Knead the dough for a few minutes.
Step 3
Put the dough back in the bowl, and cover it with plastic wrap. Let it rest for 30 minutes before you begin to use it. This dough is good for making small, delicate items or for using as tiny detail pieces for the objects you make, like a nose for a snowman or small beads to make jewelry.
Step 4
Dry the dough by following the steps in Section 1, Step 5.
Tip
Divide the dough into smaller pieces, and use food coloring to make your own colors. Colorful spices like paprika, cinnamon, turmeric can also change the hue of the basic dough.
Warning
Oven drying even at low temperatures may cause some colored pieces to discolor. If you want the colors to stay true, do not use heat.
Video of the Day