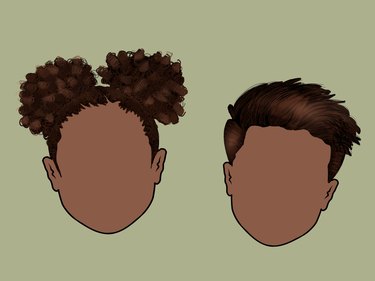
Whether you're designing characters for stories, doodling classic anime characters or creating portraits of loved ones, hair makes an illustration unique. Hairstyles can demonstrate attitude, personality or even how well rested a person is—bedhead, anyone? As artists, we draw hairstyle inspiration from both real-life and fictional folks. From Andy Warhol's signature locks to Princess Leia with her braid buns, some of the most iconic individuals—real or make-believe—have hair that shapes their legacy.
If the thought of drawing hair overwhelms you, you're not alone. But fear not: Our step-by-step tutorial proves that illustrating hair can be a fun and creative process. Because hair can have so many lengths, textures and styles, this straightforward drawing tutorial won't cover everything—but it will help you get started.
Video of the Day
Video of the Day
Ready to learn how to draw hair digitally? Read on for easy-to-follow straight hair and curly hair illustration tutorials. We're using the app Procreate for the purposes of demonstration, but this technique can be modified and used with other mediums (and even simple paper and ink drawings)—for endless hairstyles!
Things You'll Need
Drawing tablet
Digital drawing app
Stylus or drawing pen
Paper
HB pencil
Eraser
Blending stump
How to Digitally Draw Hair:
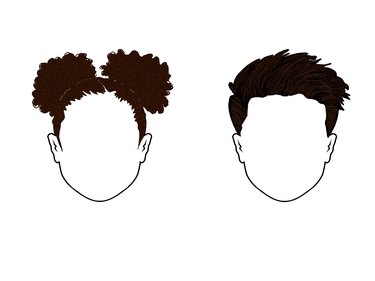
1. Outline character's head

We've included a template (exclusive to ehow) with two heads outlined, but feel free to modify to fit your desired hairstyle. The top of the head might seem huge without hair, but don't worry—we'll fill in the gaps in Step 2.
Tip
Based on age, gender and size of your character, head shape will vary.
2. Determine hairline
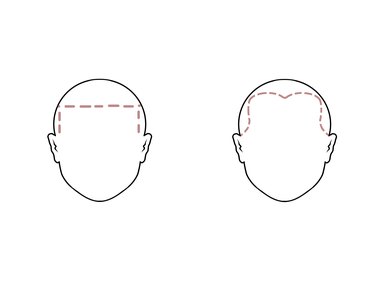
Your hairstyle might call for a round or rectangular shape hairline. Typically, a hairline begins about 5 to 6 centimeters above the eyebrows for women. For men, hairlines are slightly higher, beginning 6 to 8 centimeters above the brows. Though these measurements apply to more realistic hair, use the hairline that suits your character and story.
We'll use this template as a reference point. If creating digitally, you can place it atop another layer. With more traditional mediums, sketch template lightly or use an eraser to lighten the hairline so it serves as a reference point. Consider that a hairline might be asymmetrical for more realistic hairstyles, portrait drawings or hair types.
Tip
Consider a widow's peak or receding hairline when drawing hair if it helps tell your character's story.
3. Sketch in sections of hairstyle
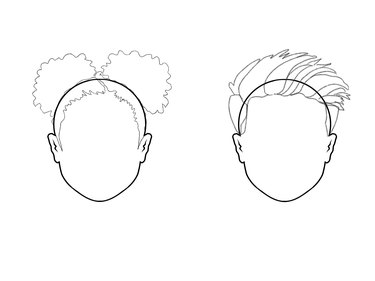
Distinguish hair sections using basic shapes as outlines. Each section will contribute to a sense of volume and structure. If it's long, divide hair into front, top of the head, sides and back sections. We're considering the hairstyle as an overall shape versus focusing on individual strands of hair. Step back and examine the overall shape. Consider the flow of hair for long hair or wavy hair, and notice how short hair is shaped around ears.
4. Fill in sketched outline
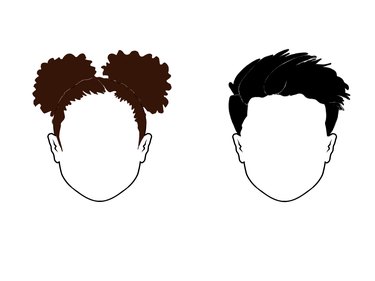
Next, fill in outline to see hairstyle's shape. If including multiple colors in your drawn hairstyle, use the darkest shade for this step.
5. Add individual strands, waves or coils
With a lighter or less saturated color, add individual strands, waves or coils, varying thickness and weight to create depth and dimension. Some areas might have thick or dense hair, while others might be more transparent or wispy. Consider how gravity, movement and texture affect hair movement.
Tip
For those with short hair or fade haircuts, some areas should remain more transparent than others to highlight overall haircut shape.
6. Add more strands
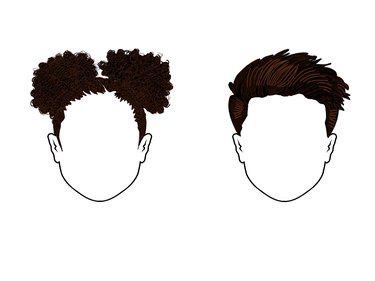
Adjust color or weight of the line and continue adding strands and coils. Lighter or less saturated color will help add depth to your style.
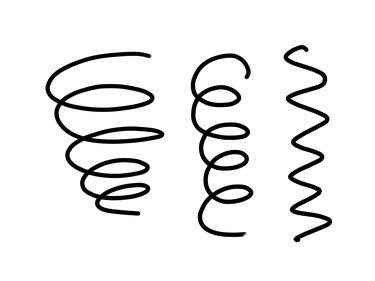
Tip
For curly styles, varying coil type will will help create more depth and mirror the real-life appearance of curly hair. Curls have been known to defy gravity! See illustration below for three ways to block in curls.
7. Blend straight styles

For the straight hairstyle template, use digital tools or blending stump to blend hard edges of lines. For the curly style, you'll need more definition, so blending will come later.
8. Repeat Steps 6 and 7
Add more coils and strands to curly ponytails, then blend out hard edges of lines on the straight style. Repeat these steps until desired shape and flow is achieved.
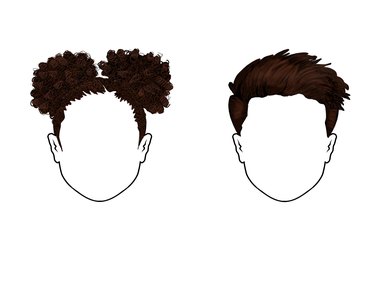
9. Refine design
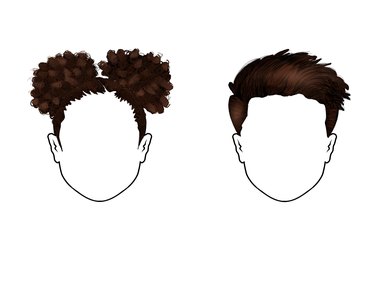
Refine your design by adding color and highlights while removing any shapes or strands that don't align with your vision. Blending some curls will give ponytails a more natural appearance. Pay attention to hair's overall shape, balance and flow. Add loose wisps, curly hair or stray hair.
Tip
Don't be afraid to use yourself as a reference! Look in the mirror and see what inspiration you can draw from your own hair.
We hope this tutorial has provided a solid baseline for how to draw hair—and inspired you to keep practicing! Try your hand at new hairstyles on characters with different hair textures, hair colors, hair types and hair lengths. Eventually, consider how each character's clothing and accessories, combined with their hairstyle, tell their unique story. Above all, have fun and don't be afraid to use your eraser and start this tutorial again.