Do you believe in fairies? In the story of Peter Pan, we learned that if we believe in fairies, we should wave our handkerchiefs and clap our hands. I've always been skeptical of that technique. A much better way to welcome fairies is by creating a fairy door for them.
Fairy doors are little doors that you can place outdoors or indoors, acting as a gateway to an imaginary world. Place it on the trunk of a tree in your backyard, and the tree becomes a fairy house. Or make a fairy door for the inside of one of the rooms of your house, placing it along one of your baseboards. While you can purchase a DIY fairy door kit on Amazon, it's just as easy to make your own fairy door, and this step-by-step fairy door tutorial will teach you how to make a fairy door for both indoors and outdoors. With this tutorial, you'll be opening the door to magical possibilities.
Video of the Day
Video of the Day
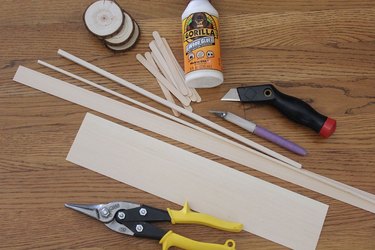
Things You'll Need
1/16 x 3 x 24-inch sheet of bass wood
Hobby knife
1/16 x 1/2 x 24-inch strip of bass wood
Acrylic paint
Cardstock
Craft glue
Utility knife
Rhinestone brad
Jump ring
Wire cutters or metal snips
Drill
Upholstery tack
Wrapped floral wire
String, ribbon or yarn
1/16 x 1 x 24-inch strip of bass wood
5/32 x 5/32 x 24-inch strip of bass wood
Wood glue or hot glue gun
Paintbrush
1/4 x 1/4 x 24-inch strip of bass wood
Sandpaper
Felt
Double-sided mounting tape
Craft sticks
Polymer clay
Toothpick or skewer
Natural wood slices, 2-inch diameter
Moss
Hammer
Nail
Making a magical fairy door for the indoors
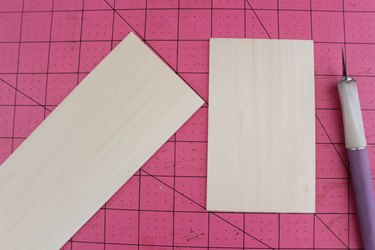
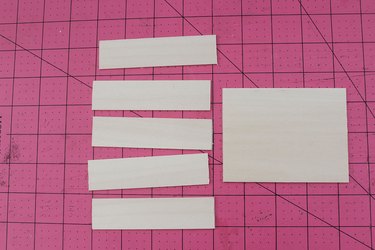
1. Cut out the door shape
Bass wood is a soft wood that is very easy to use for crafts. You can find bass wood at arts and craft stores as well as hobby stores that cater to model makers. Using a 1/16 x 3 x 24-inch sheet of bass wood, cut the piece to 3 x 5 inches. As the piece of wood is already 3 inches wide, you'll just have to mark off a length that is 5 inches long. The wood is thin enough that you can cut the wood with a hobby knife and a straightedge.
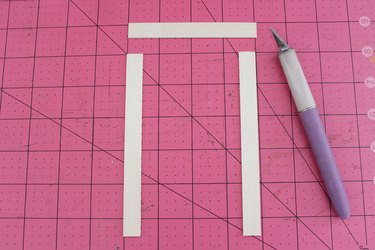
2. Cut out the door frame
Interior doors usually have a door frame, and so will this fairy door. Using the 1/16 x 24 strip of wood that is 1/2 inch wide, cut three lengths: two that are 5 inches long and one that is 3 inches long.
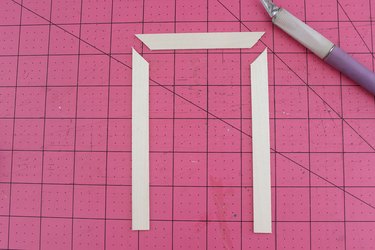
3. Miter the corners
Cut 45-degree angles at the corners of the three frame pieces so the corners will be mitered.
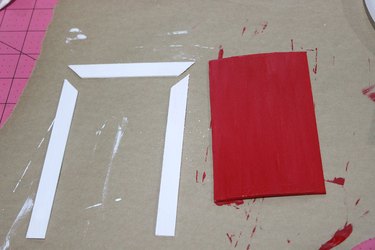
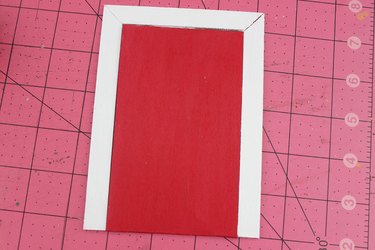
4. Paint the door and frame
With acrylic paint, paint the door and frame the colors of your choice.
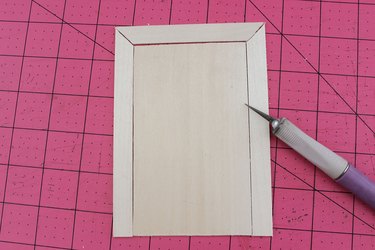
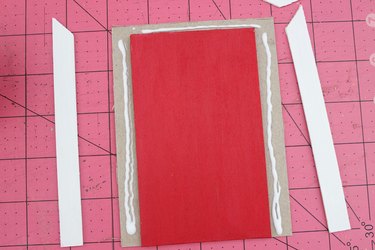
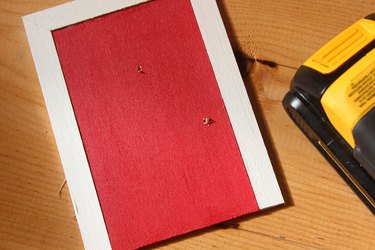
5. Assemble the door and now you're making magic!
Cut a piece of card stock that is just smaller than the door and frame, in this case 4 inches by 5 inches. Glue the wood pieces together on top of the cardstock. To prevent the wood from warping, place it under a stack of heavy books as the glue dries.
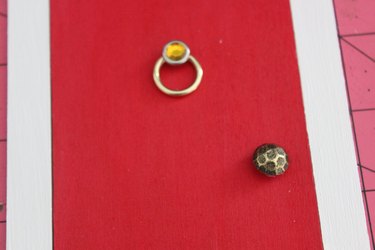
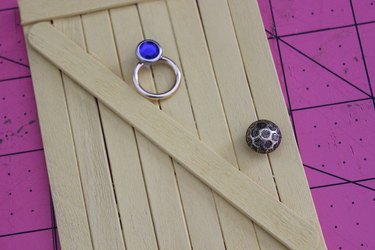
6. Add a door knocker and doorknob
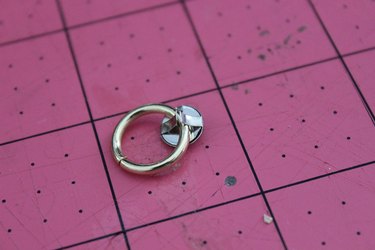
To make the door knocker, we'll use a rhinestone brad and a jump ring. With wire cutters or metal snips, shorten the pins on the brad by a half since we don't need them that long.
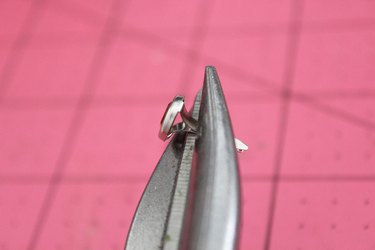
Then, wrap the pins around a brass jump ring.
Drill small holes in the door where you want your door knocker and doorknob.
Place a drop of craft glue into the holes. Push the pins of the door knocker into the hole. Then, push an upholstery tack into the hole for the doorknob. When the glue hardens, the door knocker and doorknob will be secured in place.
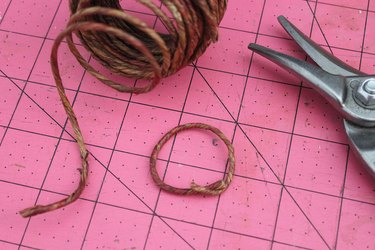
7. Make a wreath for the door
A wreath adds a cheery accent to the door. Cut off a piece of twine-wrapped floral wire that is about 3 inches and make a loop out of it.
Tie a bow to one end with string, ribbon or yarn.
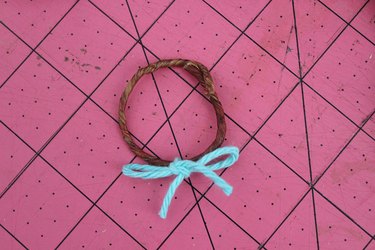
Glue it to the door with craft glue.

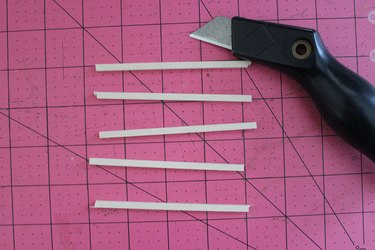
8. Now, We Need Some Stairs
Rather than being positioned right on the floor, the DIY fairy door will be elevated, placed above the baseboard. Therefore, we'll need to build some front steps for the door. Technically, fairies can fly and don't need stairs, but the front steps add a lot to the curb appeal of the fairy's home. With the 1/16 x 24-inch strip of bass wood that is 1 inch wide, cut five pieces that are 4 inches long. The stairs will also need a top landing. For this, use the 3-inch-wide piece of bass wood to cut a piece that is 3 x 4 inches.
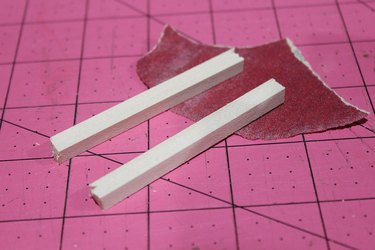
9. Cut out the connectors for the stairs
To connect the stairs and give them support, cut the 5/32 x 5/32-inch strips of bass wood (they are like square dowels) into lengths of just under 4 inches. Because these pieces of wood are thicker, use a utility knife to cut them. By making them under 4 inches, they will be hidden from view under the steps. I know things are sounding technical now, but don't worry—I'm not an engineer, just a humble crafter. I'm going to make it easy for you.
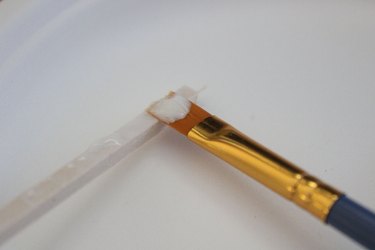
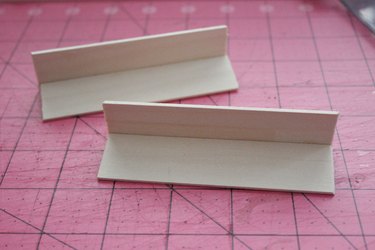
10. Assemble the stairs
Apply some wood glue to two adjacent sides of the connectors. You can also use a hot glue gun, but I like that the wood glue doesn't set immediately, so you have time to work. Also, I recommend applying the wood glue with a brush so it goes on more evenly.
Connect two perpendicular stair pieces by placing a connector behind them as shown in the photograph. You now have a stair piece with both the tread and the riser. In stair speak, the tread is the horizontal piece you step on, and the riser is the vertical piece perpendicular to it.
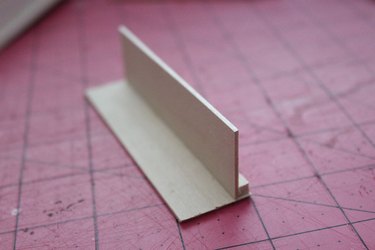
Do this twice to create two steps.
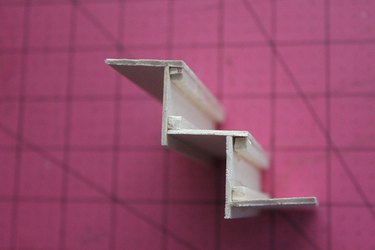
Connect the two steps by gluing another connector between them. Add an additional riser with another connector. Use the photo as a guide for how it should look so far. In the photo, the right side where all the connectors are will actually be the underside of the steps, so it is pictured upside down.
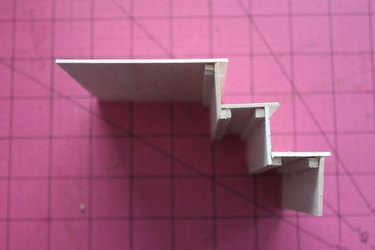
11. Add the upper landing
Flip over the steps so that the underside of the steps is on the left. Connect the landing piece to the top riser by gluing a connector to them, as shown. You need to have a roomy landing on the top of the steps. Otherwise, the fairy might open the door and trip down the stairs.
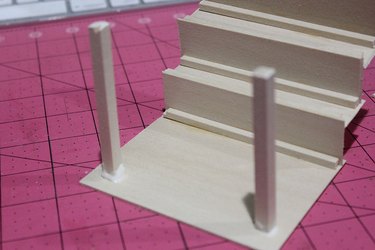
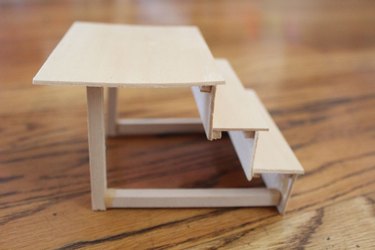
12. Add the support beams
Vertical and horizontal support beams will help give structure to the stairs and help them stand on their own. Measure the height of the landing.
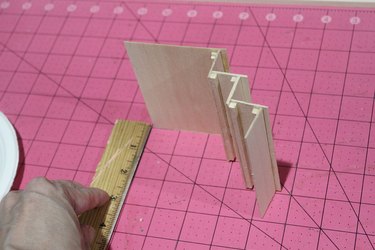
Cut two pieces of wood from the 1/4 x 1/4-inch bass wood strips that are the height of the landing. These will be the vertical legs of the stairs. Use sandpaper to smooth the edges.
Attach them to the bottom of the landing with wood glue. Don't place them at the very edge. They need to be positioned within the landing to give clearance to the baseboard.
Horizontal support beams keep the stairs more solid for visits from neighboring elves, gnomes and hobbits who may have had a little bit too much for lunch. Measure the distance from the vertical supports to the first riser, cut strips of wood to that size and glue them in place. The stairs are now nice and sturdy.
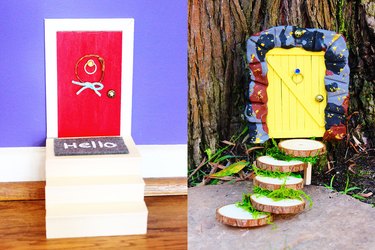
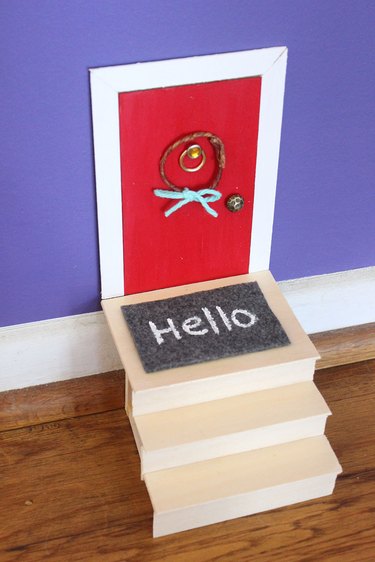
13. Bring out the welcome mat
Cut out a piece of felt that is smaller than the landing.

With acrylic paint and a thin paintbrush, write the word "Hello" on the felt. Take it from me—"Hello" is a lot easier to paint than "Welcome." "Hi" is even easier.

14. Let's install the fairy door
Choose a place in the house for your fairy door. Position the stairs against the wall so the landing sits just above the baseboard. Then, adhere the door to the wall with double-sided mounting tape. This fairy door turns any room into a fairy tale land.
The whole family will wait around the door for fairies to come out.

Making a garden fairy door for the outdoors
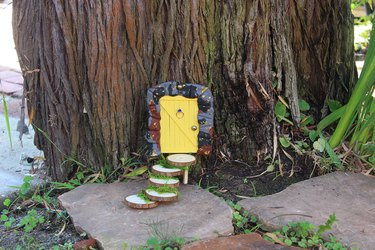
One of the most delightful garden ideas is to make a wooden fairy door to place on the trunk of a tree. It turns your yard into a magical fairy garden. Since this is a fairy door for the outdoors, it will look more rustic than the one for the interior.
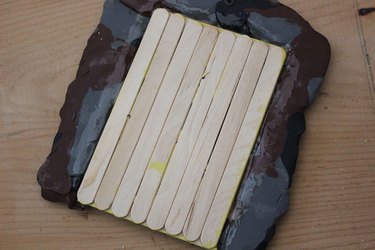
1. Construct the door
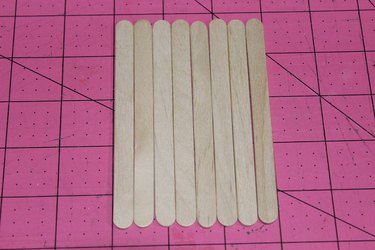
Line up several craft sticks, also known as Popsicle sticks, so that the door is about 3 inches wide. You can buy craft sticks in the craft store or go ahead and eat a bunch of Popsicles to get the sticks—the things we do for art!
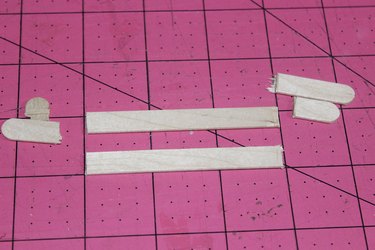
Using a utility knife, cut the ends off two Popsicle sticks so that they are 3 inches in length. These will be the top and bottom crossbars of the door.
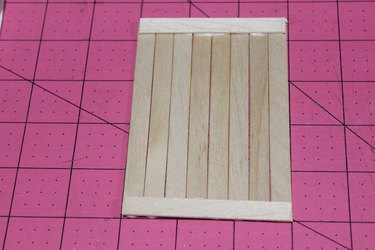
With wood glue, adhere the crossbars to the top and bottom of the row of Popsicle sticks. You can also use a hot glue gun, but wood glue is formulated to withstand the outdoor elements.
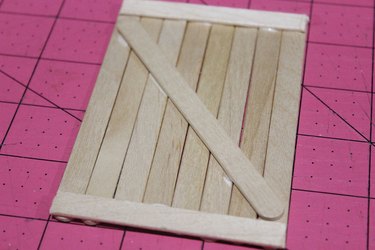
Glue an additional Popsicle stick diagonally across the door. While these crossbars are here to connect the vertical Popsicle sticks of the door, they also add nice design details.
2. Make the stone archway
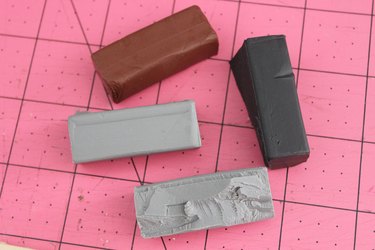
You can just leave the fairy door alone, but fairies have good taste and want the finest in home details. Therefore, this door needs a faux stone archway. To create an archway around the door, we'll use polymer clay, which is super easy to use. Choose about three colors of polymer clay for your stone. I chose gray, black and brown, with gray being the main color.
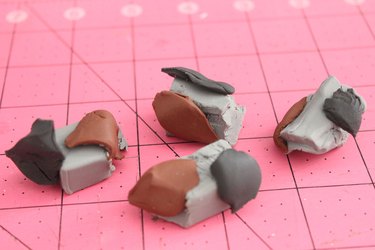
Tear off small pieces of the black and brown clay and combine them with the gray clay.
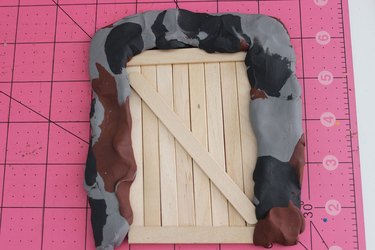
Flatten the clay with the palms of your hand and wrap the pieces around the door to create an archway.
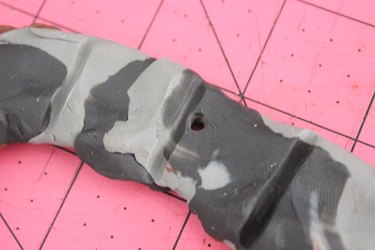
Using a toothpick or skewer, score the clay at random points to denote separate chunks of stone. Is this how the pyramids were built? Probably.
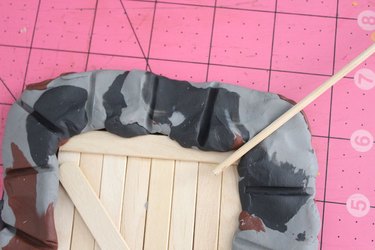
Poke a hole in the center at the top for hanging the door on a tree.
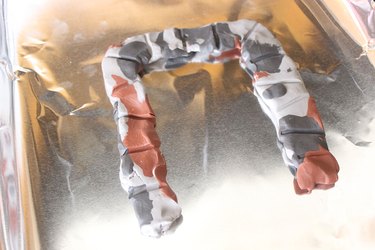
Remove the clay archway from the wooden door. Bake the clay in an oven following the directions on the package. In this case, it was baked in an oven at 275 degrees Fahrenheit for 15 minutes.
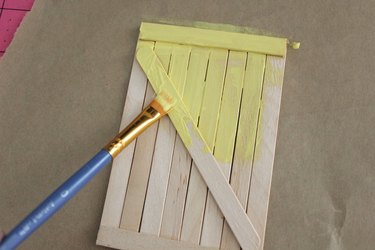
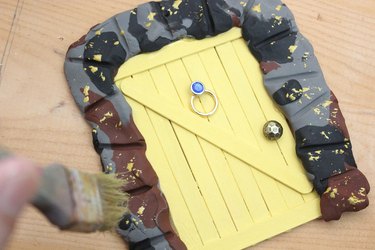
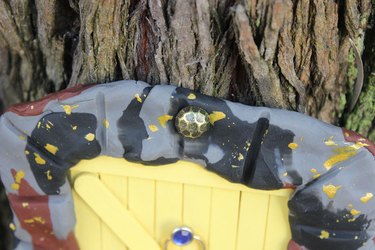
3. Decorate the door
Paint the door with acrylic paint in the color of your choice.
Drill holes in the door where you will be placing the door knocker and doorknob.
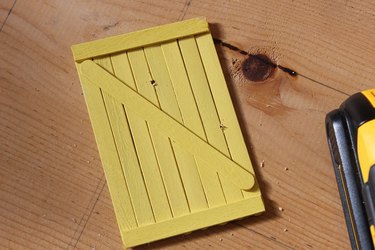
Create a door knocker like the one for the interior fairy door. Glue the door knocker and furniture tack (for the doorknob) to the door.
Flip the door upside down and glue it to the back of the archway, spreading glue along the edges where the two elements meet.
I decided the stone needed more flecks. Dapple some gold paint on the faux stone archway to give it more texture.
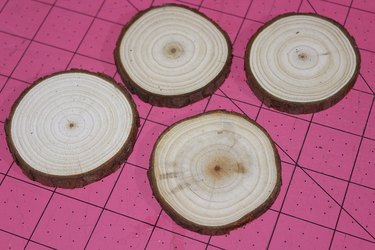
4. Create the magical steps
Fairies can fly, but steps going up to the doorway are a nice convenience for those without wings. For steps for your fairy garden door, a more rustic look is needed, which is why we're using wood slices. They are slices of a whole tree branch, with bark surrounding the entire circumference of the wood.
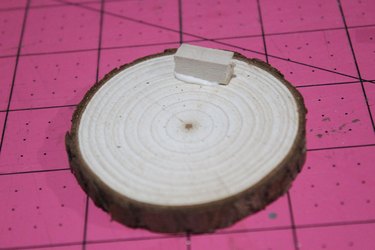
To create gaps between the wood slice steps, cut half-inch pieces of the 1/4 x 1/4-inch bass wood strips. These will act like risers.
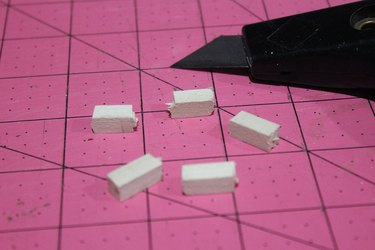
Glue these wood risers to the edge of each wood slice. OK, let's talk glue here. I used wood glue because it withstands the elements. But the glue takes time to set, and when making this staircase, it can be difficult because the stairs may want to fall apart because the glue is still wet. Working with a hot glue gun is much easier here, so if I were to do it again, I'd use the hot glue. It sets almost instantaneously.
Then, glue the wood slices to each other, applying the glue to the risers connecting them. Vary the angles of the wood as you glue to create a winding staircase. As you glue the wood slices to each other, crumble a paper towel to place under the wood to support it as the glue dries. (That won't be necessary if you're using hot glue.) Add as many wood slices as you wish depending on how high you want the steps to go. On the top step, you will not need to add a riser.
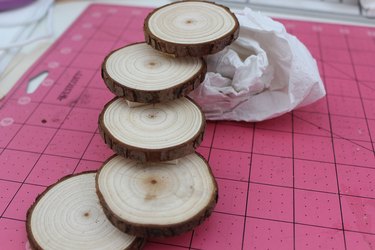
Measure the height of the top step, cut a piece of the 1/4 x 1/4-inch wood strip to that length and glue it to the top step. This piece will support the staircase.

Tuck pieces of moss into the gaps between the steps.

5. Moving-in day for the fairy
Choose the perfect tree trunk for your fairy door and install it by hammering an upholstery tack or nail through the hole in the faux stone archway.
Then, place the steps right underneath the door. This whimsical garden decor will be the delight of your outdoor space. All that magic is bound to help your plants grow better as well.