eHow may earn compensation through affiliate links in this article.
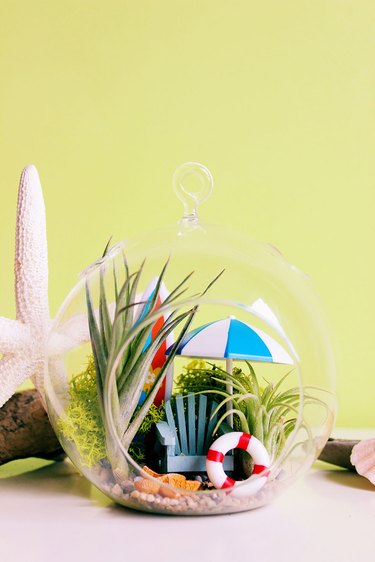
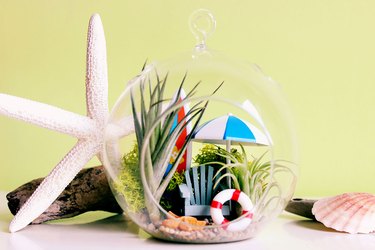
For many people, the ultimate idea of paradise is lounging on a chair on a private beach, surrounded by palm trees as gentle waves lap in the distance. Good news—this paradise can be a reality, thanks to this DIY terrarium you can make in just a few simple steps. Inside, a miniature Adirondack chair beckons to your inner beach bum, shaded by tillandsia air plants that make the terrarium virtually maintenance-free. It may not be an escape to Tahiti, but it's a lot cheaper and you don't have to deal with tourists.
Video of the Day
Video of the Day
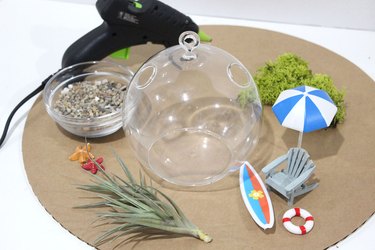
Things You'll Need
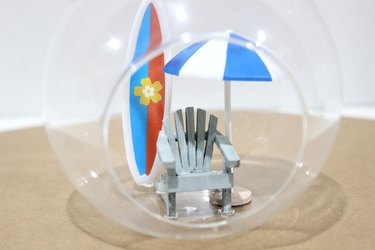
Miniature chair and beach accessories
Sand
Tillandsia air plants
Step 1: Select a Glass Container
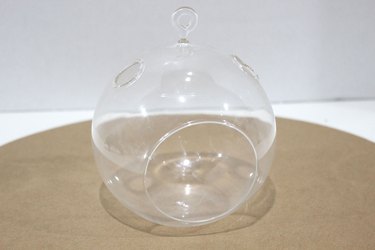
While practically any glass container with an opening can work, the ideal vessel for this beach paradise terrarium is a hanging glass globe. This type of globe has a flat bottom so it can sit on a table, but it also has a loop at the top for hanging. There is one large hole in front to fit the terrarium's elements, as well as smaller holes at the top for ventilation. They also come in various sizes. The glass globe in this example is about 4.5 inches in diameter.
Step 2: Secure the Props
Select miniature chairs and beach accessories that you can decorate your terrarium with. These tiny props are usually used for doll houses or cake toppers, so look for them at retailers (online and otherwise) that sell these types of miniatures.
Because we don't want the items sliding around or toppling over in the terrarium, secure them to the bottom of the globe with hot glue. Position them toward the back so there will be plenty of room to place the tillandsia plants later.
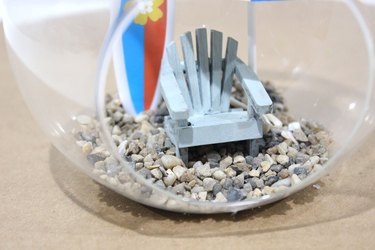
Step 3: Add Sand
Place some decorative sand in a shallow layer on the bottom of the globe. You can choose a fine sand or a larger, coarse variety. I prefer the larger granules, as they are less messy. The sand not only covers up any hot glue residue, it provides a dry base for the tillandsia air plants to sit on.
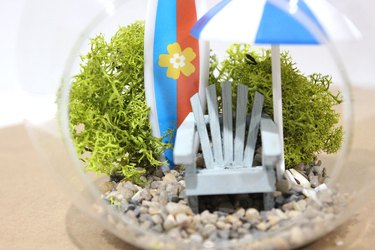
Step 4: Add Reindeer Moss
Slide some reindeer moss in the back of the terrarium behind the chair and other accessories. Besides adding a bright decorative touch, the moss holds any humidity in the air, which benefits the tillandsia plants.
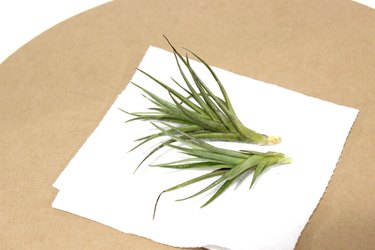
Step 5: Hydrate the Tillandsia
When you purchase tillandsia plants from the store, they might not have been hydrated in a while. Before placing them in the terrarium, submerge them upside down in a bowl of water for about 20 minutes.
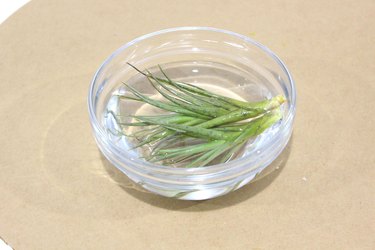
Then place the plants on a paper towel for about an hour to absorb excess moisture.
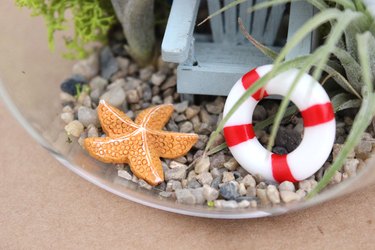
Step 6: Place Tillandsia Inside the Globe
Position the tillandsia plants in the terrarium beside the miniature beach accessories. You'll see now that one of the purposes of the chair, umbrella and surfboard in the globe is to help prop up the tillandsias so they stay upright. We won't be gluing the tillandsias permanently inside the globe. They need to be loose so we can remove them to hydrate once a week.

Step 7: Add the Finishing Touches
Place a few small beach-related miniatures on top of the sand, and your paradise terrarium is done.
Now if we could just figure out how to shrink ourselves, we'd be on vacation this very instant.