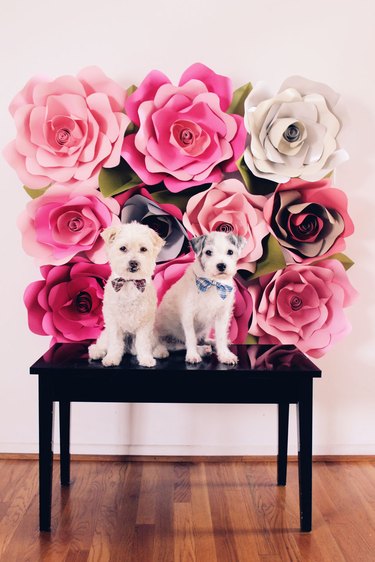
One of the must-have décor pieces for weddings and showers these days is a floral backdrop for photographs—selfies and otherwise. They look expensive and complicated to make, but here's a floral backdrop that's actually easy to create yourself. It's assembled with giant paper roses, which are super dramatic and photograph beautifully. And because they're so big, you only need to make a few of them. The backdrop is also sized so you can transport it easily in the backseat of a four-door car or sports utility vehicle. So let's make some paper flowers and get you ready for your close-up.
Video of the Day
Things You'll Need
White paper
Black marker
Scissors
Colored card stock
Hot glue
Taper candle
32 x 40-inch foam board
String
Making the Giant Paper Roses
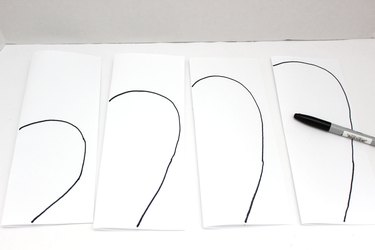
Step 1: Make Petal Templates
Fold four white sheets of paper in half lengthwise. On each, draw four successively larger half-petal shapes. Then cut along the lines and unfold the paper. You will have four petal templates that look like hearts with flattened tops and bottoms.
Video of the Day
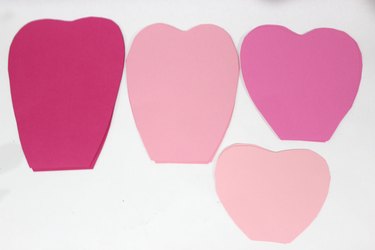
Step 2: Cut Out the Petals
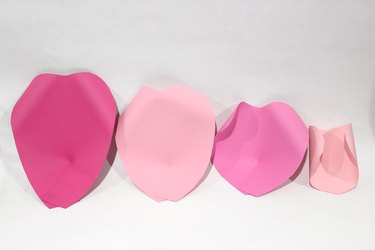
Using the templates, cut petal shapes out of colored card stock. You can choose to make each paper rose entirely the same color or make each layer of petals a different color. I'm doing the latter to make it easier to illustrate each step.

For each paper rose, you will need five of the extra large petals, five of the large ones, four of the medium ones and three of the small ones.
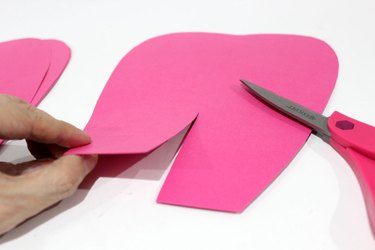
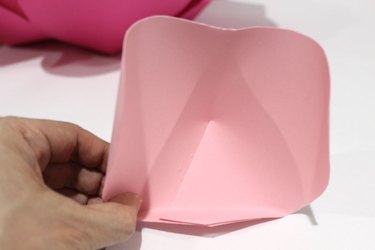
Step 3: Shape the Petals
The paper rose petals need to be shaped so they look more realistic. Start by cutting a vertical slit in between three to four inches at the bottom of each petal, in the center.
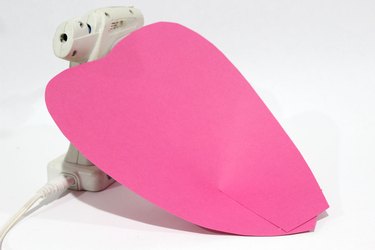
Then hot glue the right side of the slit to the left side. You'll notice that the petal becomes instantly firm and will not droop when held vertically.
What really gives the paper roses a realistic look is the curling of the petals. Curl the top corners of the petals around a thin, cylindrical object (I used a taper candle). You can curl the petals backwards or forwards.
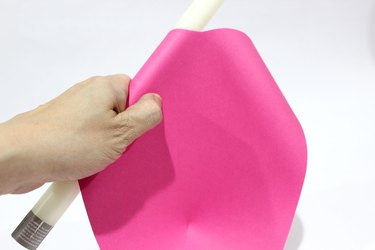
I curled the extra large petals back, the large petals back, and the small petals inward. For the medium petals, I curled the left corner inward and the right corner back (you can choose your own curling pattern). The curls will help give the paper rose dimension and fullness.
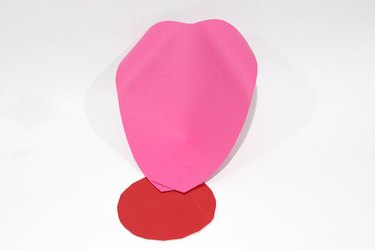
Step 4: Hot Glue the Extra Large Petals
Cut a 5-inch piece of card stock for the base of the flower. The first layer of petals we'll be attaching to the base is the extra large petals. Place a small amount of hot glue at the bottom tip of the petal and adhere it to the edge of the base.
Continue gluing the extra large petals around the base, overlapping the petals as you go.
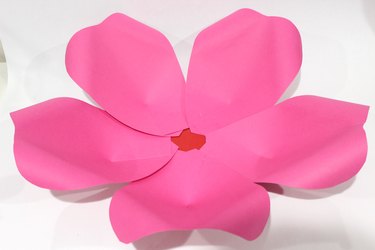
Step 5: Attach the Second Layer of Petals
The large petals go on next. Apply some hot glue to the tips and press them down on the base. Position them between the extra large petals so the flower petals are staggered.

Step 6: Add the Third Layer
Next, hot glue the four medium petals to the base. These are the petals with one corner curled inward and one corner curled out. Notice how much volume the curls give the paper rose.
Step 7: Add the Fourth Layer
For the three small petals, bend the bottom tip so it is perpendicular to the rest of the petal. This way, the tips can lay flat against the base and more easily adhere to it.
Hot glue the three small petals to the center of the rose. These will be more vertical than the other layers of petals thanks to the bend at the tips.

Step 8: Create the Inner Petals
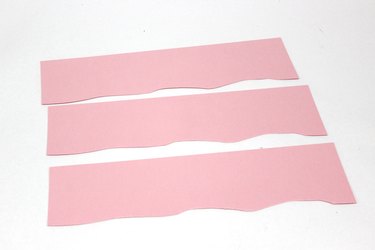
The inner petals of a rose tend to be curled up tightly. To approximate this detail in our paper roses, we'll curl up strips of card stock into a roll. Using leftover card stock from cutting the petals, or from new sheets, cut three strips that have one straight edge and one wavy edge. Make them between three to four inches wide.
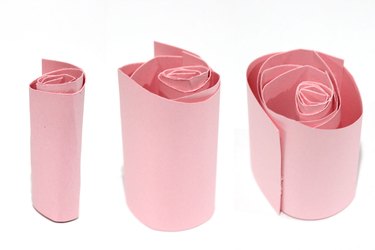
Curl up the first strip tightly, hot gluing the paper to itself as you go. Glue the second strip to the first, loosening the roll a bit more. Attach the third strip on the roll, and make it very loose. Be sure that the flat edges are at the bottom and the curved edges are at the top.
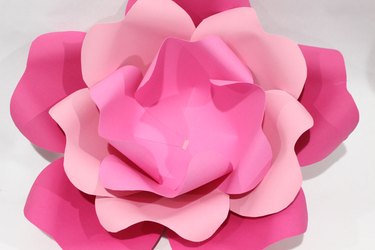
Apply hot glue to the bottom of the inner petal roll, and adhere it to the center of the paper flower. Press down firmly to make sure the hot glue makes contact with the base.

Step 9: Continue Making Flowers
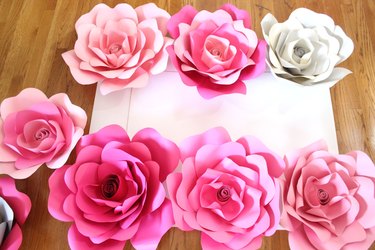
Because the paper roses are so large, you will only need to make 10 of them for this backdrop—six like the ones described in the tutorial, and four that are a little smaller. The smaller ones are made without the first layer of five extra large petals, i.e., it only uses the three small petals, four medium ones and five large ones.
Assembling the Backdrop
Step 1: Prepare the Board
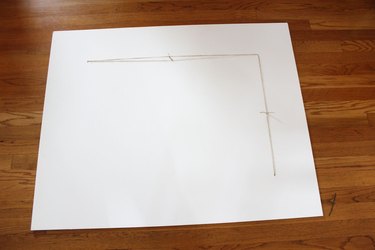
The foundation of the photo backdrop is a 32-inch by 40-inch piece of foam board. It is a standard size found at arts and crafts stores. The actual size of the backdrop will be larger than the board because the paper roses extend past the edge. To make it easy to hang the board, poke two holes six inches from opposite ends and run a string through both sides, tying a knot to secure it. Do this both horizontally and vertically if you want to have the option to hang it both ways.
Step 2: Attach the Paper Roses
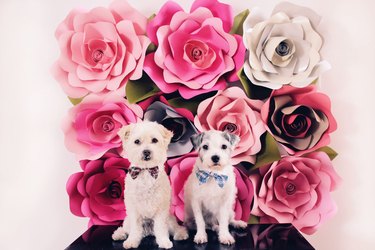
Position the roses on the board, with three large roses at the top and three on the bottom. The smaller roses will fill the middle row. Move the roses around until you get the different colors arranged where you want. Then hot glue the back of the roses to the board.
Step 3: Add Leaves
Most likely, there will still be gaps between flowers where you can see exposed foam board. To cover them, make some leaves by folding sheets of green card stock in half and cutting out leaf shapes.
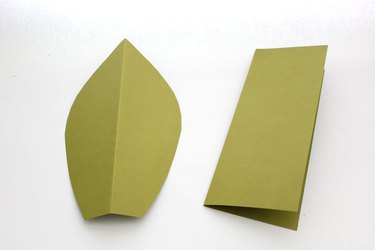
Hot glue the leaves to the foam board where there are gaps to fill in. The leaves add a beautiful accent to the backdrop and help delineate the petals of the paper flowers.

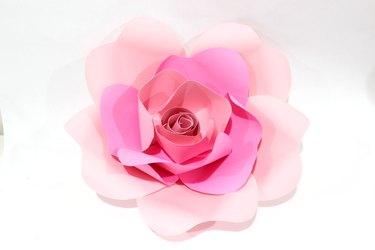
The giant paper roses create a dramatic backdrop for photos. And while it's sure to be a focal point at events, it can also be displayed afterwards as a stunning art piece for your home. Your selfies will never be the same again.