
How to Paint Clothespins

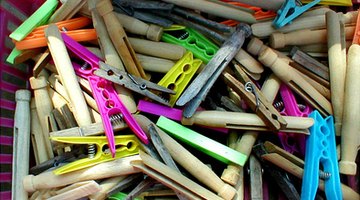
Ordinary wooden clothespins are dull and uninteresting. Each one looks exactly the same as the other. With a little creativity and craft paint, wooden clothespins can come alive and brim with their own "personality" without losing their functionality.
Things You Will Need
- Newspaper
- Paper towels
- Acrylic model paint
- Paintbrush 1/4 inch
- Paintbrush No. 2
- Cup of water
- Clear nail polish
Whether you use clothespins for stringing damp laundry on a blustery day or for hanging your children's school projects, there's no reason the simple spring-loaded gadgets can't be colorful, whimsical and useful.
-
Lay some newspaper down on your craft table and place a folded section of paper towel under the cup of water.
-
Shake each jar of acrylic paint thoroughly and then open only the paint colors you intend to use for the next few minutes.
-
Use the 1/4-inch paintbrush to paint the top side of the clothespin and let it dry.
-
Use the No. 2 paintbrush to paint fine details on the painted side of the clothespin. Give your clothespin its new personality and paint facial features, shapes, letters, numbers or other individual features. Let it dry.
-
Flip the clothespin over and paint the remaining bare top side of the clothespin. Let it dry completely.
-
Coat the entire clothespin with clear fingernail polish and let it dry before you use it.
Tip
Dip the paintbrush in the water between color changes and blot dry on the paper towel. If you don't want to paint the clothespin spring, disassemble the two wooden legs of the fastener from the spring and set the spring aside. Reassemble after the painting steps are completed. Paint only the outside of the clothespin and leave the inside bare if you're concerned about the paint staining any fabric it contacts.
Warning
Apply paint in a well-ventilated area. Paint that is not completely sealed with a coat of fingernail polish may leach or bleed onto fabric and other materials. Young children should be supervised when painting the clothespins.
References
Tips
- Dip the paintbrush in the water between color changes and blot dry on the paper towel.
- If you don't want to paint the clothespin spring, disassemble the two wooden legs of the fastener from the spring and set the spring aside. Reassemble after the painting steps are completed.
- Paint only the outside of the clothespin and leave the inside bare if you're concerned about the paint staining any fabric it contacts.
Warnings
- Apply paint in a well-ventilated area.
- Paint that is not completely sealed with a coat of fingernail polish may leach or bleed onto fabric and other materials.
- Young children should be supervised when painting the clothespins.
Writer Bio
Chuck Douros is a writer, journalist, copywriter and editor. He specializes in writing SEO optimized website content for business enterprise. He writes web-based news, personal profiles and product reviews. Douros’s writing credits include articles for the Boy Scouts of America. He is the chief Mad Gab writer for Mad Gab Online and studied broadcast communication at San Francisco State University.
Photo Credits
- dorothy's clothespins image by Hilma Anderson from Fotolia.com
- dorothy's clothespins image by Hilma Anderson from Fotolia.com
More Articles