
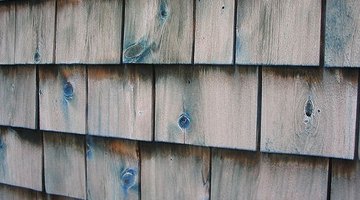
How to Prepare Cedar Shingles for Painting

Before you can paint your cedar shingles, you'll need to prepare them, otherwise your paint job may not last. Preparing cedar shingles for painting will help preserve your shingles and maintain the life of your paint.
Things You Will Need
- 50- to 60-grit sandpaper
- Scrub brush
- Soap
- Heat gun
- Paint scraper
- 150-grit sandpaper
- Preservative treatment
- Primer
The age and condition of your cedar shingles will determine the type of preparations you need to make before painting.
-
Roughen the surface of brand new cedar shingles with 50- to 60-grit sandpaper. Roughening will help the shingles absorb the finish or paint you plan to use, without detracting from the smooth appearance of the shingles.
-
Treat slightly weathered and unfinished shingles by first cleaning away dirt and residue with a scrub brush, mild soap and then rinsing with water. Thoroughly dry the shingles so they don't warp. After the shingles dry, roughen them by running 50- to 60-grit sandpaper over the surface to help absorb the paint or finish.
-
Scrape off old paint if you're planning to refinish/repaint and reuse old shingles. Use a paint scraper to remove the paint, and a heat gun to get rid of stubborn paint. You will need to start with a clean surface, otherwise your paint will not stick and you will have to redo the job in a matter of months.
-
Remove old stain with fine, 150-grit sandpaper. Sand away the surface of the finish until the cedar shows through. Wipe dust from the surface with a damp cloth, and dry the cedar shingles before refinishing or painting.
-
Treat shingles with a coat of water-repellent preservative to protect them from weathering.
-
Add a coat of primer to your shingles before you paint. Primer will help provide an absorbent surface and ensure even coating when you begin to add your coat of paint.
Warning
Primer and preservative may be harmful if inhaled. Be sure to work in a well-ventilated area to avoid inhalation.
References
Resources
Warnings
- Primer and preservative may be harmful if inhaled. Be sure to work in a well-ventilated area to avoid inhalation.
Writer Bio
Jennifer Hudock is an author, editor and freelancer from Pennsylvania. She has upcoming work appearing in two Library of the Living Dead Press anthologies and has been published in numerous print and online journals, including eMuse, Real TV Addict and Strange Horizons. She has a Bachelor of Arts in English/creative writing from Bloomsburg University.
Photo Credits
- Robbie1: Flickr.com
- Robbie1: Flickr.com
More Articles