
How to Build a Brick Shed

If you are in need of an extra storage space for your outdoor seasonal decorations, bike, barbecue grill, or gardening tools and extra firewood, then a brick shed is what you need. A brick shed is structurally sound and can withstand the outdoor elements better than wood. With a little bit of planning and a lot of elbow grease, you will have your own brick shed in no time.
-
Check the location where you are going to build a brick shed. See to it the you have ample space. At an average you can try building a 5-feet (W) by 8-feet (L) brick shed that is about 6-feet tall. It is important that you check with your homeowner's association or local building agency if you would need some kind of permit before you start building. There may be height restrictions in your specific housing area that you have to comply with so be sure to check them out before you start.
-
Clean the soil of debris, roots, rocks and weeds. Use a rake to remove small rocks and plantings.
-
Mark the outline of the brick shed based on your measurement. Use a color spray can to do this. For a 5-feet by 8-feet brick shed, make sure to outline at least an extra 12 inches on each side for the base.
-
Dig at least 8 inches of dirt using a shovel.
-
Pour in 2 inches of sand to use as base. Use a hand tamper or soil compactor and ensure that the base is level.
-
Excavate six holes about 4 inches deep each, wide enough to fit a 4 x 4 lumber piece that 6-feet high to use as post. When you place each post, remember to leave 12 inches of space for the bricks. In other words, these posts will be housed inside the brick walls. Pour concrete in the holes to stabilize the posts. Let dry. These posts will be used to support the roof later on.
-
Pour in your concrete mixture which should be at least 6-inches deep. Make sure to use a 2 x 4 lumber to spread it evenly. make sure to cover evenly around the posts for added strength. Allow the concrete to dry or cure overnight. In colder weather this may take a couple of days.
-
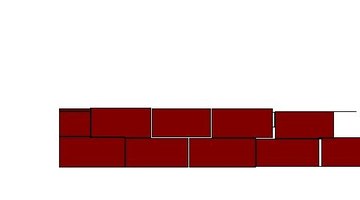
Start laying down your bricks. Choose thick and wide bricks to ensure that it is stable. Start by laying down the lowest part from the concrete base. Put mortar then lay down your bricks one by one. When building up, you would need to ensure that the second brick is placed centered on top of two bricks for more stability. Trim the first brick about half its original size.
-
Add mortar as you pile up the bricks and ensure that there is no hole for water to seep through. Make sure to check the level as you go. Leave at least 3 inches of gap for ventilation and for the roofing frame. Also, don't forget to leave an opening for a door.
-
Build your roofing frame by cutting your 2 x 4 lumber. Nail in the lumber horizontally on top of each post, one connecting to the other, in parallel with each other, make a 6-inch overhang on each side. To make a slanted roof, make one side about 2 inches higher than the other side to allow for water drainage.
-
Add the corrugated galvanized steel roofing material. Connect them on each end of each lumber using nuts and bolts. Use flushing to avoid water leakage. Place them with about 5 to 6 inches of overhang on each side. Cover the side of the slightly elevated side of the roofing frame with metal sheeting, ensuring that it is flush to the joist or lumber to prevent water from coming inside. For the lower side you can leave it exposed for ventilation. Water will not go in because of the overhang.
-
Install a door. You can use the ones they use for a gate fence made of redwood. You may opt for ready made fence gate made of vinyl or plastic. They come ready-made in a kit. Install these gates by adding the framing around the bricks and securing them with galvanized 3-inch screws against the bricks. Then follow the manufacturer's instructions on how to hang the gate. Add a tarp or waterproof membrane stapled from the inside of the door for extra protection during the rainy days.
Tips
- For a more creative door, you can install a barn type door or a door that you can glide on tracks that you install from the outside. Allow for enough clearance on each side.
- Some people leave the opening without a door, and just hanging tarp on a steel rod to cover the opening during rainy season.
Warnings
- When building a shed, avoid building it too close to your fence, give enough clearance or space, at least 3 feet away from your fence.
Writer Bio
Josienita Borlongan is a full-time lead web systems engineer and a writer. She writes for Business.com, OnTarget.com and various other websites. She is a Microsoft-certified systems engineer and a Cisco-certified network associate. She graduated with a Bachelor of Science in medical technology from Saint Louis University, Philippines.
More Articles