Wooden wicks are easy to light, and they're known for their natural burning quality, versatility with different types of wax and the crackling campfire glow they emit when lit. Best of all, they're not difficult to make and can save you money in the craft store – that's more money for wax and other supplies.
Video of the Day
Things You'll Need
scissors
flat dish
paper towel
wax adhesive or wax dots
spouted glass or metal container
pot holder or oven mitt
large bowl
tongs
Step 1: Cut the Balsa Wood
Snip the balsa wood stick to your desired wick size with everyday scissors. If making the wicks for a specific candle project, cut the wood to be about 1 inch longer than your container is tall.
Video of the Day
Tip
Both hard and soft woods can be used to make wood wicks, but balsa wood sticks are the easiest and most affordable option available. They're long, lightweight wooden craft sticks that can be found at most hobby stores. They come in several different sizes, which can all be made into wood wicks using this method.
Step 2: Coat and Soak the Wood
Place the wood pieces in a shallow dish and pour olive oil over them to coat all sides of every stick. Soak the sticks in the oil for 20 minutes, then remove them and wipe clean with a paper towel. Save your pricy cooking oil and use a budget-friendly olive oil for this project. It's important not to skimp on oil because it coats and soaks into the wood, which will help supplement the burning quality when the candle is lit.
Step 3: Place Wood in Wick Tabs
Push the oil-treated wood pieces into wood wick tabs. Be sure to get tabs that are designed for wood wicks, as the tabs made for cotton/hemp wicks won't work here.
Tip
Mason jars, jelly jars and baby food jars all make recyclable options for candle-making. Buy a bulk pack of mason jars to make many candle gifts at once.
Step 4: Prepare Wax for Melting
Measure your wax into a spouted heat-safe glass or metal container. How much wax you'll use depends on the size of the container you're filling. Using soy wax chips makes it easy to control how much you melt at once, but some candle makers prefer to cut and melt pieces from paraffin wax blocks.
Step 5: Heat and Melt Wax
Heat the wax using the double boiler method by suspending the container holding the wax over a pot of simmering water. Stir the wax with a spare wood stick until it's completely melted to a clear liquid. Do not to touch the hot glass. Add a few drops of your favorite candle fragrance oil or color the wax by adding in tinted wax chips at this stage, if you like.
Step 6: Warm the Jars
Warm the glass jars just prior to pouring in the liquid wax; doing so will help prevent jump lines in the finished candle. Submerge uncovered jars in a sink or bowl of hot water and remove them with tongs when ready to pour wax. Dry their insides completely.
Step 7: Adhere Tabs to Bottom of the Jars
Using candle adhesive, press a wick tab onto the bottom center of a glass jar. Using wax dots should also work to keep the wick and wick tab centered after the wax is poured. This is essential for safety because if the wick moves off-center in the jar while you're pouring the wax, the candle's flame may be too close to the edge of the jar.
Step 8: Pour Wax Into Jars
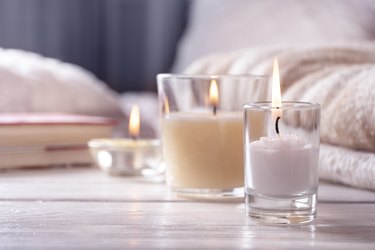
Wearing heat-safe gloves, a hot pad or oven mitt, slowly pour the hot liquid wax into the center of the jar, coating the wooden wick and filling the jar to no higher than 1 inch below base of the rim. Allow the wax to completely cool and harden.
Step 9: Trim the Wicks
When the candle is cool, trim the wooden wick to 1/3 inch above the wax, and they're ready for use. Always keep a burning candle within sight, and use caution when handling the glass containers after a candle has been burning.